> For the complete documentation index, see [llms.txt](https://help.hippoly.com/llms.txt). Markdown versions of documentation pages are available by appending `.md` to page URLs; this page is available as [Markdown](https://help.hippoly.com/administration/workspace-administration/manage-users-and-roles.md).
# Manage users and roles
## Add user to the workspace
{% stepper %}
{% step %}
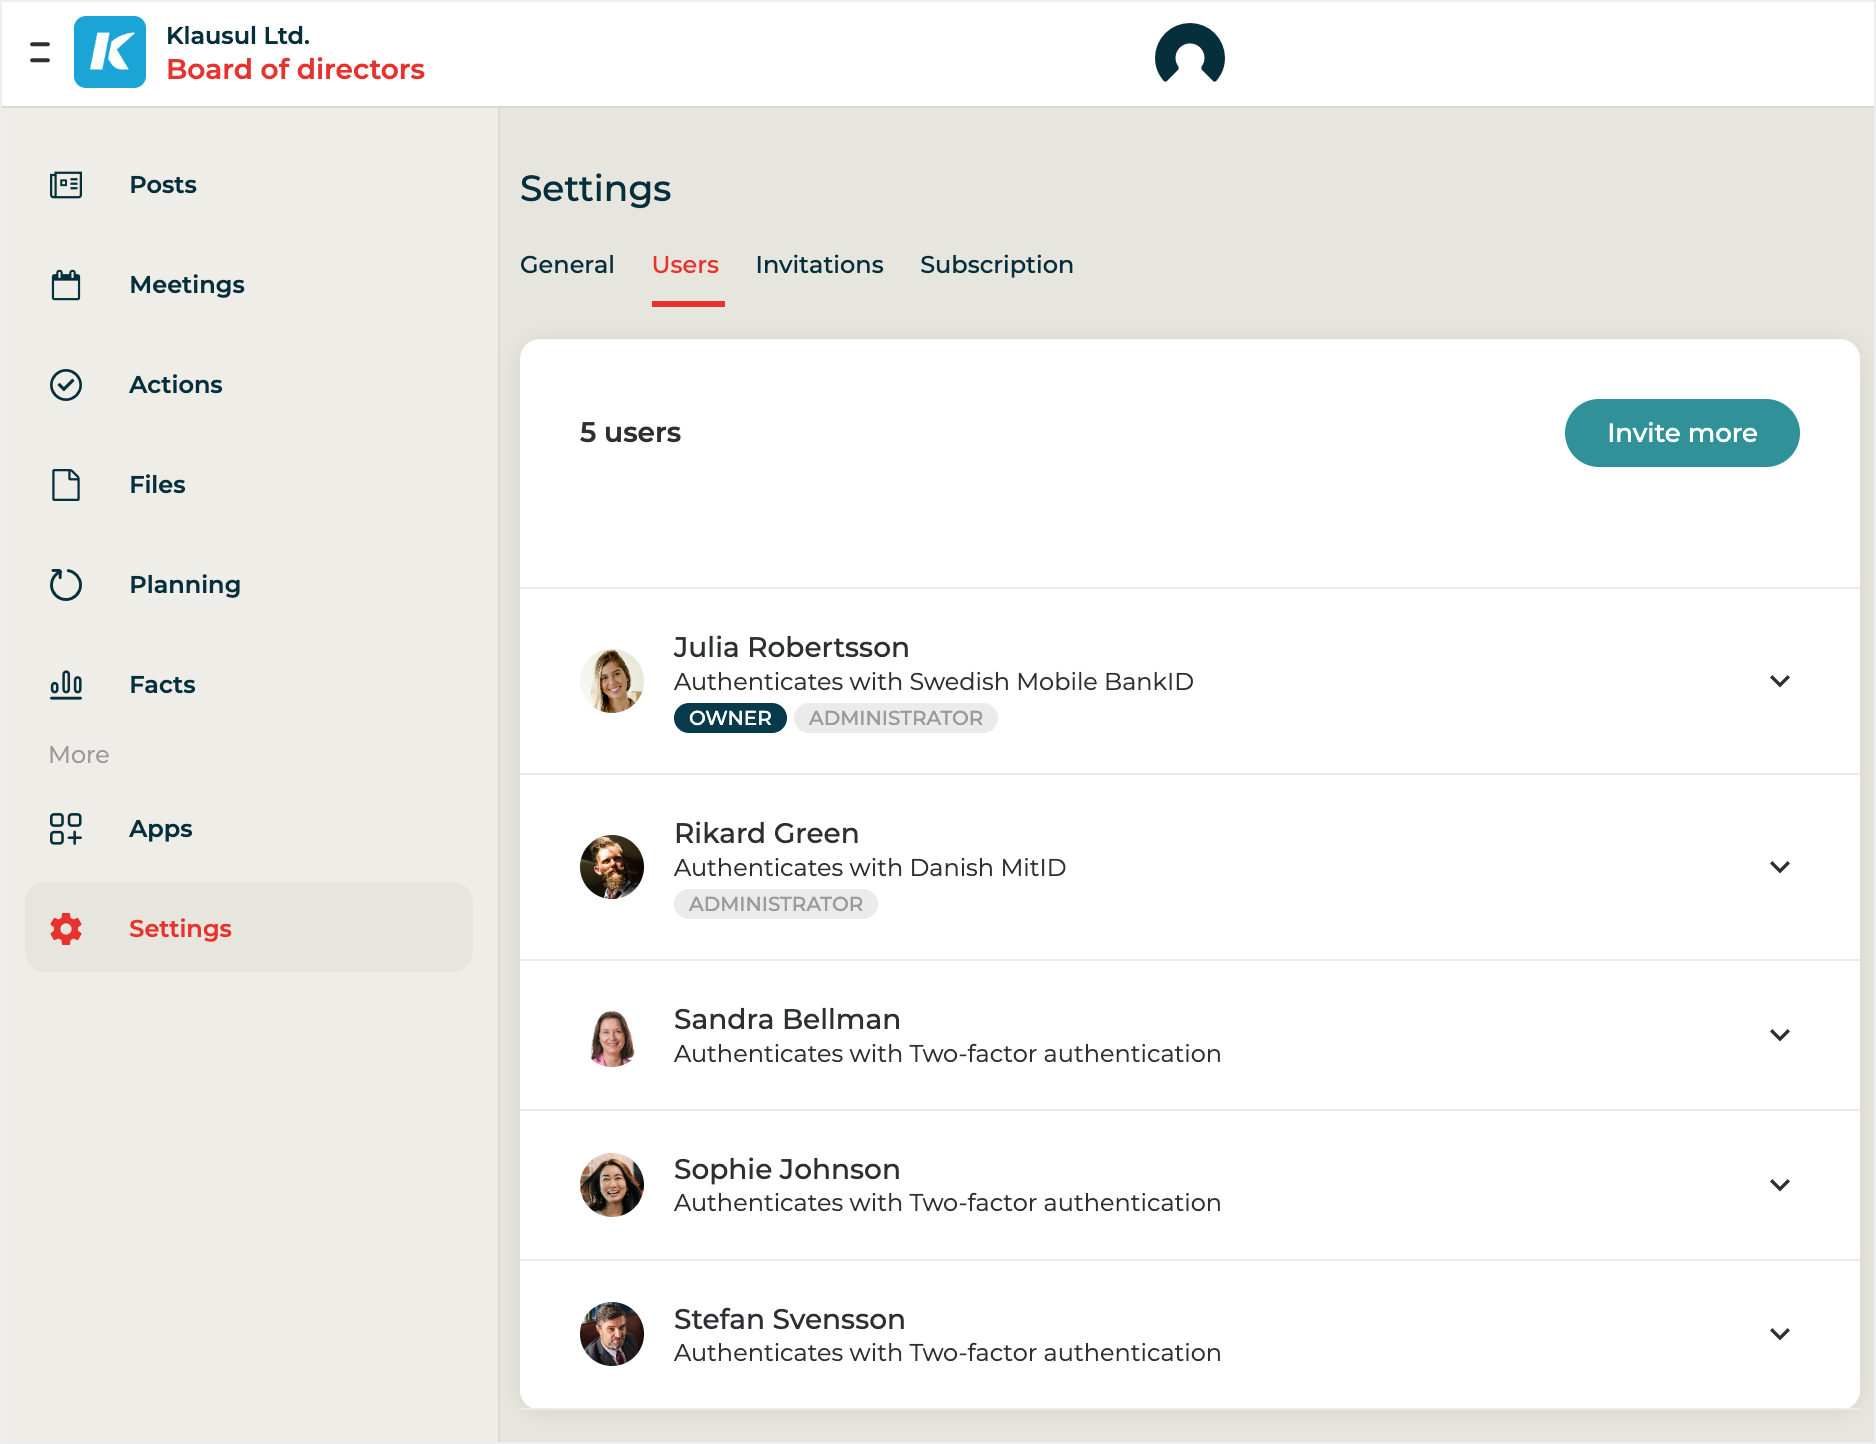
Navigate to `Settings` in the main menu.
{% endstep %}
{% step %}
Click the `Users` tab.
{% endstep %}
{% step %}
Click the `Invite more` button.
{% endstep %}
{% step %}
Enter the email address to the person you want to invite to the workspace.
You can invite multiple persons by clicking the `Add email address` button.
{% endstep %}
{% step %}
Finally click the `Send invitations` button.
An email will automatically be sent to the email addresses you’ve added with instructions on how to join the workspace. When a user joins the workspace, you’ll receive a notification.
{% endstep %}
{% endstepper %}
## Make user workspace admin
{% hint style="info" %}
A workspace can have unlimited number of admin. An admin can administrate the workspace, manage A workspace can have an unlimited number of Administrators. Administrators can manage the workspace, including settings, users, and subscriptions. They can also access all data and Files in the workspace, except for Direct messages.
{% endhint %}
{% stepper %}
{% step %}
Navigate to `Settings` in the main menu.
{% endstep %}
{% step %}
Click the `Users` tab.
{% endstep %}
{% step %}
Click on the **user** you want to make admin.
{% endstep %}
{% step %}
Click the `Make admin` button.
{% endstep %}
{% endstepper %}
## Remove admin role from user
{% stepper %}
{% step %}
Navigate to `Settings` in the main menu.
{% endstep %}
{% step %}
Click the `Users` tab.
{% endstep %}
{% step %}
Click on the **user** you want to make admin.
{% endstep %}
{% step %}
Click the `Remove admin rights` button.
{% endstep %}
{% endstepper %}
## Make user workspace owner
{% hint style="info" %}
A workspace can have only one Owner. The Owner has the same permissions as a Workspace Administrator but is the only one who can request deletion of the workspace. The Owner is also the billing contact for the workspace.
{% endhint %}
{% stepper %}
{% step %}
Navigate to `Settings` in the main menu.
{% endstep %}
{% step %}
Click the `Users` tab.
{% endstep %}
{% step %}
Click on the **user** you want to make admin.
{% endstep %}
{% step %}
Click the `Make owner` button.
{% endstep %}
{% step %}
A confirmation dialog will appear where you need to confirm the transfer of ownership.
{% endstep %}
{% endstepper %}
## Remove user from workspace
{% stepper %}
{% step %}
Navigate to `Settings` in the main menu.
{% endstep %}
{% step %}
Click the `Users` tab.
{% endstep %}
{% step %}
Click on the **user** you want to make admin.
{% endstep %}
{% step %}
Click the `Remove from workspace` button.
{% endstep %}
{% step %}
A confirmation dialog will appear where you need to confirm the removal.
{% endstep %}
{% endstepper %}
## User titles in a workspace
Each user in a workspace has a title. The title appears throughout Hippoly and can also be shown in the Meeting minutes attendance section.
When a user joins a workspace, they receive a default title based on the workspace type. The default title is either **Member** or **Co-opted Member**.
You can change a user's title at any time.
{% stepper %}
{% step %}
Navigate to `Settings` in the main menu.
{% endstep %}
{% step %}
Click the `User` tab.
{% endstep %}
{% step %}
In the user list, click the **user** you want to update the title for.
{% endstep %}
{% step %}
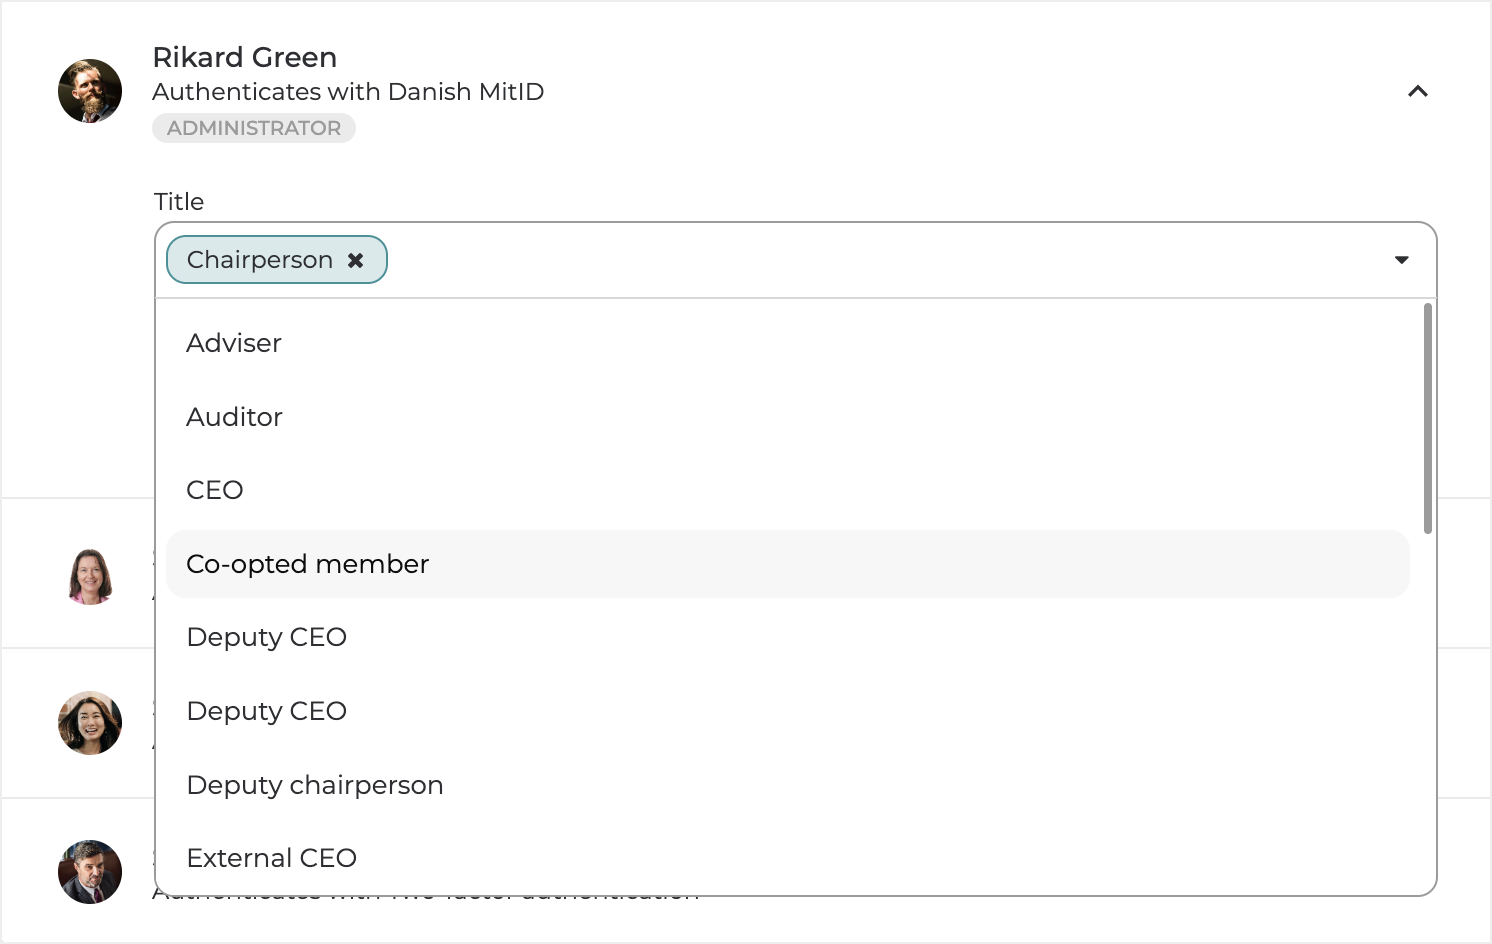
In the **Title dropdown**, select the title you want to add. A user can have a maximum of three titles. To remove a title, click the `X-icon` on the added title. If you don’t find the title you need in the dropdown, you can [add a custom title](#add-a-custom-title).
{% endstep %}
{% endstepper %}
### Add a custom title
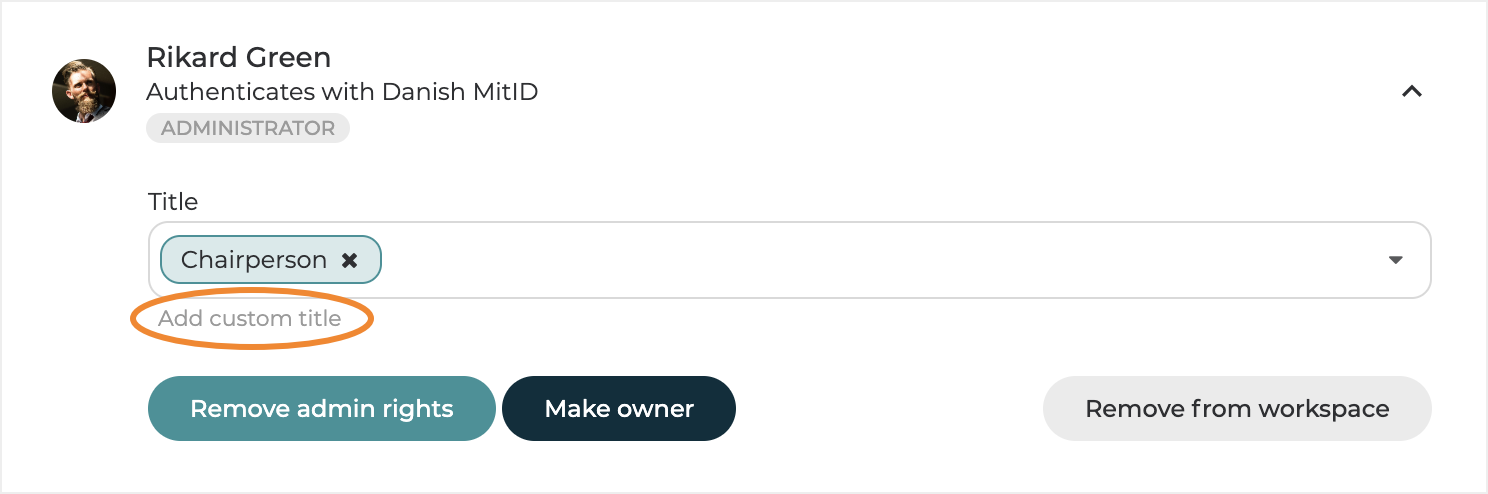
If you want a user to have a title that isn’t available in the dropdown of predefined titles, you can add a custom title.
{% stepper %}
{% step %}
Click the `Add custom title` link.
{% endstep %}
{% step %}
In the dialog that appears, enter the title or titles you want the user to have. Click the `OK` button.
A custom title can’t be combined with predefined titles selected from the Title dropdown. You need to remove the custom title before you can select a predefined one again.
{% endstep %}
{% endstepper %}
### Remove a custom title
{% stepper %}
{% step %}
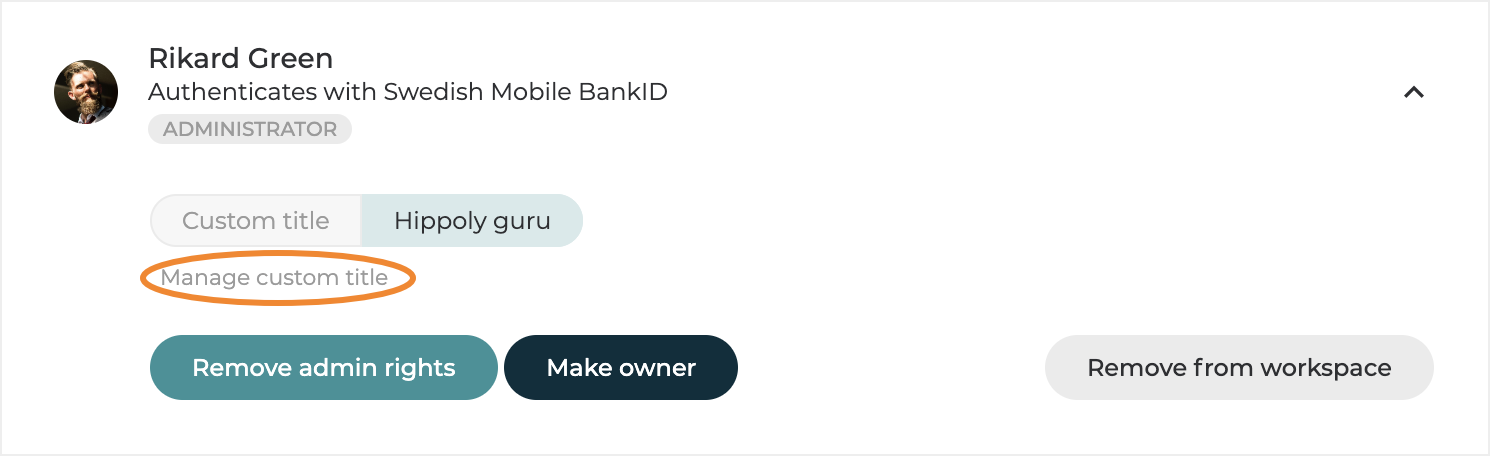
Click the `Manage custom title` link.
{% endstep %}
{% step %}
In the dialog that appears, clear the title text in the input field and click the `OK` button.
The Title dropdown will appear, and you can select from the predefined titles.
{% endstep %}
{% endstepper %}
---
# Agent Instructions
This documentation is published with GitBook. GitBook is the documentation platform designed so that both humans and AI agents can read, navigate, and reason over technical content effectively. Learn more at gitbook.com.
## Querying This Documentation
If you need additional information that is not directly available in this page, you can query the documentation by asking a question.
Perform an HTTP GET request on the following URL with the `ask` and `goal` query parameters:
```
GET https://help.hippoly.com/administration/workspace-administration/manage-users-and-roles.md?ask=&goal=
```
`ask` is the immediate question: it should be specific, self-contained, and written in natural language.
`goal` is what the user is ultimately trying to achieve, the reason they need the answer. Sharing it helps GitBook give you a better, more relevant answer. A goal is most helpful when it describes the outcome the user wants rather than restating the question. For example, with `ask=how do I create an API token`, a goal like `automate deployments from our CI pipeline` lets GitBook tailor the answer to that use case.
The response will contain a direct answer to the question and relevant excerpts and sources from the documentation.
Use this mechanism when the answer is not explicitly present in the current page, you need clarification or additional context, or you want to retrieve related documentation sections.