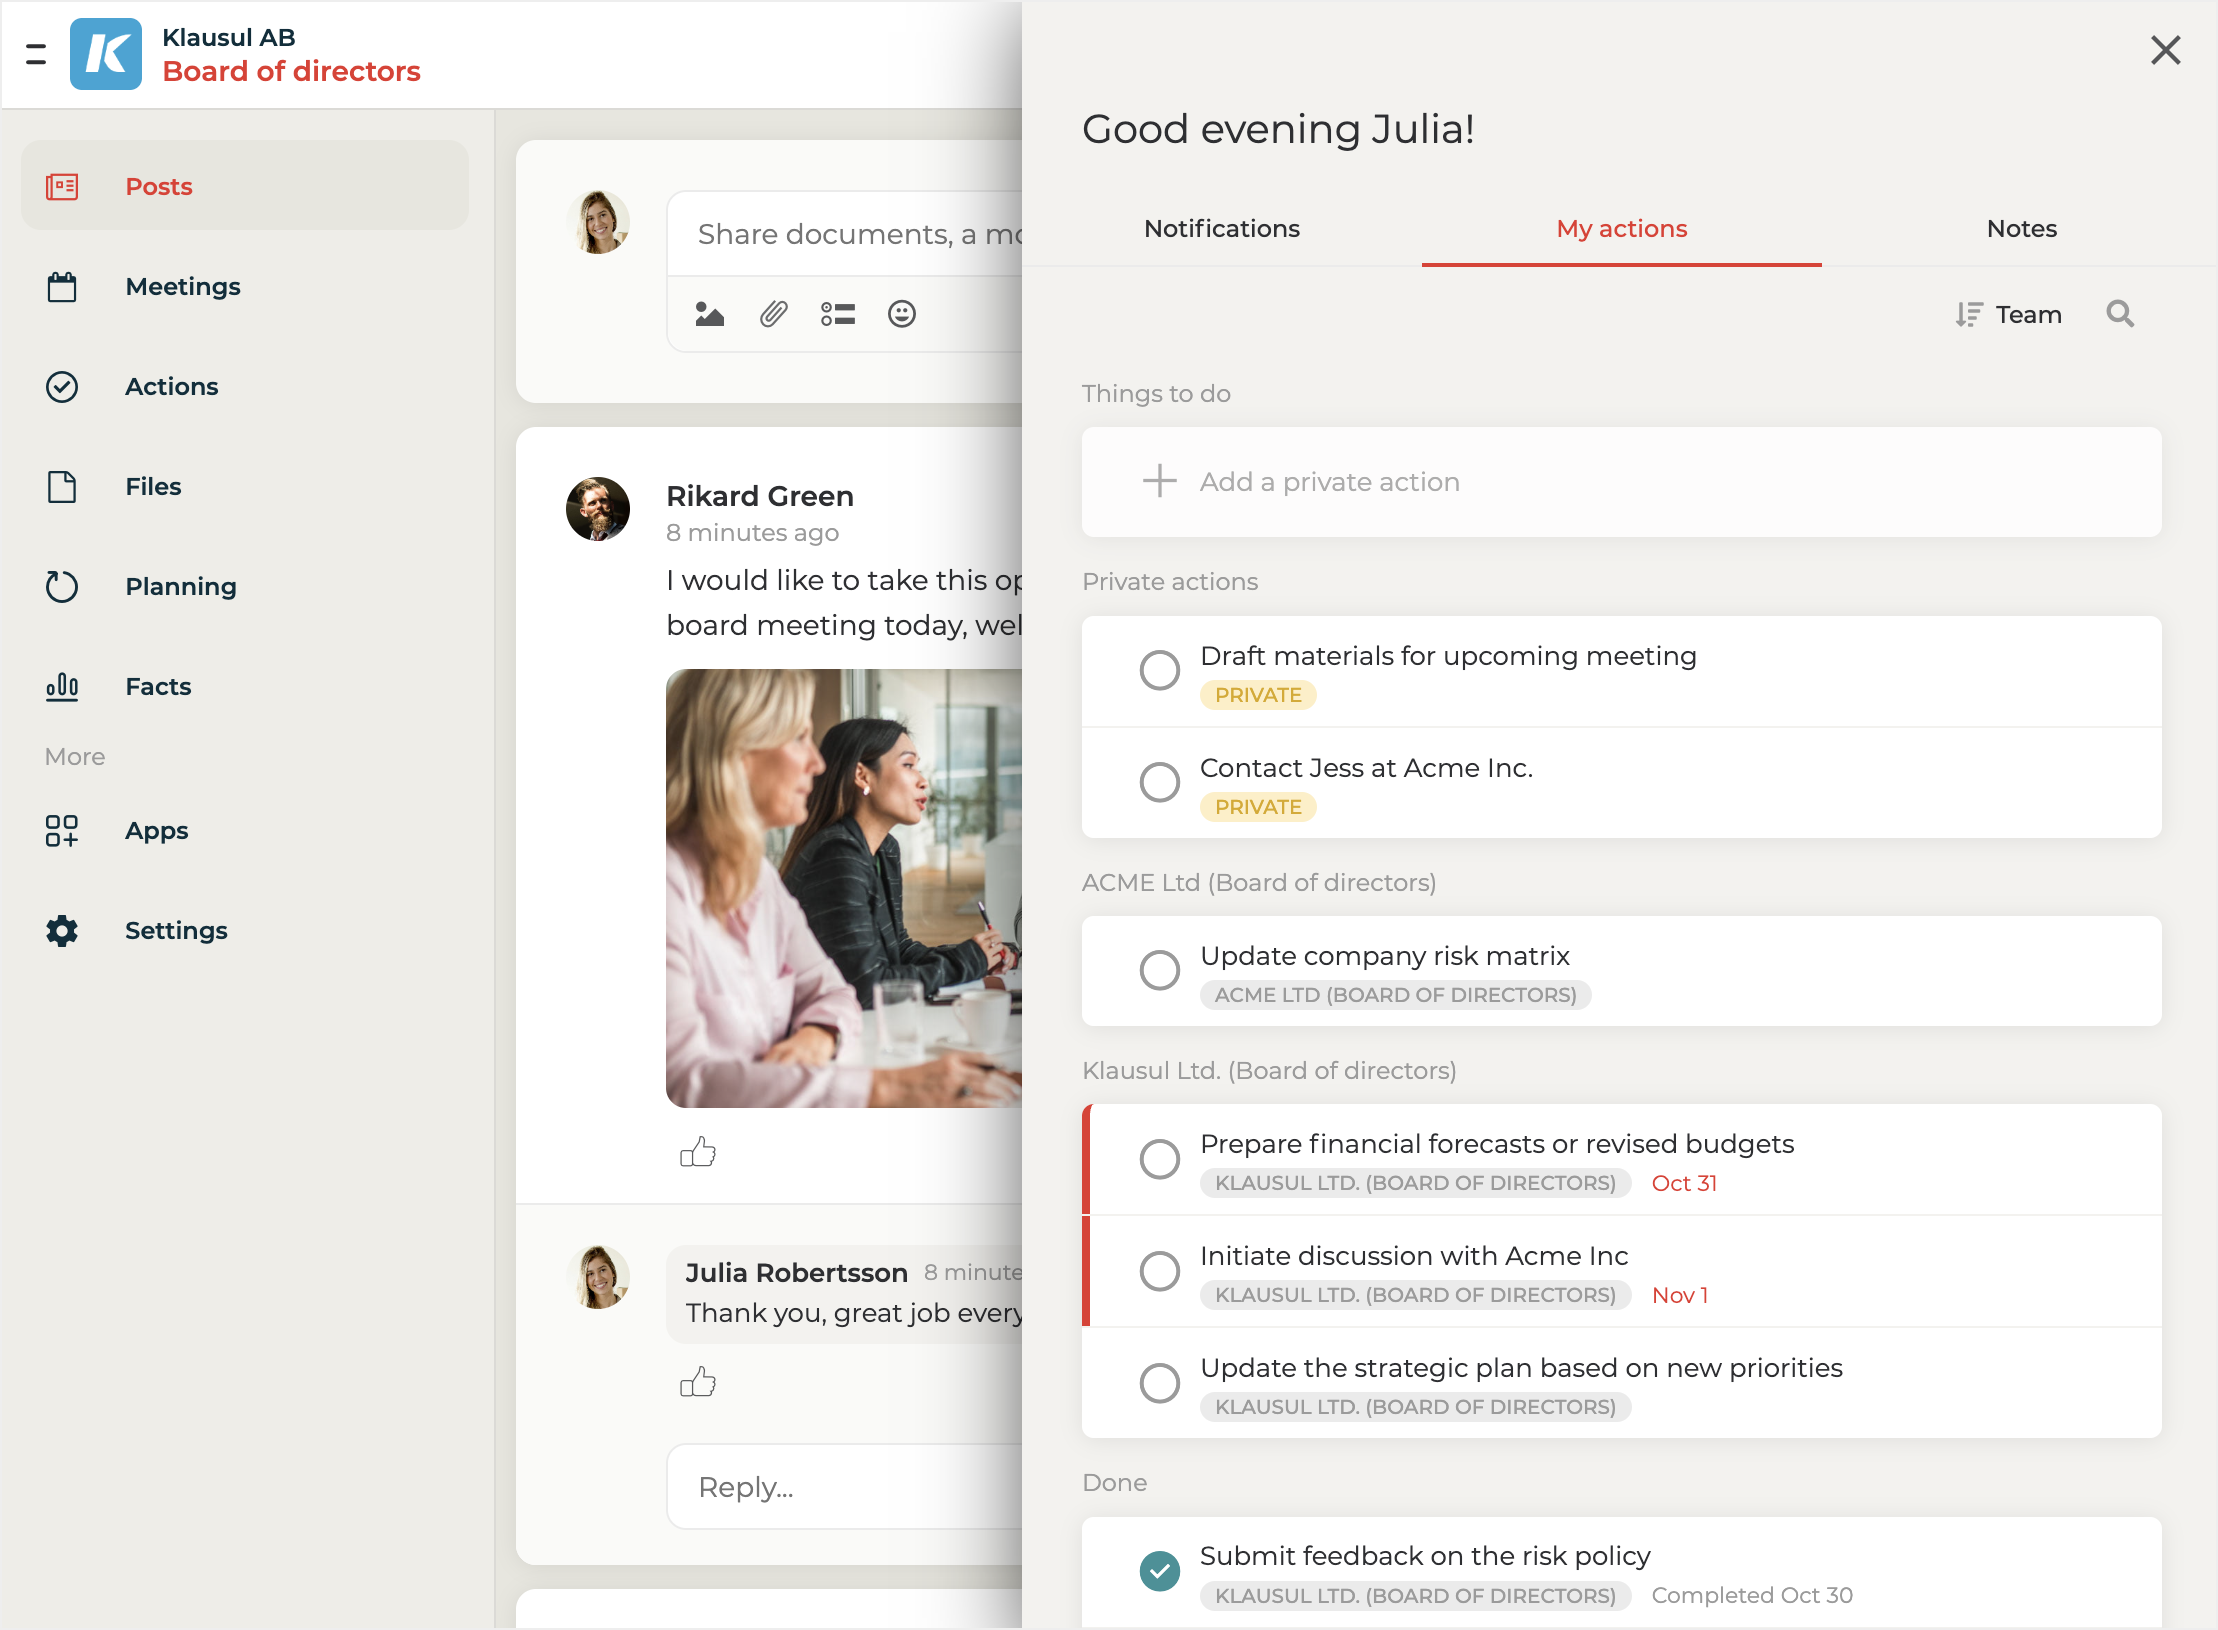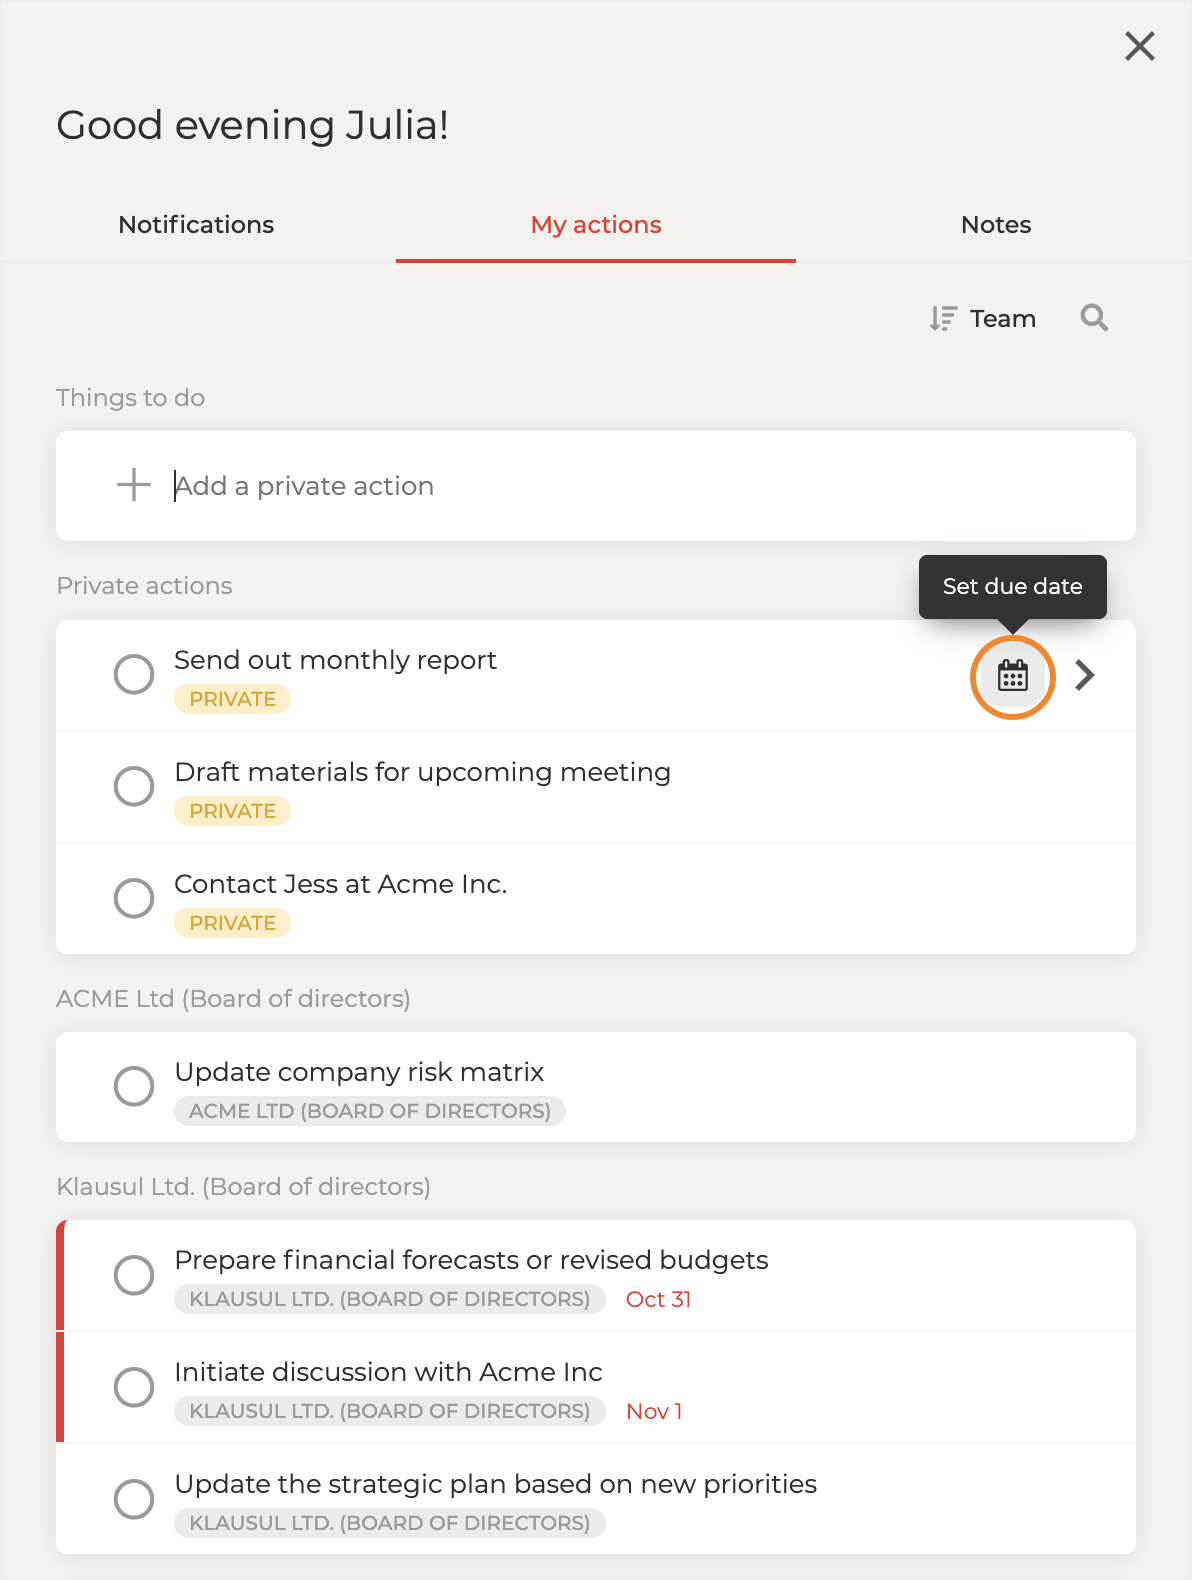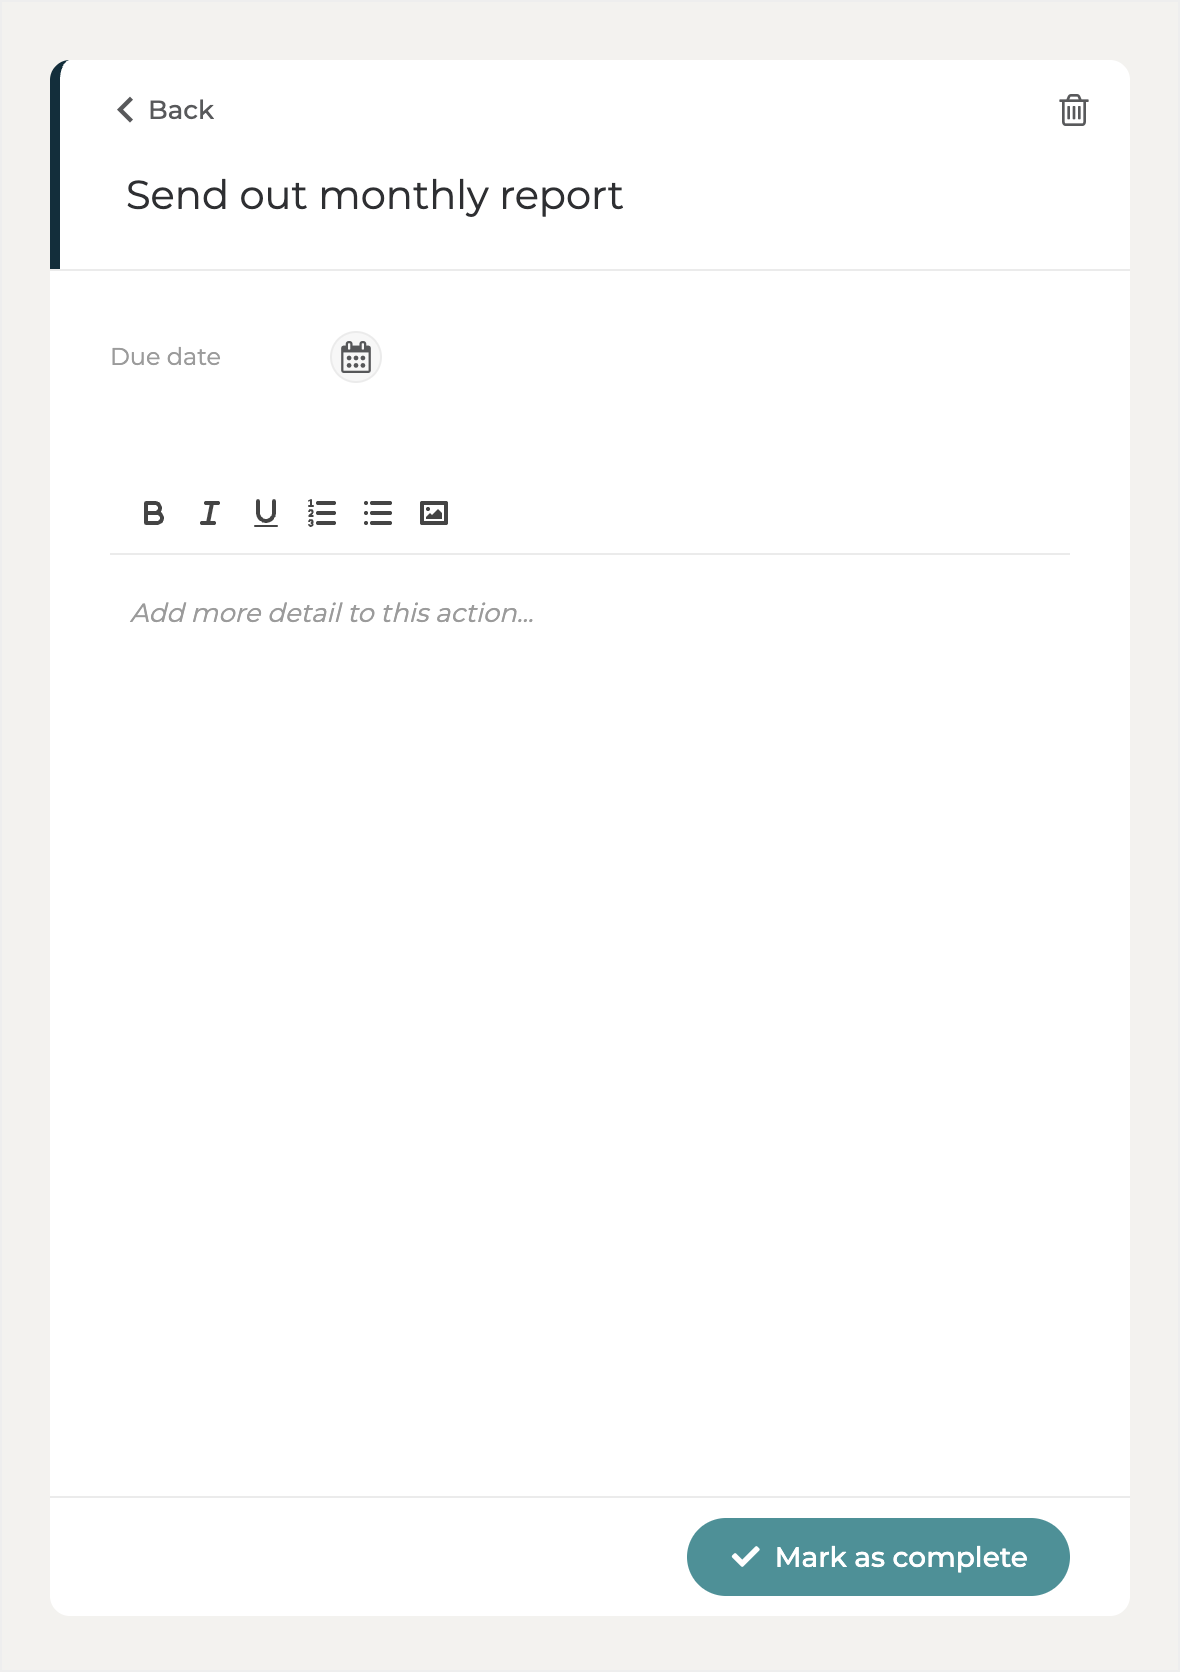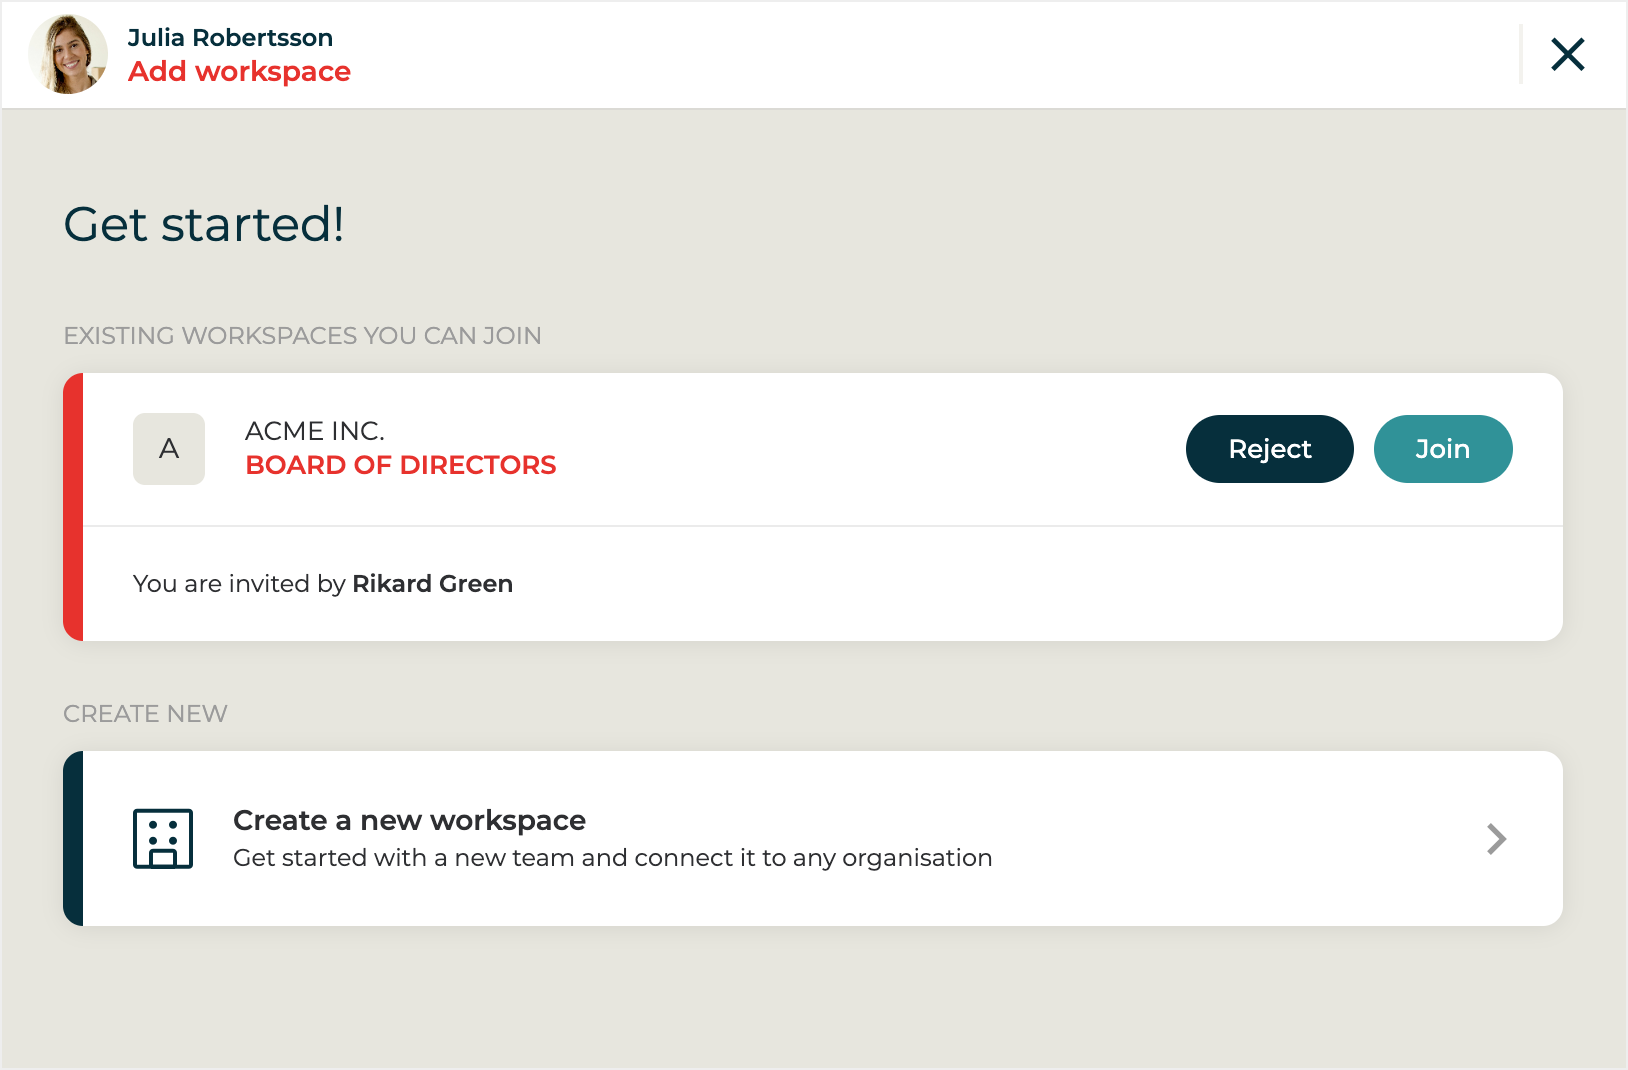
# Welcome to Hippoly Help Center

<table data-card-size="large" data-view="cards"><thead><tr><th align="center"></th><th align="center"></th><th data-hidden data-card-cover data-type="image">Cover image</th><th data-hidden data-card-target data-type="content-ref"></th></tr></thead><tbody><tr><td align="center"><h3>Getting started</h3></td><td align="center">Welcome to Hippoly! Let's get started!</td><td><a href="/files/cuvFRJl8RrnGkM0srR1d">/files/cuvFRJl8RrnGkM0srR1d</a></td><td><a href="/pages/Flt6LG1pvM0AgTYgWSmb">/pages/Flt6LG1pvM0AgTYgWSmb</a></td></tr><tr><td align="center"><h3>Using Hippoly</h3></td><td align="center">The basics of using Hippoly</td><td><a href="/files/XOV1SbF2b8TZPMXAxwcq">/files/XOV1SbF2b8TZPMXAxwcq</a></td><td></td></tr><tr><td align="center"><h3>Your profile &#x26; preferences</h3></td><td align="center">Adjust Hippoly to work the way you prefer.</td><td><a href="/files/rDWuinUFSPklMnY8GkVi">/files/rDWuinUFSPklMnY8GkVi</a></td><td><a href="/pages/Ke60mNv0PHY9azavsEWJ">/pages/Ke60mNv0PHY9azavsEWJ</a></td></tr><tr><td align="center"><h3>Workspace administration</h3></td><td align="center">Manage users, roles, and key settings.</td><td><a href="/files/5hh73TFR2MQiinsURb99">/files/5hh73TFR2MQiinsURb99</a></td><td><a href="/pages/B1Ddbl5jyflV6yK2IVu0">/pages/B1Ddbl5jyflV6yK2IVu0</a></td></tr></tbody></table>


# Frequently asked questions

Quick answers to the questions Hippoly users ask most often, with links to the full how-to articles.

The questions below are the ones we hear most often. Each answer links to the full article where you can read more.

## Account and sign-in

<details>

<summary>How do I create a Hippoly account?</summary>

You create an account the first time you join or create a workspace. See [Getting started with Hippoly](/getting-started/getting-started-with-hippoly).

</details>

<details>

<summary>Which sign-in methods can I use?</summary>

Hippoly supports email and password with two-factor authentication, Swedish BankID, Norwegian BankID, Danish MitID, and Finnish FTN. You can also add a passkey for faster sign-in. See [Sign-in method](/administration/user-account-settings/sign-in-method).

</details>

<details>

<summary>Can I change my sign-in method later?</summary>

**Yes.** You can change your primary sign-in method yourself at any time from your account settings. See [Sign-in method](/administration/user-account-settings/sign-in-method).

</details>

<details>

<summary>I was invited to a workspace but can't see it. What's wrong?</summary>

This almost always means the invitation was sent to an email address that isn't linked to your account. Check which address the invite went to and [add that address to your account](/administration/user-account-settings/email-addresses), or sign in with BankID and accept the pending invitation from the invitations page. See [Join an existing workspace](/getting-started/join-an-existing-workspace).

</details>

<details>

<summary>Can I join a workspace without an invitation?</summary>

**No.** You need an invitation link. Ask an administrator of that workspace to invite you. See [Join an existing workspace](/getting-started/join-an-existing-workspace).

</details>

<details>

<summary>How do I change the email address on my account?</summary>

You manage your addresses yourself in account settings, where you can add, remove, or change which address is primary. See [Email addresses](/administration/user-account-settings/email-addresses).

</details>

<details>

<summary>How do I add another workspace to my account?</summary>

You can either create a new workspace or accept an invitation to an existing one. See [Add workspace to my account](/administration/user-account-settings/add-workspace-to-my-account).

</details>

<details>

<summary>How do I leave a workspace?</summary>

You can leave a workspace from your account settings. See [Leave a workspace](/administration/user-account-settings/leave-a-workspace).

</details>

## Members, roles, and access

<details>

<summary>How do I invite people to my workspace?</summary>

Workspace administrators invite members by email from `Settings` under the `Users` tab. See [Manage users and roles](/administration/workspace-administration/manage-users-and-roles).

</details>

<details>

<summary>How do I make someone an administrator?</summary>

Open the user in `Settings` under the `Users` tab and click `Make admin`. See [Manage users and roles](/administration/workspace-administration/manage-users-and-roles#make-user-workspace-admin).

</details>

<details>

<summary>How do I transfer ownership of a workspace?</summary>

A workspace has one owner, who is the billing contact and the only person who can request deletion. Open the user you want to transfer to and click `Make owner`. See [Manage users and roles](/administration/workspace-administration/manage-users-and-roles#make-user-workspace-owner).

</details>

<details>

<summary>How do I change a member's title?</summary>

Each member has a title that can appear in meeting minutes. You can change it, or add a custom title, from the `Users` tab. See [Manage users and roles](/administration/workspace-administration/manage-users-and-roles#user-titles-in-a-workspace).

</details>

<details>

<summary>How do I remove a member from the workspace?</summary>

Open the user in `Settings` under the `Users` tab and click `Remove from workspace`. See [Manage users and roles](/administration/workspace-administration/manage-users-and-roles#remove-user-from-workspace).

</details>

<details>

<summary>Can I give someone access to only certain folders or documents?</summary>

Access in Hippoly is managed at the workspace level. Per-folder or per-document permissions aren't available. Workspaces that need to keep material separate usually use more than one workspace. Drafts are an exception, you choose exactly who collaborates on a draft document. See [Invite collaborators to draft](/using-hippoly/hippoly-docs/invite-collaborators).

</details>

## Plans and billing

<details>

<summary>Is Hippoly free?</summary>

Hippoly uses a freemium model. Every workspace starts on the **Free plan**, which can be used for an unlimited time with certain limits. Paid plans add more features and higher limits. See [Subscription and billing](/administration/subscription-and-billing).

</details>

<details>

<summary>How do I upgrade to a paid plan?</summary>

A workspace owner or administrator can upgrade the workspace at any time. See [Upgrade to a paid plan](/administration/subscription-and-billing/upgrade-to-a-paid-plan).

</details>

<details>

<summary>How do I change or cancel my subscription?</summary>

Owners and administrators manage the plan from the subscription settings. See [Change plan](/administration/subscription-and-billing/change-plan) and [Cancel subscription](/administration/subscription-and-billing/cancel-subscription).

</details>

<details>

<summary>Who can manage billing and subscriptions?</summary>

Only users with the **Workspace Owner** or **Workspace Administrator** role can manage subscription and billing. See [Subscription and billing](/administration/subscription-and-billing).

</details>

<details>

<summary>Does each workspace have its own plan?</summary>

**Yes.** Each workspace has its own subscription and is billed separately. If you manage several workspaces and want them handled together, contact us.

</details>

## Meetings

<details>

<summary>How do I create a meeting?</summary>

Go to `Meetings` and click the `Add` button, then add participants and share. See [Create and share meeting](/using-hippoly/meetings/create-and-share-meeting).

</details>

<details>

<summary>Will meetings show up in my Outlook or Google calendar?</summary>

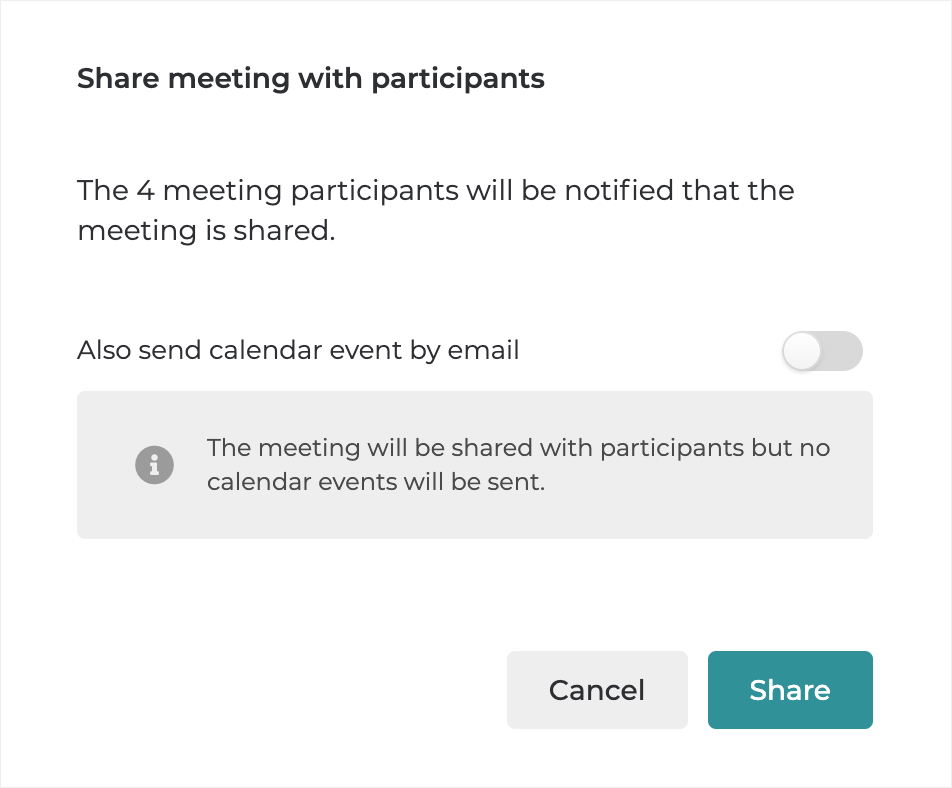
**Yes.** When a meeting is shared, participants can receive a calendar event by email that adds it to their personal calendar, just like a normal calendar invitation. The organiser can turn this off, and no calendar events are sent for meetings created in the past. See [Create and share meeting](/using-hippoly/meetings/create-and-share-meeting).

</details>

<details>

<summary>How do I attach a file or document to an agenda item?</summary>

When building the agenda, use the `Add file` button on the agenda item to upload a file or reference one already in your workspace. See [Attach files to agenda items](/using-hippoly/meetings/create-and-edit-agenda#attach-files-to-agenda-items).

</details>

<details>

<summary>Can I reuse an agenda or minutes from a previous meeting?</summary>

**Yes.** When you create a new agenda you can duplicate one from a previous meeting, and you can copy minutes from an earlier meeting whose minutes have been shared. See [Create and edit agenda](/using-hippoly/meetings/create-and-edit-agenda) and [Create and edit meeting minutes](/using-hippoly/meetings/create-and-edit-meeting-minutes).

</details>

<details>

<summary>How do I invite a guest who isn't in my workspace to one meeting?</summary>

You can add an external participant to a single meeting from the meeting's participants tab, without adding them to the workspace. See [Manage meeting participants](/using-hippoly/meetings/manage-meeting-participants).

</details>

<details>

<summary>How do meeting minutes get approved and signed?</summary>

Minutes are created in the meeting, can go through approval, and can then be e-signed. See [Create and edit meeting minutes](/using-hippoly/meetings/create-and-edit-meeting-minutes), [Approve meeting minutes](/using-hippoly/meetings/approve-meeting-minutes), and [Send meeting minutes for e-signing](/using-hippoly/meetings/e-sign-meeting-minutes).

</details>

## E-signing

<details>

<summary>How do I send a document or file for e-signing?</summary>

You start the signing flow from the file or document in the folder view, then add signers and send. See [Send for e-signing](/using-hippoly/e-signing/e-sign-files-and-docs).

</details>

<details>

<summary>How does signing meeting minutes work?</summary>

Signing minutes starts from the meeting protocol panel rather than the folder view, and you can include attachments from the meeting. See [Send meeting minutes for e-signing](/using-hippoly/meetings/e-sign-meeting-minutes).

</details>

<details>

<summary>How do I actually sign a document I've been asked to sign?</summary>

Workspace members open the request from their notifications, while external signers get an email with a signing link. Both lead to the signing page where you verify your identity and sign. See [Sign a document](/using-hippoly/e-signing/sign-a-document).

</details>

<details>

<summary>Can people outside my workspace sign?</summary>

**Yes.** You can add external signers by name and email address. They receive a signing invitation by email and don't need a Hippoly account. See [Send for e-signing](/using-hippoly/e-signing/e-sign-files-and-docs).

</details>

<details>

<summary>What identity verification methods are available for signing?</summary>

Signers can verify with Swedish BankID, Norwegian BankID, Danish MitID, Finnish FTN, an SMS PIN, or without additional verification. You choose the method per signer. See [Signing methods](/using-hippoly/e-signing/signing-methods).

</details>

<details>

<summary>Can I hide personal identity numbers in the signed PDF?</summary>

**Yes.** A workspace administrator can turn on a setting that hides personal identity numbers in signed documents. See [E-signing settings](/administration/workspace-administration/e-signing-settings).

</details>

<details>

<summary>A document is already signed but needs changes. What do I do?</summary>

A signed document is locked and can't be edited. You create a new editable copy (for Hippoly Docs) or unsigned copy (for uploaded files), make your changes, and sign again. See [Re-sign a document](/using-hippoly/e-signing/re-sign-document).

</details>

<details>

<summary>How do I see who has signed and remind those who haven't?</summary>

Open the signing details to track each signer's status, and send a reminder to anyone who hasn't signed yet. See [Manage signing process](/using-hippoly/e-signing/manage-signing-process).

</details>

## Documents and files

<details>

<summary>Can I edit Word or Excel files directly in Hippoly?</summary>

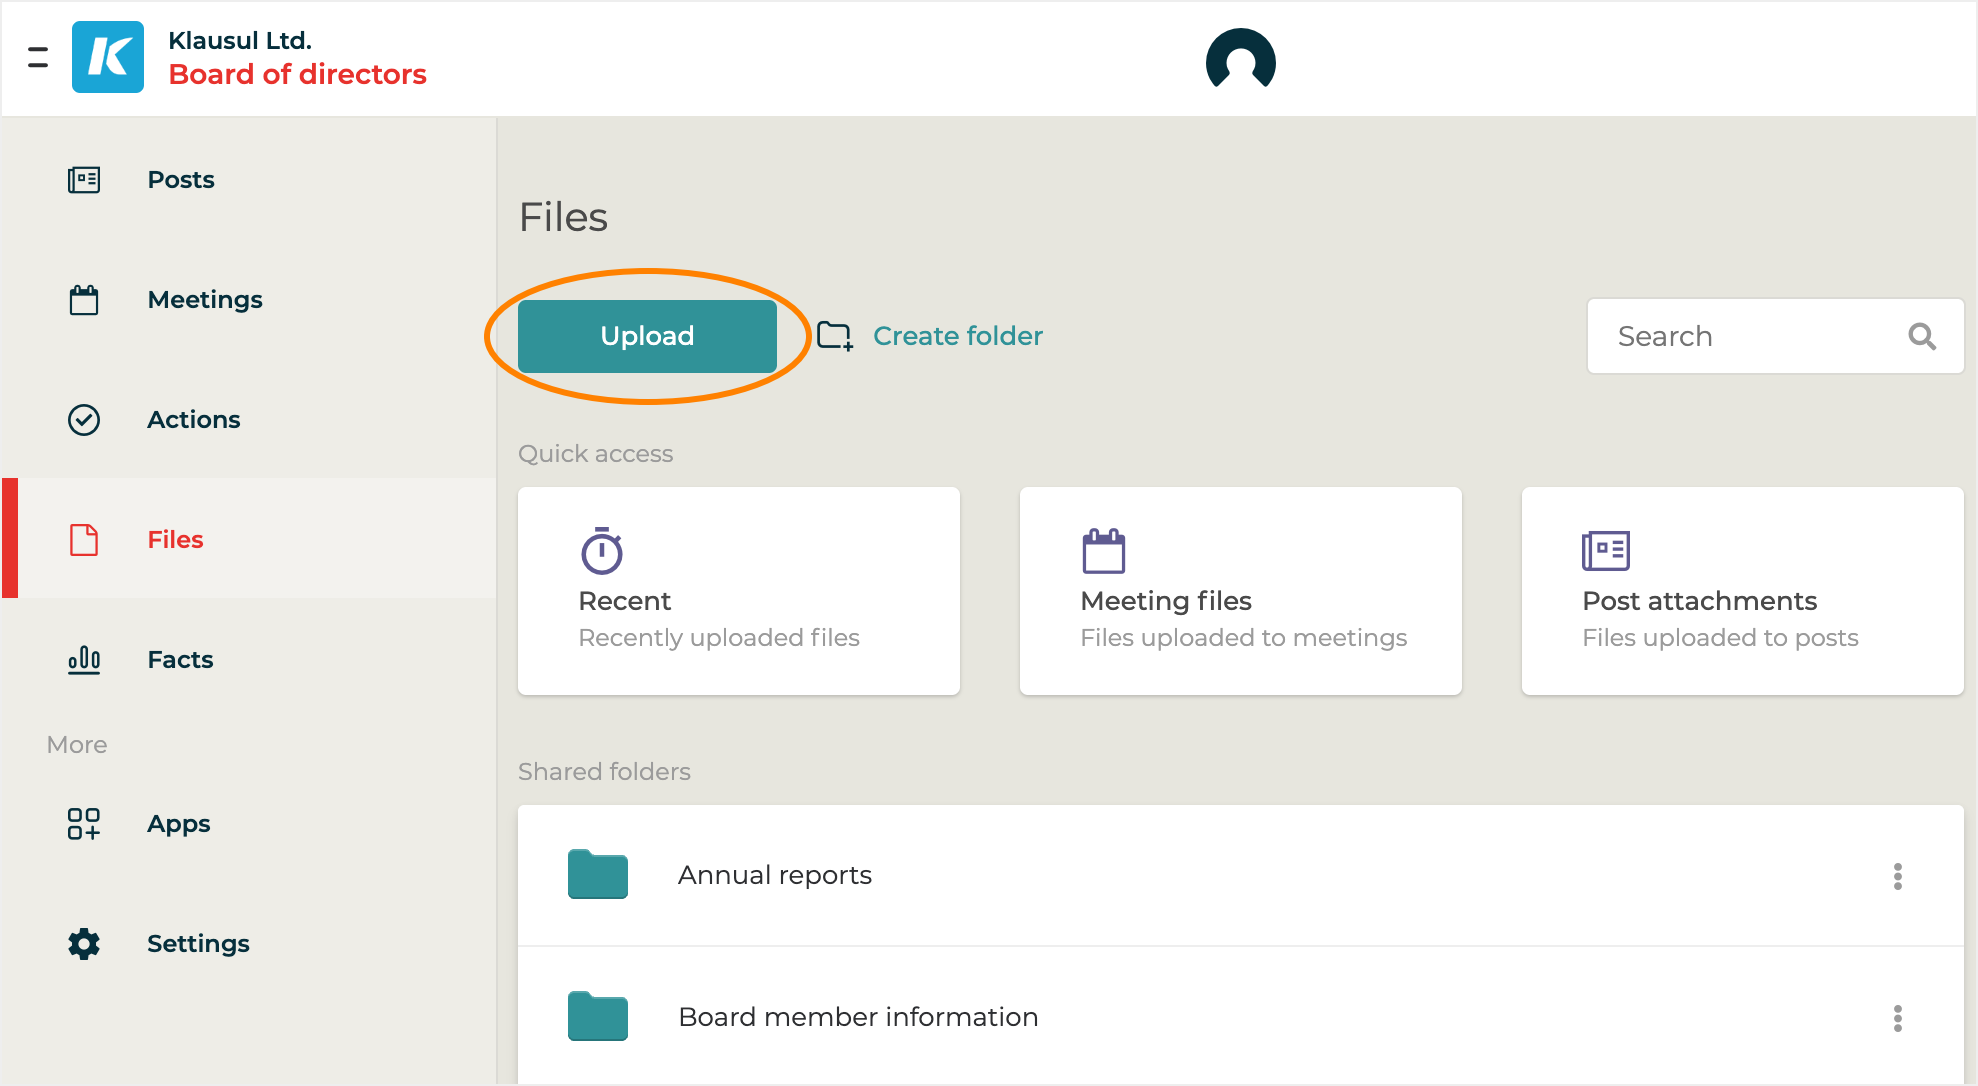
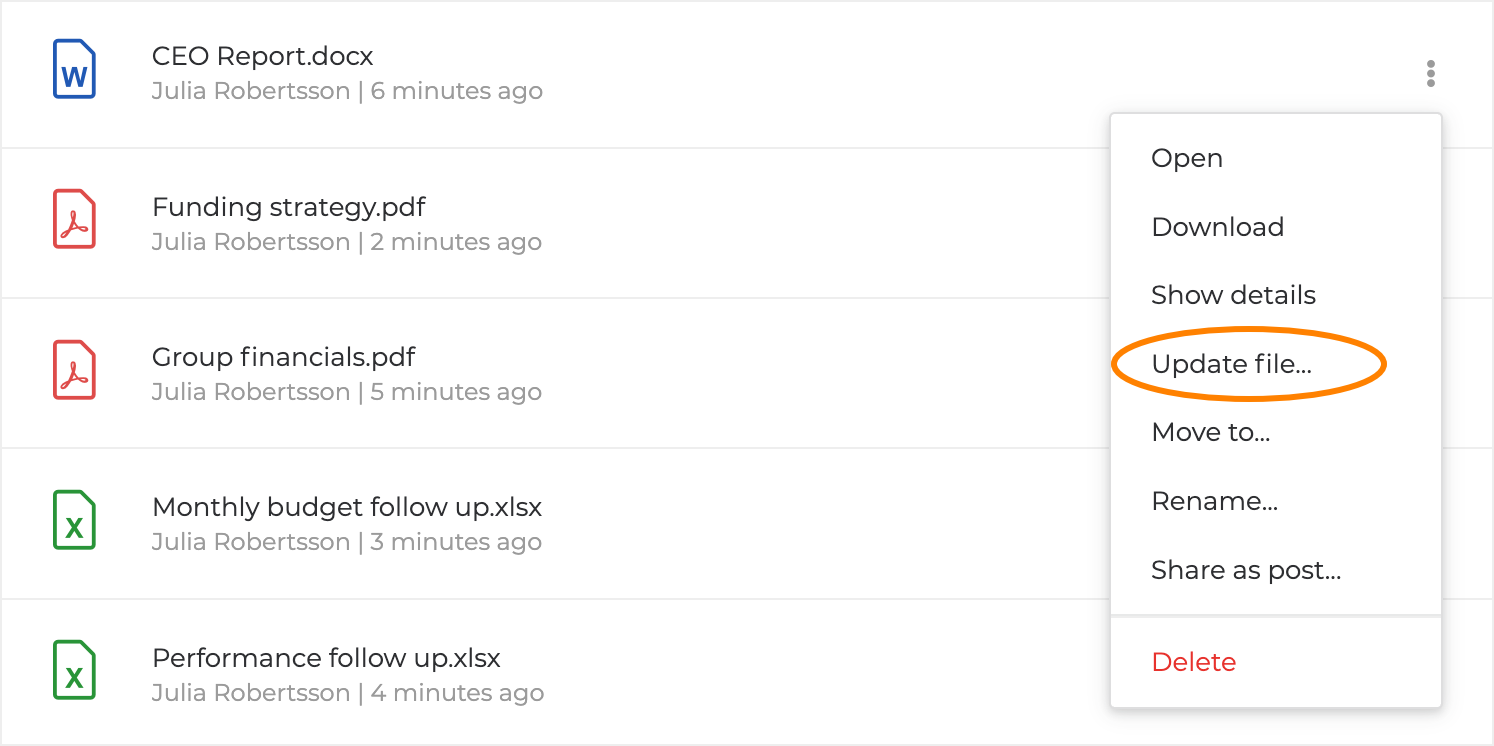
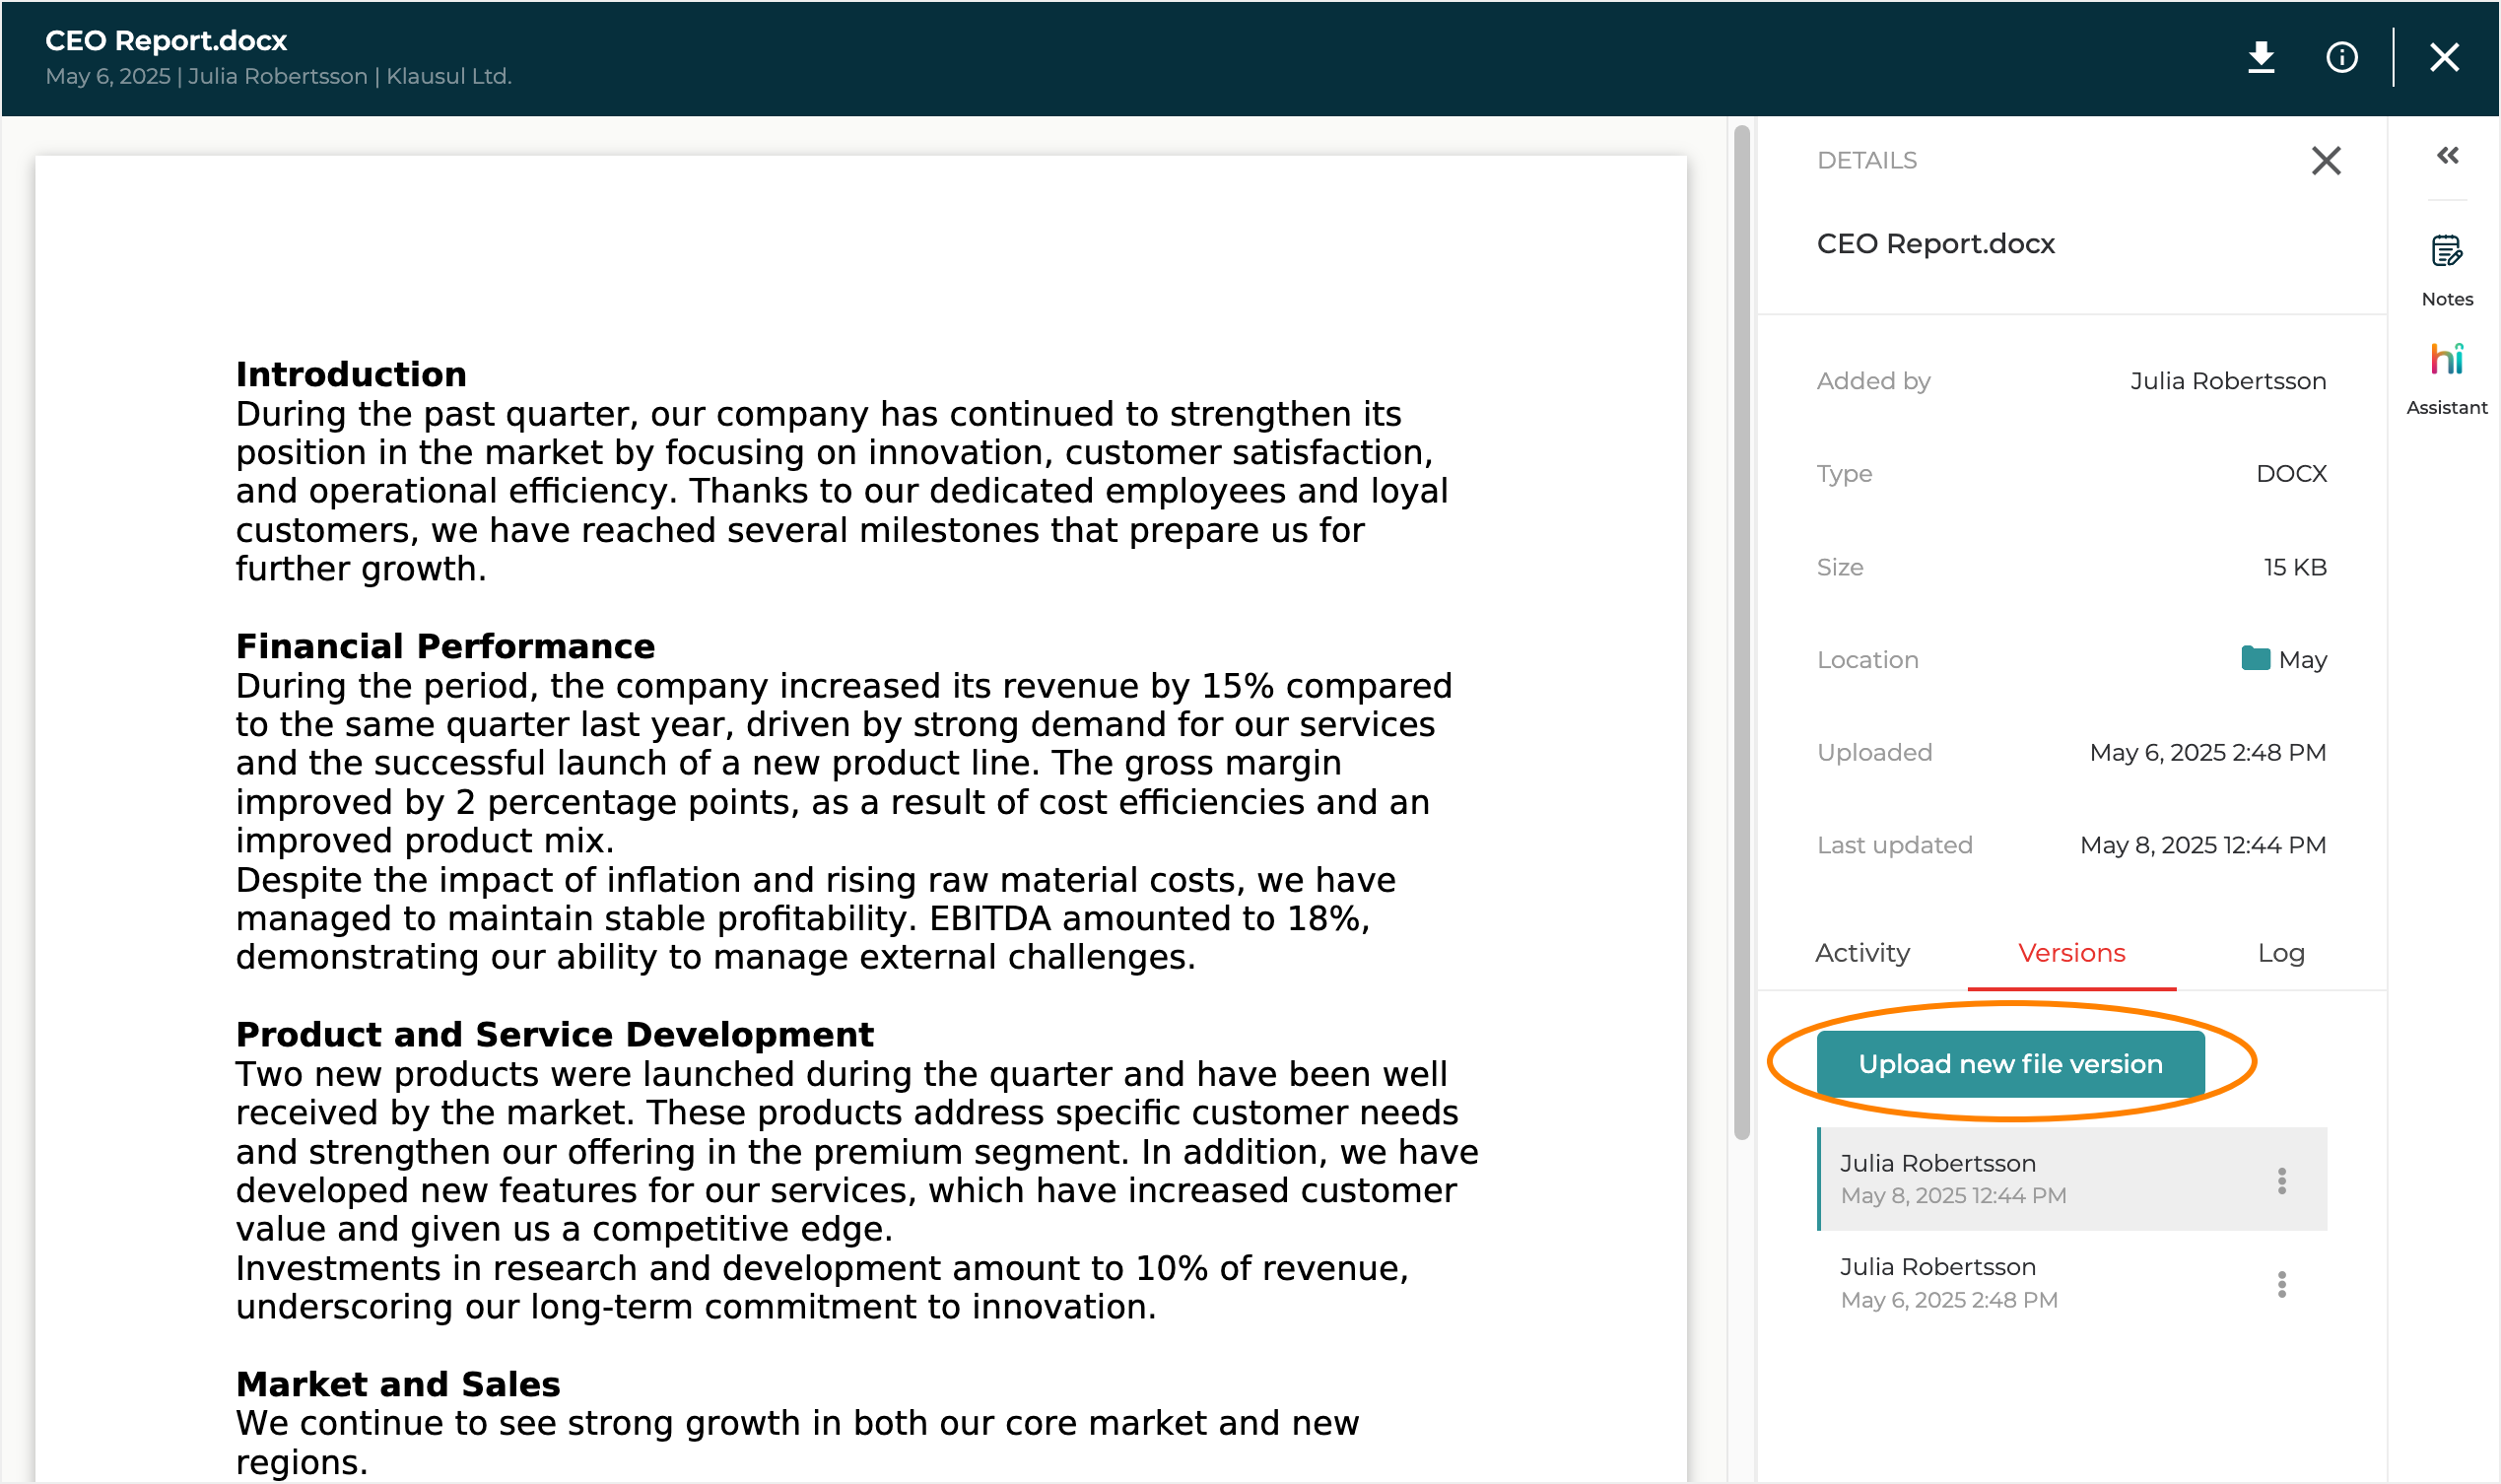
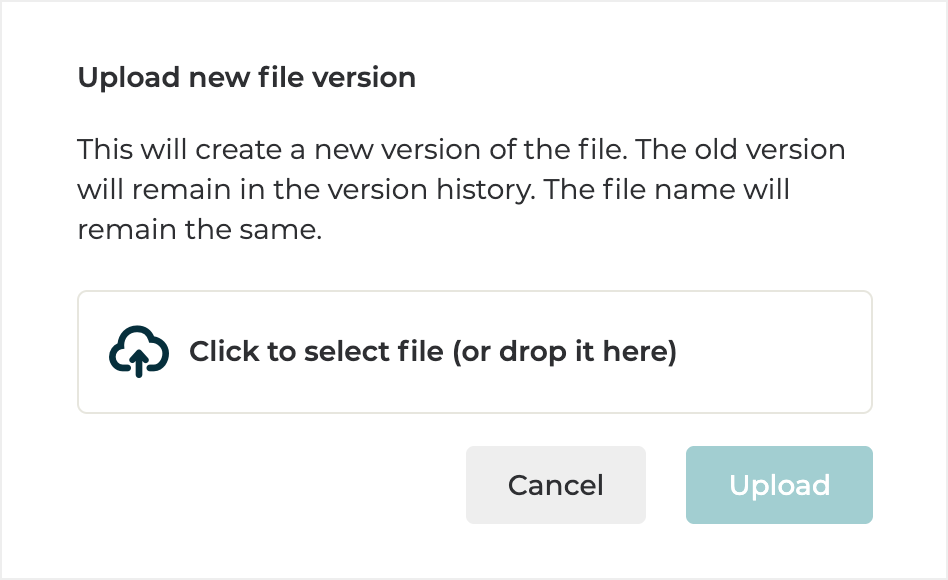
Uploaded files aren't edited in place and there's no sync with OneDrive or Google Drive. To change an uploaded file, download it, edit it on your device, and upload it again as a new version. For documents you write and edit inside Hippoly, use [Docs](/using-hippoly/hippoly-docs). See [Update file](/using-hippoly/files-and-folders/update-file).

</details>

<details>

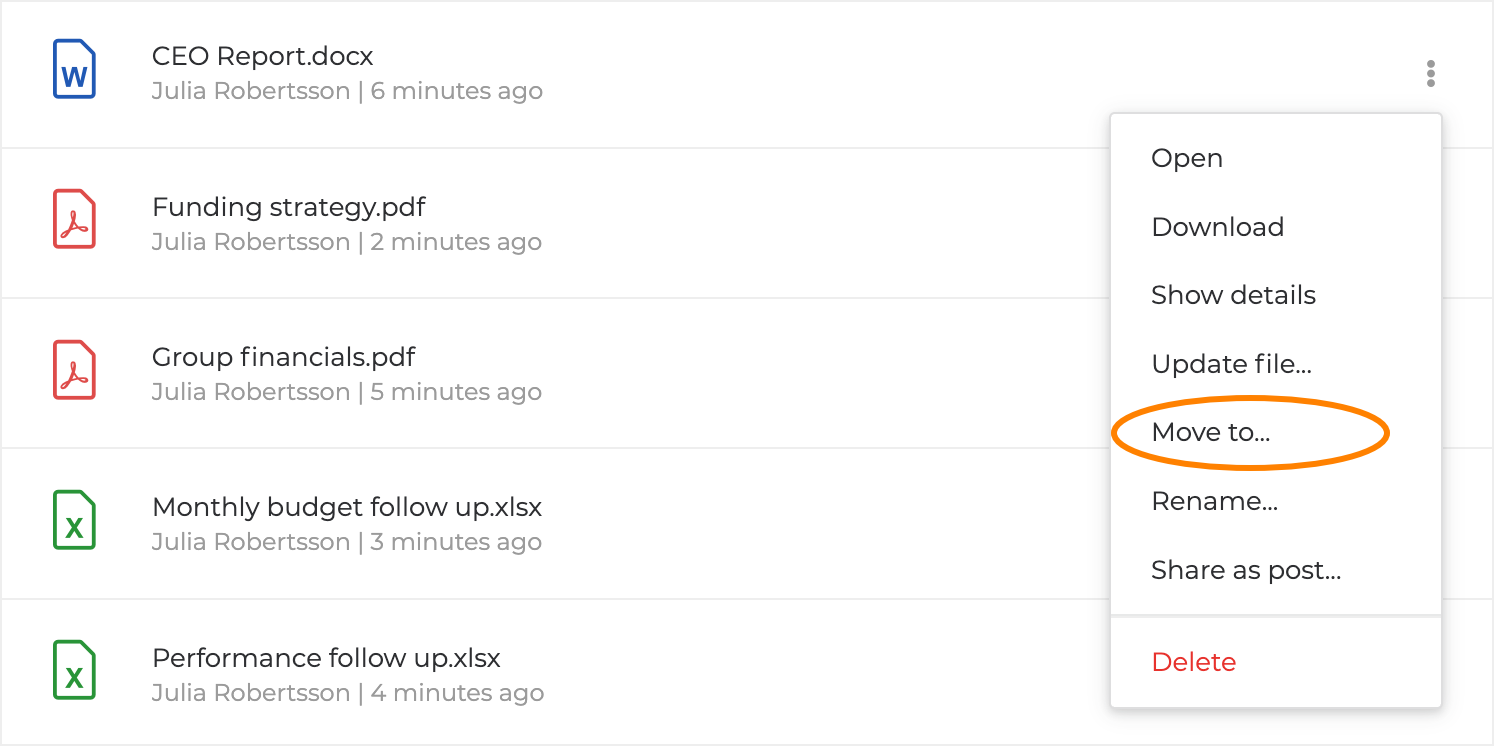
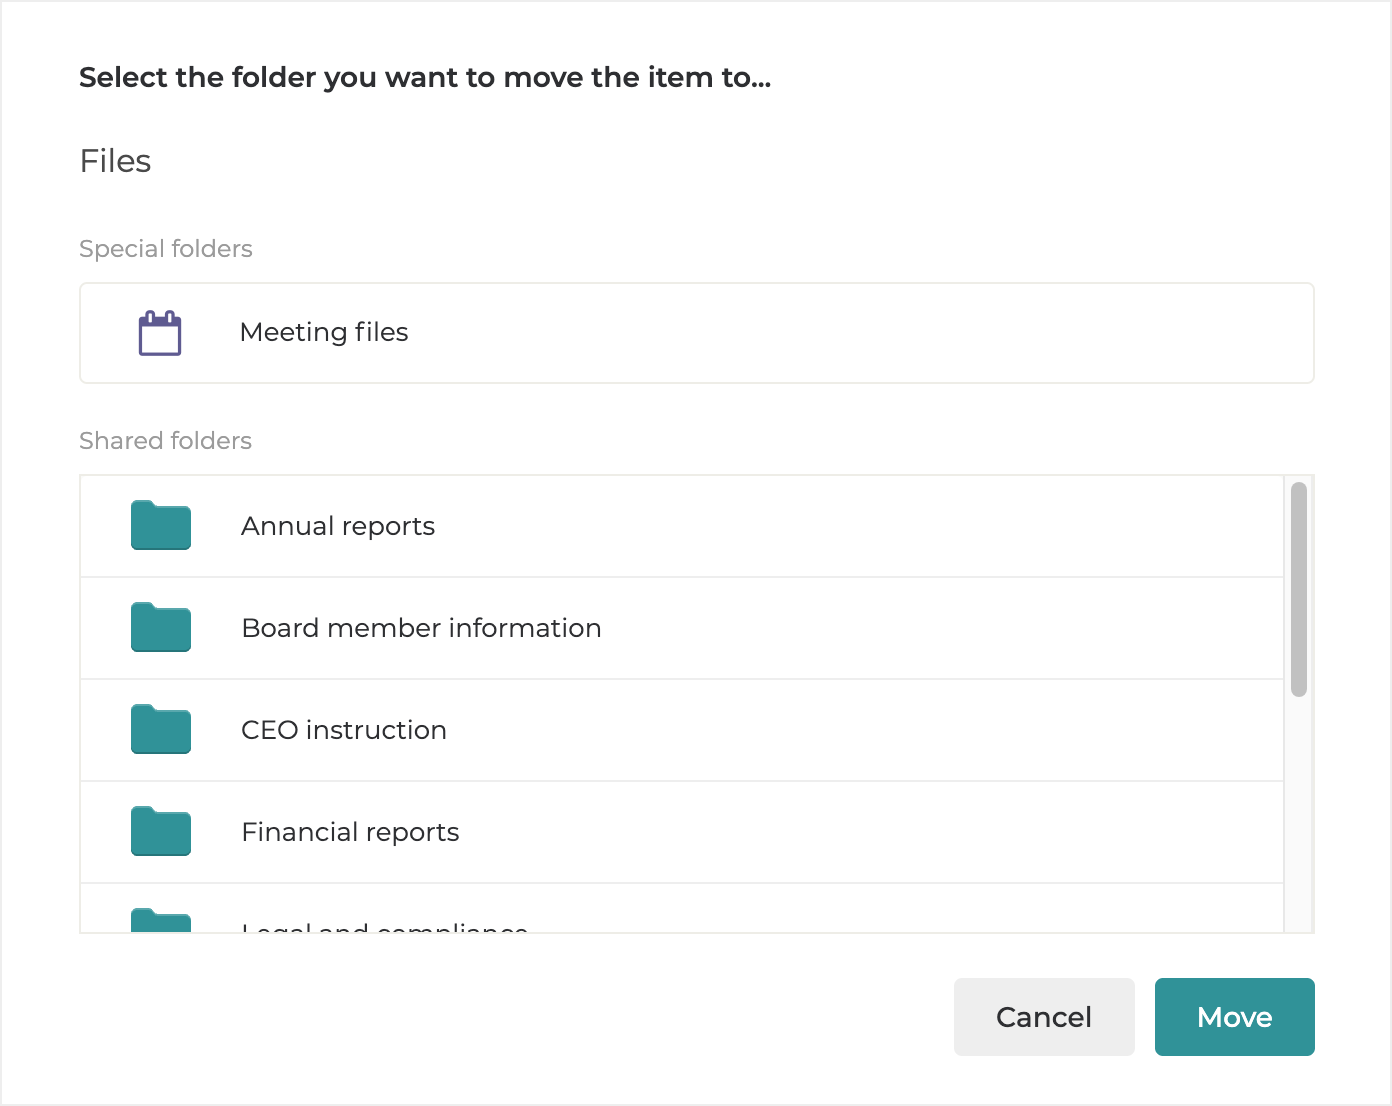
<summary>How do I move or organise files and folders?</summary>

You can create folders and move files and folders between them. See [Create folders](/using-hippoly/files-and-folders/create-folders) and [Move file](/using-hippoly/files-and-folders/move-file).

</details>

<details>

<summary>Will members be notified when I add a file to a folder?</summary>

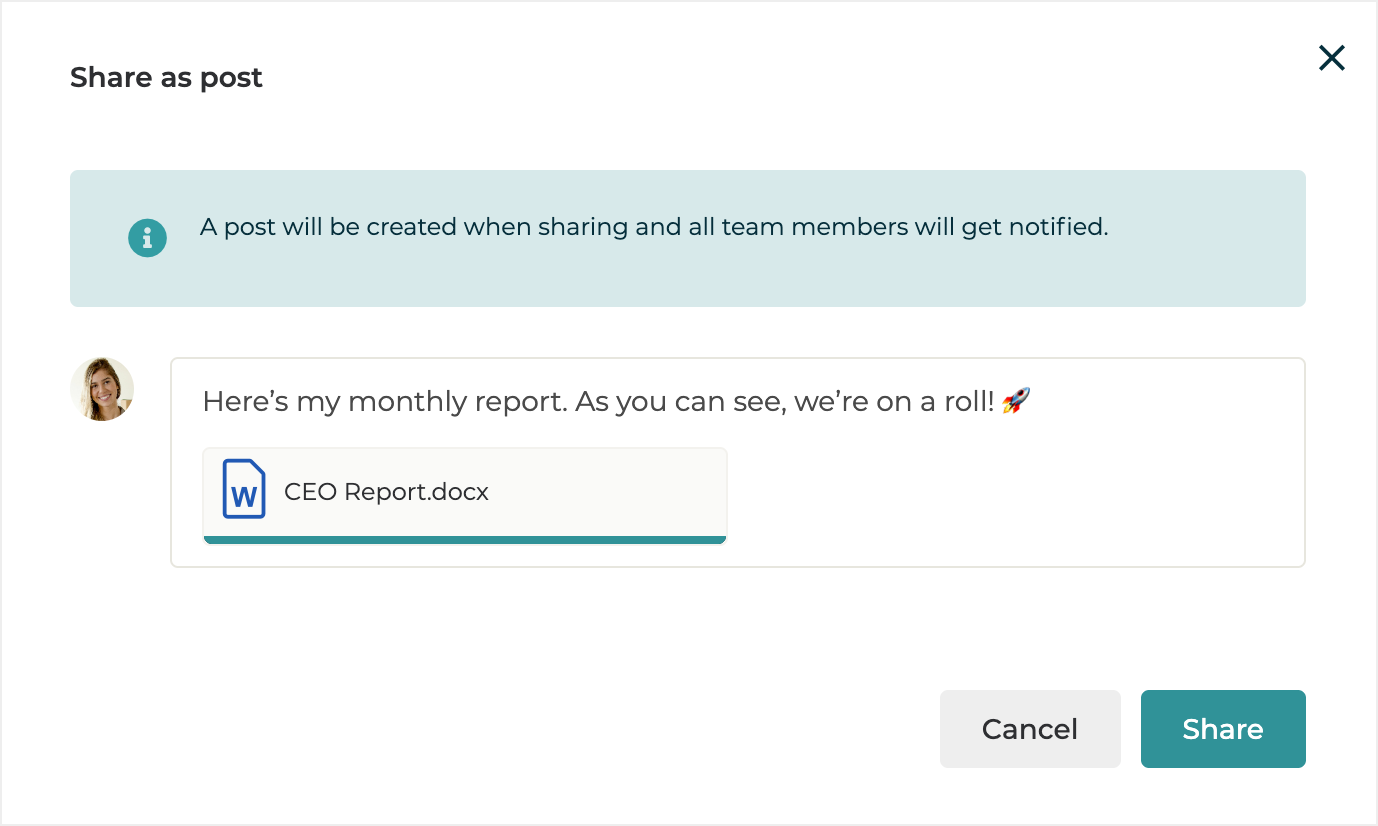
**No.** Adding a file to a folder doesn't notify anyone. To let the workspace know about a file, share it as a post. See [Share file as post](/using-hippoly/files-and-folders/share-file-as-post).

</details>

<details>

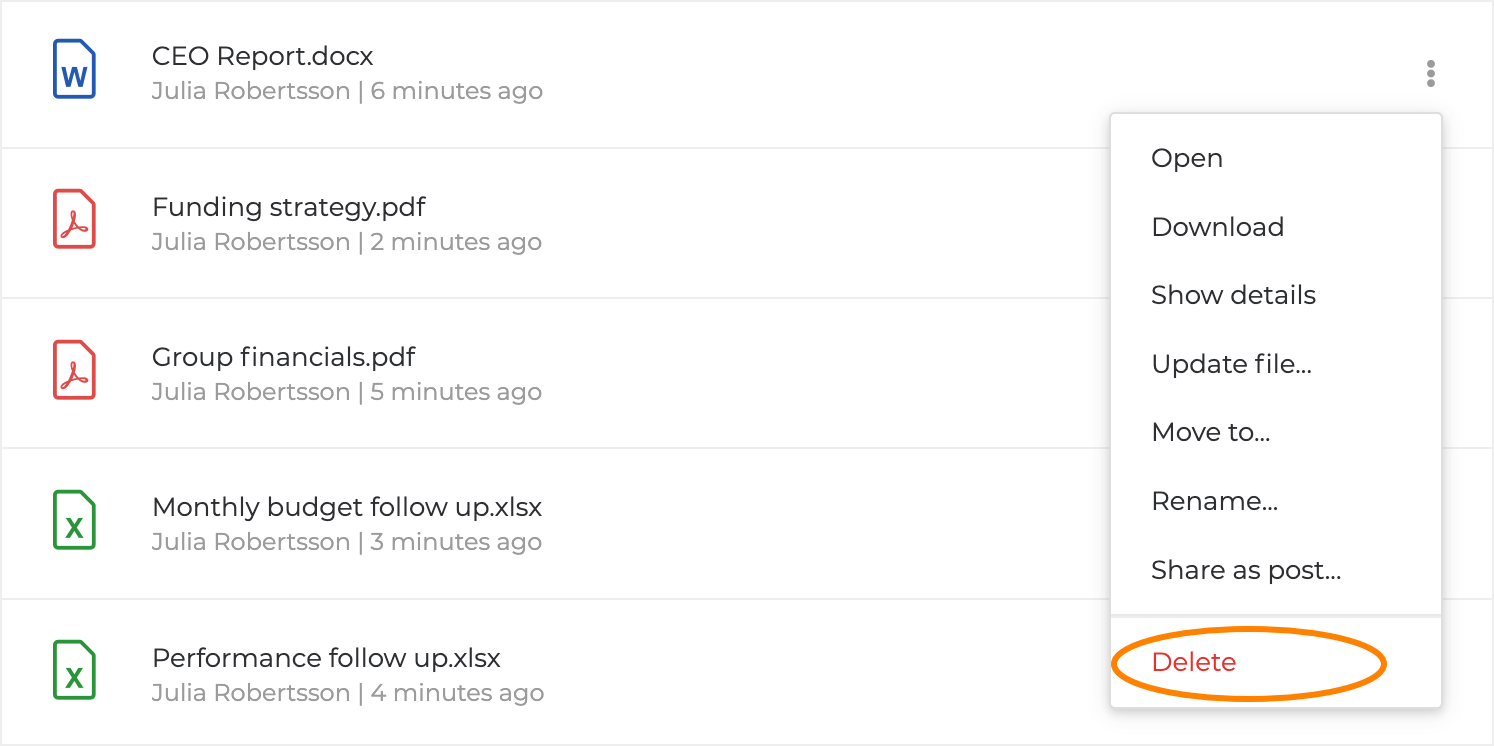
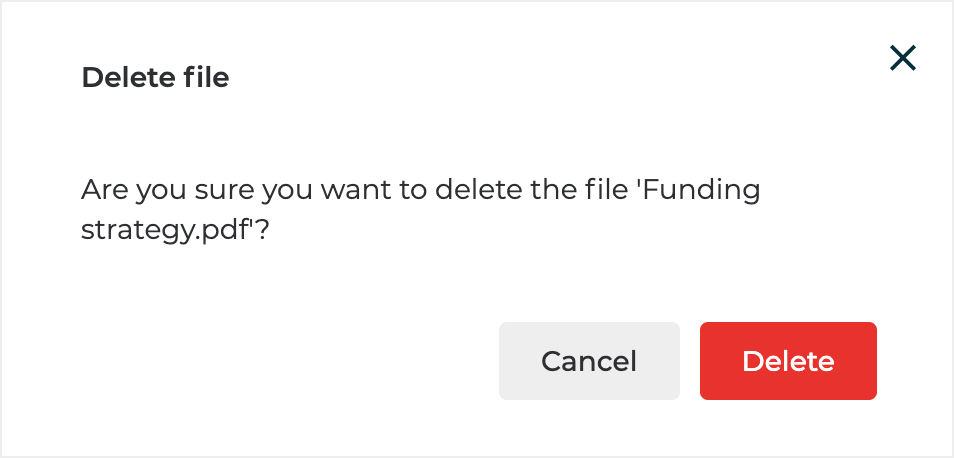
<summary>Can I recover a document, file, or meeting I deleted?</summary>

**No.** Deletion is permanent and can't be undone. If you only need to roll back changes to a document rather than remove it, use [version history](/using-hippoly/hippoly-docs/version-history) instead.

</details>

<details>

<summary>How do I download a document or file?</summary>

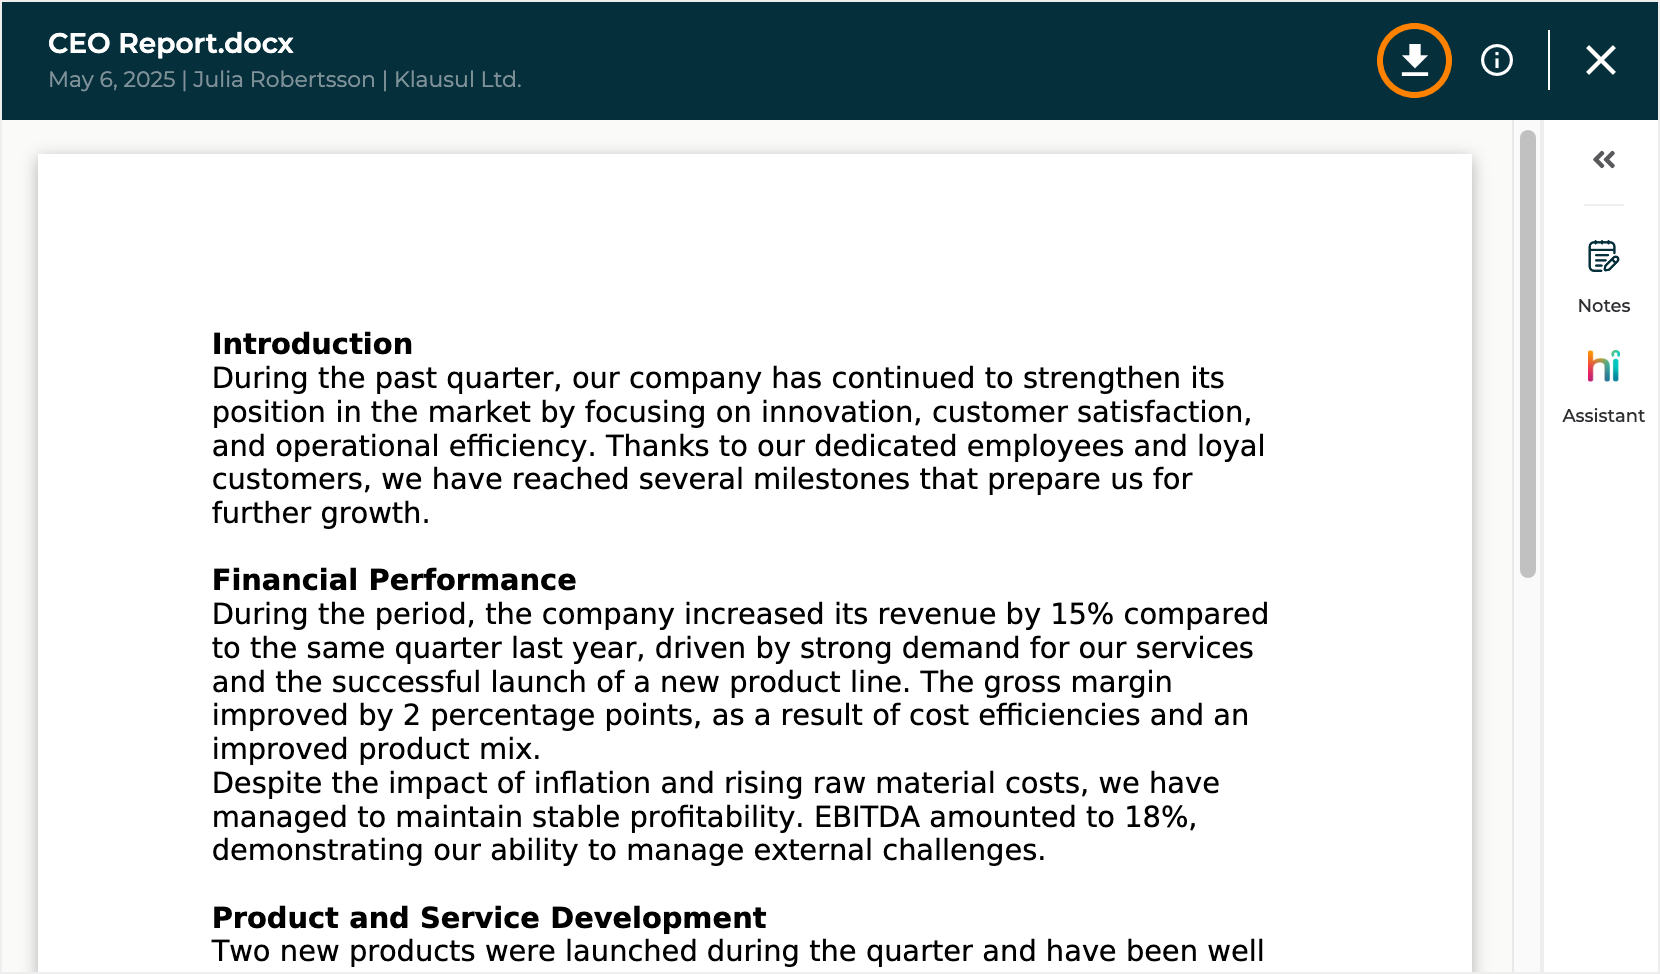
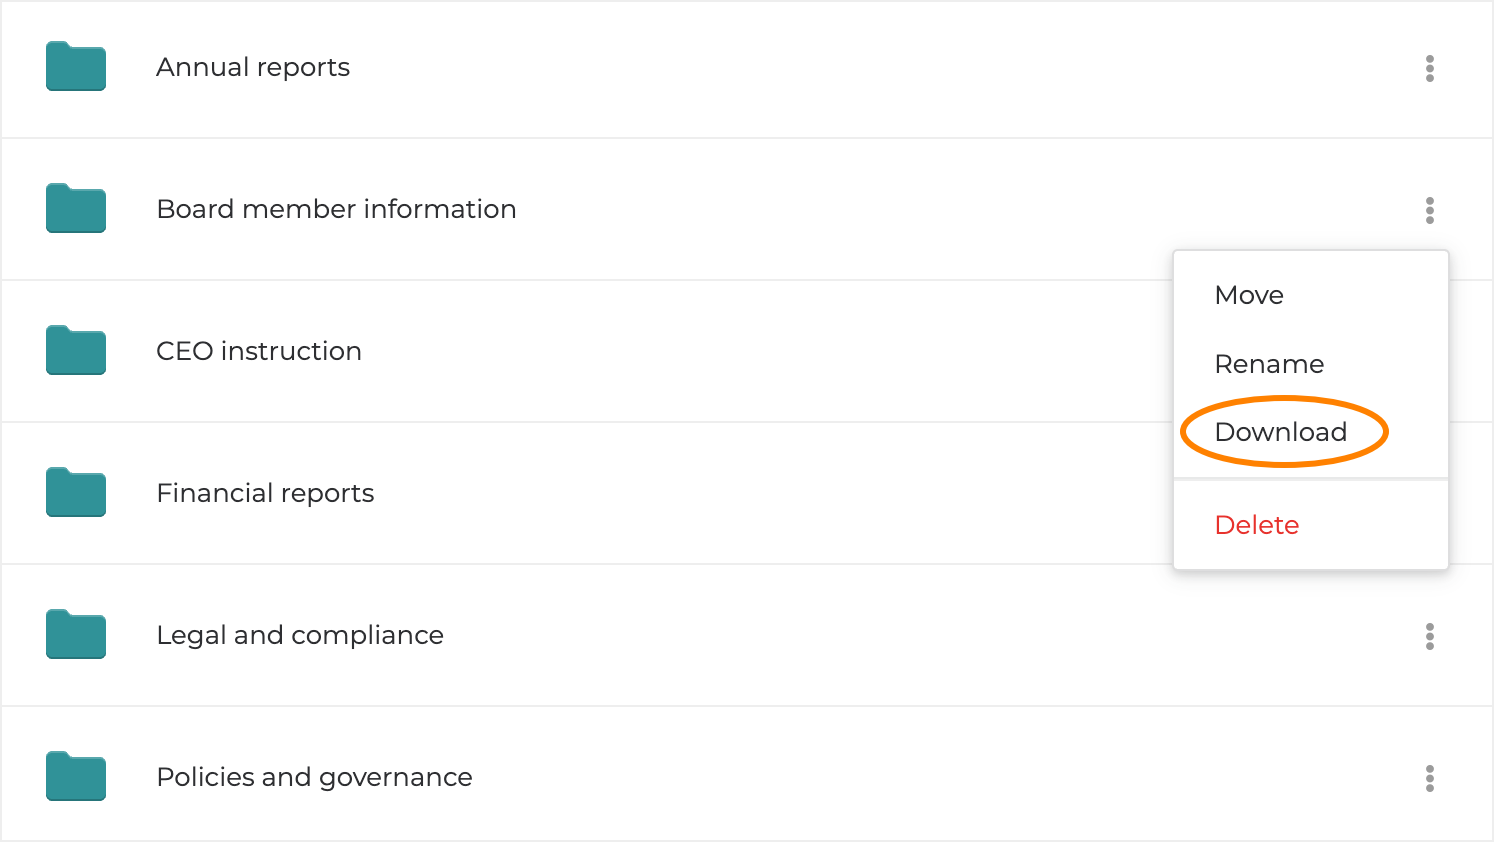
You can download individual documents and files, or whole folders. See [Download document](/using-hippoly/hippoly-docs/download-document) and [Download files and folders](/using-hippoly/files-and-folders/download-files-and-folders).

</details>

## Notifications

<details>

<summary>I'm not receiving notification emails. Why?</summary>

The most common cause is that notifications are going to an address that isn't your primary one, so check the addresses linked to your account. You can also review which events you're notified about. See [Email addresses](/administration/user-account-settings/email-addresses) and [Notification preferences](/administration/user-account-settings/email-notifications).

</details>

<details>

<summary>How do I control which notifications I receive?</summary>

You choose, per category, whether you're notified by email, by push, or both, from your account settings. See [Notification preferences](/administration/user-account-settings/email-notifications).

</details>


# Getting started with Hippoly

To use [Hippoly](/getting-started/what-is-hippoly), you need a personal user account. Your account is unique to you and can be linked to multiple workspaces, allowing you to seamlessly navigate between different boards and decision-making teams.

### 1. Create your user account

{% stepper %}
{% step %}
Go to <https://secure.hippoly.com/#/auth/signup>.
{% endstep %}

{% step %}
Enter your email address (this will be pre-filled if you accessed via a workspace invitation link).
{% endstep %}

{% step %}
Select your preferred login method (eID is recommended in regions where it is supported).
{% endstep %}

{% step %}
Complete the registration process based on your chosen login method.
{% endstep %}

{% step %}
Click the `Create account` button.
{% endstep %}
{% endstepper %}

Your user account is set up, now you need a place to collaborate with your team. We call that a workspace, and you can become part of one either by creating a new one or join an existing one.

### 2. Create or join a workspace

* [Join an existing workspace](/getting-started/join-an-existing-workspace) I have been invited to .&#x20;
* [Create a new workspace for my team](/getting-started/create-a-hippoly-workspace).

### 3. Configure your profile and preferences

{% stepper %}
{% step %}
[Add a profile picture](/administration/user-account-settings/profile-picture). It looks nice and helps your colleagues recognise you on Hippoly.
{% endstep %}

{% step %}
Make sure your [Display name](/administration/user-account-settings/display-name) includes both your first and last name, since it will be used in documents such as Meeting minutes.
{% endstep %}

{% step %}
[Add a passkey](/administration/user-account-settings/passkeys) as a complementary sign-in method. It makes signing in faster and easier, and it also lets you access your account if, for any reason, you can’t use your primary sign-in method.
{% endstep %}

{% step %}
[Configure your notifications](/administration/user-account-settings/email-notifications). Notifications alert you to activity in your workspaces and make sure you don’t miss anything important.
{% endstep %}

{% step %}
Make sure you have installed the Hippoly app on your phone and/or tablet.

[Download Hippoly for  iOS](https://apps.apple.com/app/id1469078766)&#x20;

[Download Hippoly for Android](https://play.google.com/store/apps/details?id=com.hippoly.capapp)
{% endstep %}
{% endstepper %}

### Noteworthy about your Hippoly user account

* For the best experience, we strongly recommend using only one Hippoly user account, even if you work across multiple teams or organizations. If you need to receive emails, calendar invitations, or notifications at different addresses for different teams, you can [add multiple email addresses](/administration/user-account-settings/email-addresses) to your account and choose which one to use for each team.for which team.
* Always make sure you have a working primary email address and a verified mobile number linked to your user account. Otherwise, you may miss important updates from your workspaces, won’t be able to e-sign documents, and won’t be able to restore your account if you forget your password.


# Join an existing workspace

### If you received a workspace invitation email

{% stepper %}
{% step %}
Click the **invitation link** in the email you have received
{% endstep %}

{% step %}
Sign in to your account (if you’re not already signed in), or [create a user account](https://help.hippoly.com/getting-started/pages/Kkbi0tMcjdxipkkOYi5r#id-1.-create-your-user-account) if you don’t have one yet.
{% endstep %}

{% step %}
When you’re signed in, you will be redirected to a page listing your workspace invitations. Click the `Accept` button to join the workspace.

<figure><img src="/files/Ur4Dcfq8uMztwoRf6BZ2" alt=""><figcaption></figcaption></figure>

{% hint style="info" %}
**If you don’t get redirected to the invitations page or don’t see the invitation**, it is usually because the invitation email was sent to an address that isn’t linked to your Hippoly user account. Check which email address the invitation was sent to and [add that address to your user account](/administration/user-account-settings/email-addresses#add-a-new-email-address).
{% endhint %}
{% endstep %}

{% step %}
When you have accepted the invitation, you will be redirected to the workspace and are ready to start collaborating with your colleagues.
{% endstep %}
{% endstepper %}

### I haven’t received an invitation email, but I want to join a workspace I know exists

Unfortunately, you can’t join an existing workspace without an invitation link. You’ll need to ask an administrator of that workspace to invite you.


# Create a Hippoly workspace

This article explains how to create **a new workspace** for your board or other decision-making team. If your team already has a workspace on Hippoly that you want to join, continue by reading the [Join an existing workapce](/getting-started/join-an-existing-workspace) article.

{% hint style="info" %}
**Creating a Hippoly workspace is completely free.** Every new workspace is automatically set up with the Free subscription, giving you the flexibility to get your team started at your own pace. You can explore all Hippoly features, and you have full control to decide if and when you want to upgrade to one of the paid subscription plans.
{% endhint %}

## Things to keep in mind

* To create a workspace, you need to have a [user account](/getting-started/getting-started-with-hippoly) on Hippoly.
* There are two ways to create a workspace, from scratch (the most common) and, in some regions, through an organisation lookup based on official registry data.

## Create a workspace from scratch

{% stepper %}
{% step %}
Go to <https://secure.hippoly.com/#/add-workspace>.
{% endstep %}

{% step %}
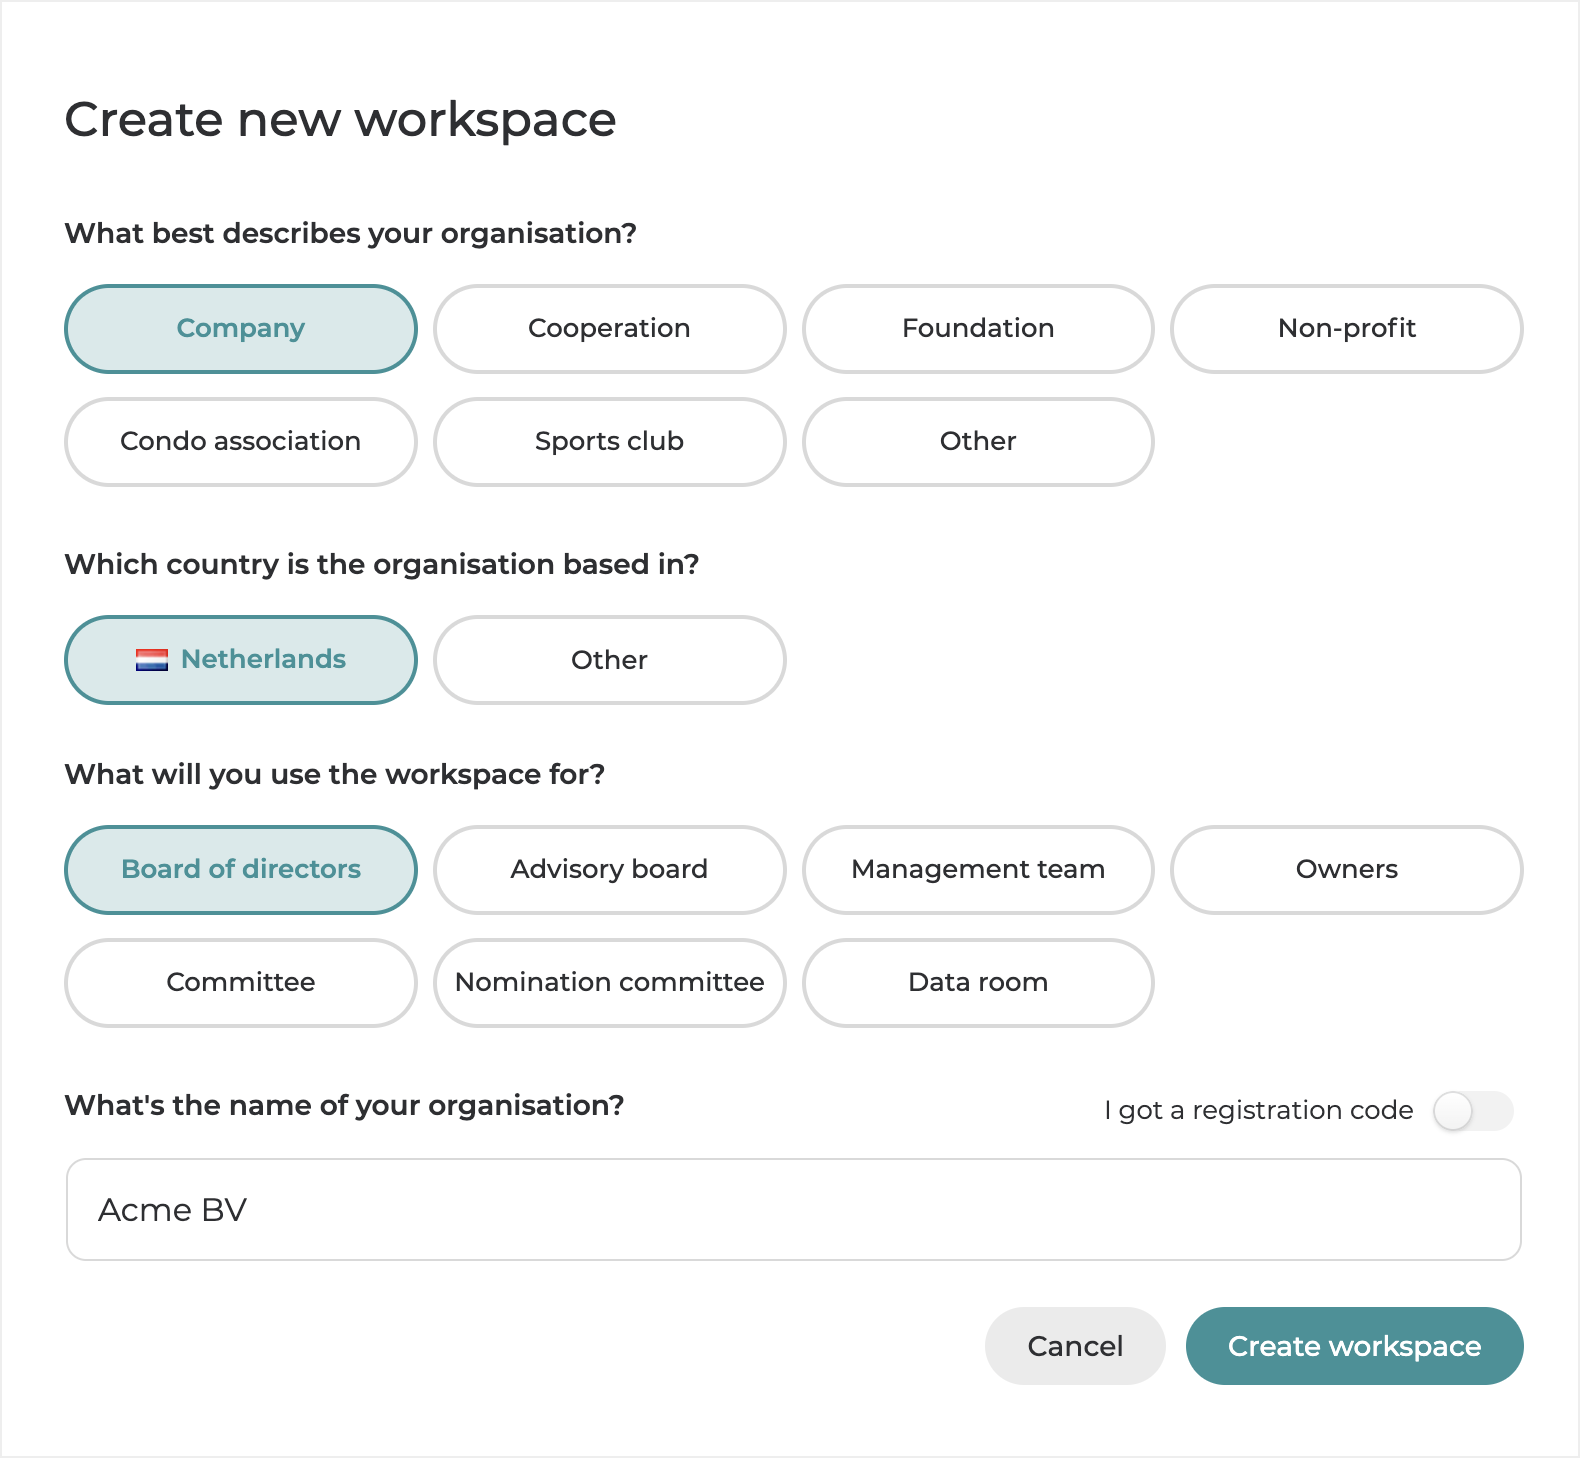
Select the **type of organisation**, the **country** the organisation is based in, and the **type of team** that will use the workspace.
{% endstep %}

{% step %}
Name the workspace (typically the name of your organisation).

<figure><img src="/files/ulSFT3nDlBopHOP0jxg4" alt=""><figcaption></figcaption></figure>
{% endstep %}

{% step %}
Optional: If you have a registration code, enable the `Registration code` toggle and enter or paste the code.

{% hint style="info" %}
A registration code is a unique code used to link the workspace to an organisational context. If you haven’t received one, simply skip this step.
{% endhint %}
{% endstep %}

{% step %}
Click the `Create workspace` button.
{% endstep %}

{% step %}
Your new workspace is now ready! You can [begin setting it up and inviting your colleagues.](/getting-started/getting-started-as-workspace-admin)
{% endstep %}
{% endstepper %}

## Create a workspace through an organisation lookup

In some regions, Hippoly can automatically look up your organisation in official registries. This only works if you have an eID connected to your user account, since we use it to verify whether you are a registered representative of the company, such as a CEO or board member.&#x20;

{% stepper %}
{% step %}
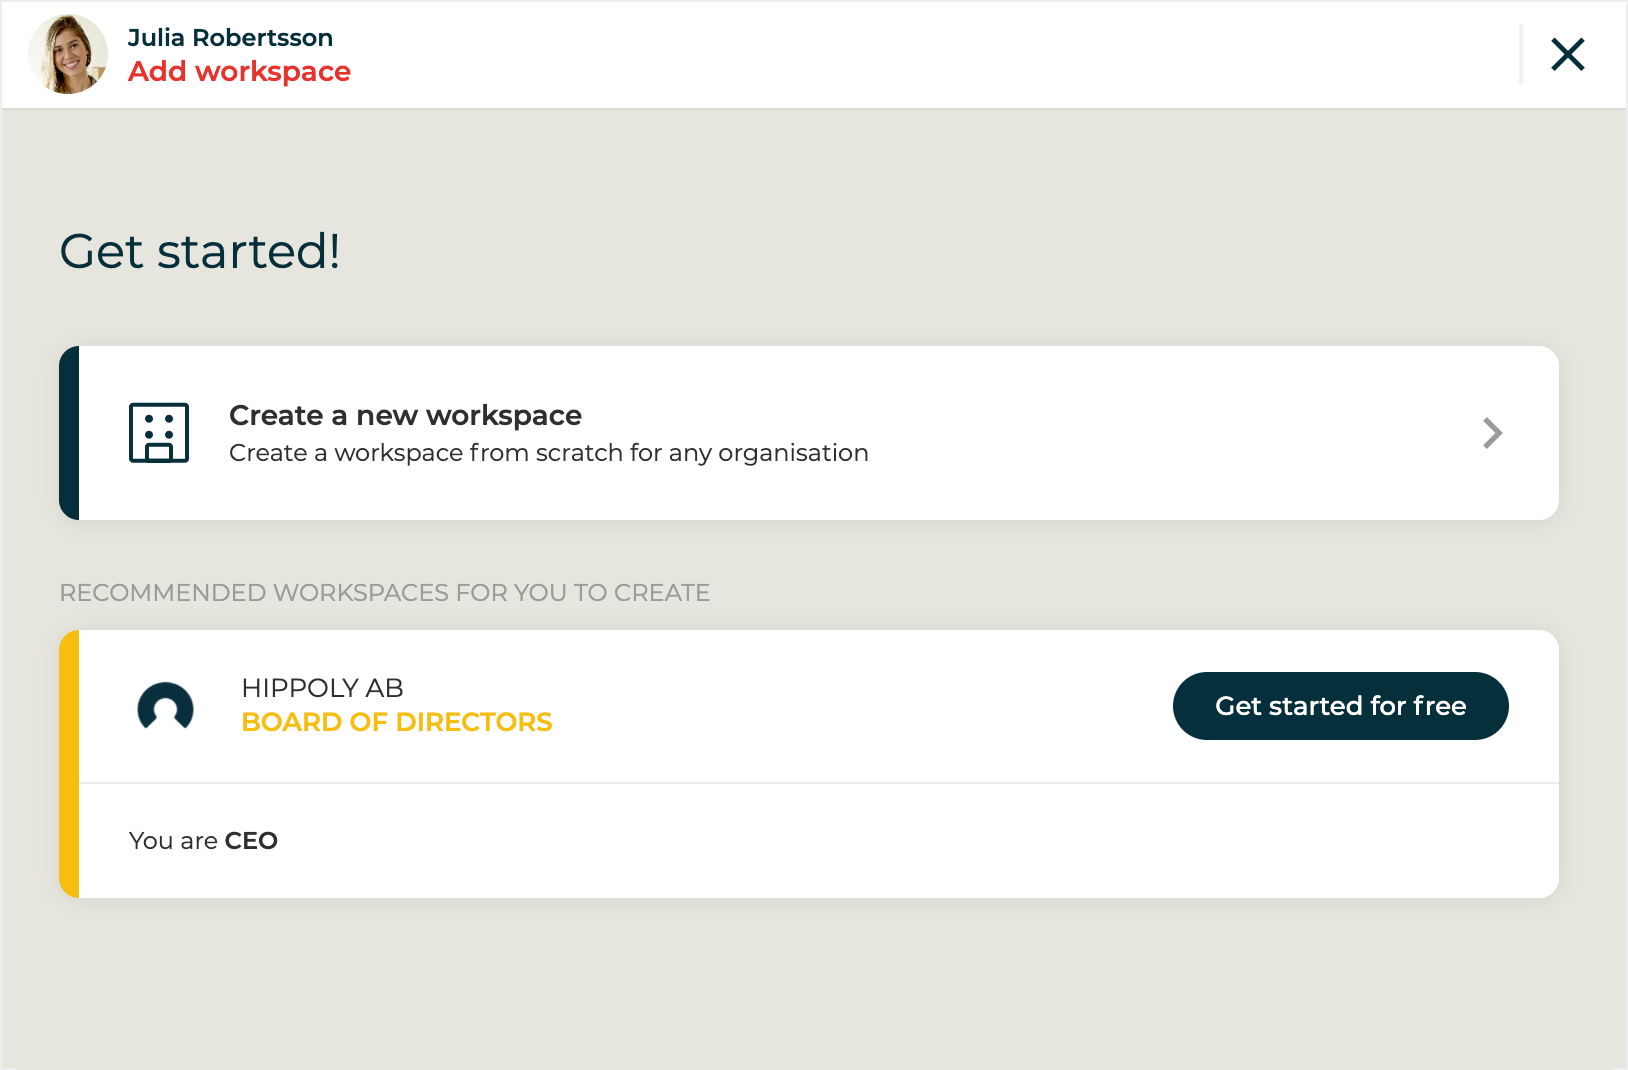
Go to <https://secure.hippoly.com/#/engagement-list>

We will check the registries and list any organisations linked to your verified identity. If we find any, they will be displayed for you to select. If not, you will need to [create your workspace from scratch](#create-a-workspace-from-scratch) as described earlier in this article.
{% endstep %}

{% step %}
Click the `Get started for free`  button to create a workspace for any listed organisation.

<figure><img src="/files/mWuCL3D2suayu9gzkfwF" alt=""><figcaption></figcaption></figure>

Hippoly automatically retrieves all required information from public records to set up the workspace. It’s a fast and effortless way to get started without entering details that already exist.
{% endstep %}

{% step %}
Your new workspace is now ready! You can [begin setting it up and inviting your colleagues.](/getting-started/getting-started-as-workspace-admin)
{% endstep %}
{% endstepper %}


# Getting started as workspace admin

## Getting started for workspace creators


# The basics of using Hippoly

### Communicate with your team

* Create a post
* Send DMs&#x20;
* Create a group

***

### Create and conduct a meeting

* **Create meeting and agenda**
* **Prepare for the meeting**
* **Write, review and sign meeting minutes**

***

### Share and Working with files

* **Upload a file**
* **Add a new version of a file**

***

E-sign documents


# What is Hippoly?

Hippoly is a board management platform designed to help boards and leadership teams work securely, efficiently, and without unnecessary complexity. Some people call it a board portal, others a governance platform. Labels aside, it’s built to give decision-makers a single, secure place to collaborate, prepare for Meetings, manage Documents, stay aligned on Actions, and handle sensitive information with confidence.

What sets Hippoly apart is built into its DNA:

* **Security first.** Hippoly is created for organizations that handle sensitive material every day. Strong authentication, encrypted storage, and strict access controls come standard, not as optional add-ons.
* **Simplicity without compromise.** You don’t need a training course or a secret decoder ring to use it. Everything is designed to be clear, intuitive, and fast, so you can focus on governance, not on figuring out where a file went.
* **Built for real collaboration.** Whether you’re preparing an Agenda, reviewing Board materials, sharing Files, or following up on Actions, Hippoly helps your team stay coordinated across every workspace.

**In short**: Hippoly gives boards and executives a more secure, smarter, and smoother way to do their work.&#x20;

### For whom is Hippoly for?

Hippoly is built for any organization that needs a secure, smooth, and smart way to manage board and leadership work. It supports everything from early-stage startups and growing private companies to large listed corporations. Hippoly is also well suited for non-profits, associations, and public sector organizations that handle sensitive information and require a reliable governance platform.

**In short:** If your team needs a safe and efficient way to collaborate, prepare for Meetings, and manage critical information, Hippoly is designed for you.

### Workspace types - describe the different types

### How to get started with Hippoly?

1. Create a user account
2. Set up a workspace
3. Invite you colleagues to a more secure, smart and smooth way to do board work. &#x20;


# Hippoly glossary

## A

**Action** A task or to-do item assigned to a workspace member with a due date. Actions can be created from meetings, posts, or the action list and are tracked in the My Actions view.

**Agenda** A structured outline of discussion points for a meeting. The agenda is built using the Agenda Builder and can include items with descriptions, file attachments, responsible persons, and time allocations.

**Agenda Builder** The tool in Hippoly for creating and editing meeting agendas. It supports drag-and-drop ordering, sub-items, file attachments, and AI-assisted suggestions.

**Annotation** A private note you add to a specific part of a document. Annotations are only visible to you and are useful for capturing thoughts or questions during review.

## B

**BankID** A digital identity verification method used for e-signing. Hippoly supports Swedish BankID, Norwegian BankID, and similar national eID solutions.

**Board Pack** A complete digital collection of meeting materials — the agenda and all attached documents — organised together so participants can review everything before the meeting.

## C

**Collaborator** A person invited to view or edit a document that is still in draft. Collaborators can have either the Editor or Viewer role.

## D

**Direct Message** A private conversation between two or more workspace members, separate from posts. Direct messages can include text, files, and images.

**Draft** A document status indicating that the content is only visible to the creator and invited collaborators. Drafts are not visible to the rest of the workspace until they are shared.

## E

**Editor** A collaborator role that allows the person to read and edit a draft document, invite other collaborators, and publish changes.

**E-signing** The process of adding a legally recognised electronic signature to a document directly in Hippoly, powered by Scrive.

## F

**File Versioning** Automatic tracking of previous versions of an uploaded file. When a file is updated, the previous version is kept in the version history.

**FTN (Finnish Trust Network)** A Finnish digital identity verification method used for e-signing in Hippoly.

## H

**Hippoly Docs** The built-in collaborative document editor in Hippoly. Hippoly Docs supports real-time co-editing, version history, e-signing, and PDF export.

## M

**Meeting Admin** A meeting role with the same permissions as the organiser — they can edit the agenda, upload materials, and manage meeting settings.

**Meeting Minutes** The formal record of a meeting's discussions, decisions, and action items. Meeting minutes are created by the secretary and can be reviewed, approved, and e-signed directly in Hippoly. Also referred to as the protocol.

**Meeting Organiser** The person who creates a meeting. The organiser has full control over the meeting settings, agenda, participants, and materials.

**Meeting Participant** A user invited to attend a meeting. Participants can view the agenda, attached materials, and meeting minutes.

**Meeting Secretary** The person responsible for writing the meeting minutes. The secretary role is automatically assigned to whoever creates the minutes.

**MitID** A Danish digital identity verification method used for e-signing in Hippoly.

## N

**Notification** An automatic alert about activity in your workspace. Notifications can appear in-app, as push notifications on your device, or as emails, depending on your settings.

**Note** A private text record you create for yourself. Notes are only visible to you and are useful for personal reminders or preparation.

## P

**Poll** A voting or survey feature that can be attached to a post. Polls allow single or multiple-choice answers and results are visible to all workspace members.

**Post** A message shared with everyone in the workspace. Posts can include text, images, files, and polls, and workspace members can comment on them.

**Protocol** Another term for meeting minutes, commonly used in board governance contexts.

## R

**Registration Code** A unique code that links your workspace to your organisation. Registration codes can unlock organisation-specific templates, branding, and settings.

**Revision** A saved version of a document. Every time a document is edited and saved, a new revision is created. You can browse, compare, and restore previous revisions from the version history.

## S

**Scrive** The third-party e-signing provider that powers Hippoly's digital signature capabilities. Scrive handles secure delivery, identity verification, and audit logging.

**Shared** A document status indicating that the content is visible to everyone in the workspace. To edit a shared document, you start a new version.

**Signed** A document status indicating that the document has been e-signed. Signed documents are read-only and the signed PDF is stored alongside the document.

**Signer** A person who has been asked to e-sign a document. Signers can be workspace members or external parties.

**Signing Method** The way a signer verifies their identity when e-signing. Options include Swedish BankID, Norwegian BankID, Danish MitID, Finnish FTN, SMS PIN, or no additional verification.

**Signing Order** A setting that controls whether signers sign in parallel (all at once) or in a specific sequence (one after another).

## T

**Template** A pre-built document or agenda structure that can be reused when creating new content. You can use built-in templates or save your own documents as templates.

## V

**Viewer** A collaborator role that allows the person to read a draft document but not make changes.

**Version History** A chronological record of all saved versions of a document or file. You can view, compare, and restore any previous version.

## W

**Workspace** The secure, shared environment where your team collaborates in Hippoly. A workspace contains all your posts, meetings, documents, files, and messages.

**Workspace Admin** A user role with administrative privileges. Workspace admins can manage settings, invite and remove users, and access most workspace data.

**Workspace Member** A regular user role with full access to workspace features, including creating meetings, documents, and posts.

**Workspace Owner** The highest-level user role in a workspace. The workspace owner has full control over all settings and is the only person who can request workspace deletion.


# Posts

Posts let you share important updates and insights directly with all of your team members. Everyone is automatically notified, so nothing gets missed.

## **Understand Posts**&#x20;

Posts are a smarter alternative to email for sharing updates, documents, and insights with your team or board. Instead of long email threads, you can keep all communication secure, organised and accessible directly in the workspace. Each post creates a clear thread where comments and questions stay structured and easy to follow.&#x20;

**Use Posts when you want to share something with your entire team.** If you need to communicate with a specific person or a smaller group, it's better to [use direct messages](/using-hippoly/direct-messages).

<figure><img src="/files/6wvaHOilXknRCWBr607n" alt=""><figcaption></figcaption></figure>

## Posts FAQ

<details>

<summary>Can I see who has read a Post?</summary>

Yes. You can see who has viewed a Post and its comments by opening the [View log](/using-hippoly/posts/view-log).

</details>

<details>

<summary>If I upload a File to a Post, can I move that File to a folder?</summary>

Yes. Files uploaded to Posts are stored in the [Post attachments folder](/using-hippoly/files-and-folders/post-attachments-folder), and you can move those Files from there to any folder of your choice.

</details>


# Create post

Creating posts ara super easy. Apart from text your posts can contain images, files and polls. To create a post follow these steps

{% stepper %}
{% step %}
Navigate to `Posts` in the main menu.&#x20;
{% endstep %}

{% step %}
Type your message in the input field at the top of the page.

<figure><img src="/files/aVoJzc7K13KH9QGy4D5z" alt=""><figcaption><p>Create post</p></figcaption></figure>
{% endstep %}

{% step %}
To add an image, file, or poll to your post, simply use the buttons below the input field.
{% endstep %}

{% step %}
Finally click the `Send` button to share your post with your team.
{% endstep %}
{% endstepper %}

{% hint style="info" %}
Want to include a poll in your post? [Learn more about creating a poll in this article](/using-hippoly/polls/create-poll).
{% endhint %}


# Edit post

Sometimes you need to make updates to your post. Its super easy, just follow these steps

{% hint style="info" %}
**Note:** When you edit an existing post, no new notifications will be sent to your team.
{% endhint %}

{% stepper %}
{% step %}
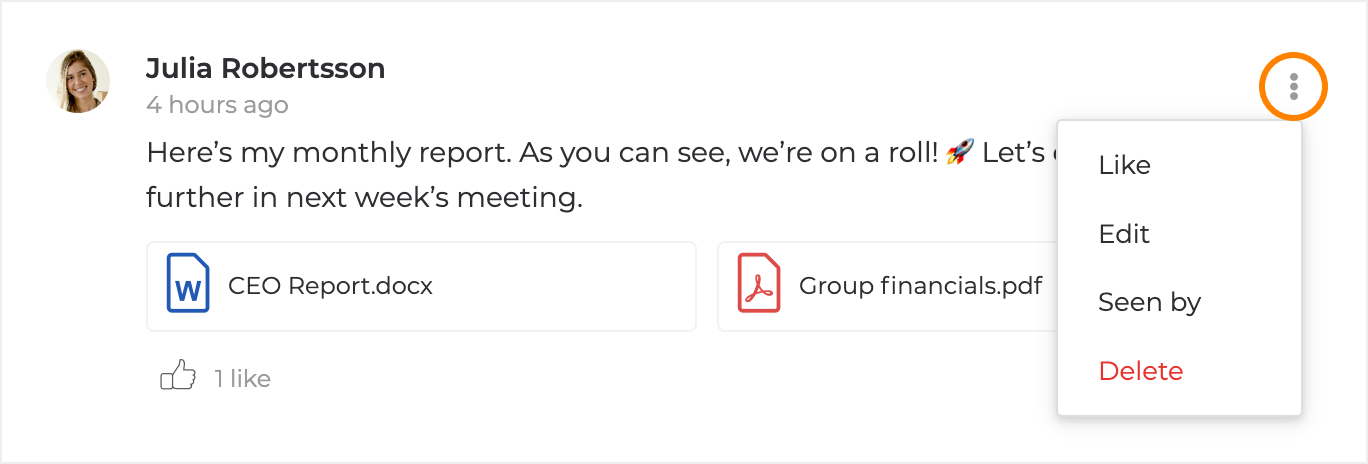
Go to your post and click the `Menu-icon` at the top right corner of the post.&#x20;
{% endstep %}

{% step %}
Select the `Edit` menu option.

<figure><img src="/files/bP0J281Rthf8Y2TwJihX" alt=""><figcaption></figcaption></figure>
{% endstep %}

{% step %}
Make your edits and click the `Update` button to save your changes.
{% endstep %}
{% endstepper %}


# Delete post

{% hint style="info" %}
Note that you can only delete posts that you have created. However, workspace administrators can delete any post.
{% endhint %}

{% hint style="warning" %}
Note that deleting a post does not remove any comments made by users on that post.
{% endhint %}

If you want to delete a post follow these steps

{% stepper %}
{% step %}
Go to your post and click the `Menu-icon` at the top right corner of the post.&#x20;
{% endstep %}

{% step %}
Select the `Delete` menu option.

<figure><img src="/files/bP0J281Rthf8Y2TwJihX" alt=""><figcaption></figcaption></figure>
{% endstep %}

{% step %}
A confirmation dialog will appear. Click **`Delete`** to confirm the deletion.

{% endstep %}
{% endstepper %}


# Pin post

Pinning a post keeps it at the top of the feed so it's always easy to find. Pinned posts are shown in a separate **Pinned posts** section above the latest posts, making them ideal for important announcements, guidelines, or updates that the whole team needs to see.

{% hint style="info" %}
Only **Workspace Owners** and **Workspace Admins** can pin and unpin posts.
{% endhint %}

## Pin a post

{% stepper %}
{% step %}
Go to the post you want to pin and click the `Menu icon` at the top right corner of the post.
{% endstep %}

{% step %}
Select `Pin to top`.
{% endstep %}

{% step %}
The post is moved to the **Pinned posts** section at the top of the feed and marked with a pin indicator. All workspace members will see the pinned post at the top of the feed immediately.
{% endstep %}
{% endstepper %}

You can pin more than one post. When multiple posts are pinned, they are shown in the order they were pinned, with the most recently pinned post first.

## Unpin a post

{% stepper %}
{% step %}
Go to the pinned post and click the `Menu icon` at the top right corner of the post.
{% endstep %}

{% step %}
Select `Unpin`.
{% endstep %}

{% step %}
The post is moved back to its original position in the feed and the pin indicator is removed.
{% endstep %}
{% endstepper %}


# View log

With the view log, you can easily see who has viewed and read posts and comments. It helps you stay informed about reach and ensures important updates aren’t missed.&#x20;

{% hint style="info" %}
**Note:** If a post or comment has attached files, the view log only shows who viewed the post or comment - not whether they opened the attached files. To see who has viewed a specific file, go to the [file’s view and download log](/using-hippoly/files-and-folders/view-and-download-log).
{% endhint %}

To open the view log for a post or comment follow these steps

{% stepper %}
{% step %}
Go to your post or comment and click the `Menu-icon` at the top right corner.&#x20;
{% endstep %}

{% step %}
Select the `Seen by` menu option.

<figure><img src="/files/bP0J281Rthf8Y2TwJihX" alt=""><figcaption></figcaption></figure>
{% endstep %}

{% step %}
A dialog will appear showing all users who have viewed the post or comment.
{% endstep %}
{% endstepper %}


# hi — Your personal assistant

hi is your personal AI assistant in Hippoly. It helps you write documents, prepare meetings, create tasks, summarize content, and more — directly inside your workspace.

## **Understand hi**

**hi** is Hippoly's built-in AI assistant, designed to help you work smarter with documents, meetings, and everyday workspace tasks. Think of **hi** as a knowledgeable colleague who is always available to help — whether you need to draft a document, summarize a meeting agenda, create action items, or get a quick answer.

**hi** is **context-aware**, meaning it adapts to where you are in Hippoly. Open **hi** from a document and it can help you edit, review, or improve the text. Open it from a meeting and it can summarize the agenda, suggest protocol items, or create tasks from decisions. You can also chat with **hi** from anywhere in the workspace for general assistance.

### What hi can help you with

* **Write and edit documents.** Ask **hi** to draft a new document, fix grammar, shorten text, translate, or check if anything is missing.
* **Prepare and follow up on meetings.** **hi** can suggest agenda items, help you write meeting minutes, and create action items from meeting decisions.
* **Read and summarize files.** Upload a file or point **hi** to a document in your workspace and get a quick summary or review.
* **Create workspace content.** Ask **hi** to create documents, action items, meetings, calendar events, or posts — **hi** will show you a preview before anything is created.
* **Search and find.** Ask **hi** to find a specific document, meeting, or action item in your workspace.
* **Answer questions.** Ask **hi** about your workspace content, governance best practices, or general questions.

### Privacy and security

**hi** is a secure assistant that does not share any information outside of Hippoly. Information shared with **hi** is used solely to process and respond to your specific query. Your conversations with **hi** are private — only you can see them.

{% hint style="info" %}
Your workspace administrator controls whether **hi** is available and whether it can access workspace content such as documents, files, and meetings. See [Enable and configure hi](/using-hippoly/hi-your-assistant/enable-hi) for details.
{% endhint %}

## hi FAQ

<details>

<summary>Where can I find hi?</summary>

**hi** appears in the **Team members** section in the left sidebar. Click on **hi** to open a conversation. You can also access **hi** from the document editor, from meetings, and from the file preview. See [Use hi](/using-hippoly/hi-your-assistant/use-hi) for details.

</details>

<details>

<summary>Can hi access my documents and files?</summary>

Only if your workspace administrator has enabled workspace content access. When content access is turned off, **hi** can still answer general questions but cannot read or reference your workspace content. See [Enable and configure hi](/using-hippoly/hi-your-assistant/enable-hi).

</details>

<details>

<summary>Will hi create or change things without asking me first?</summary>

No. Whenever **hi** is about to create or modify something — such as a document, meeting, or action item — it shows you a preview and asks for your confirmation before proceeding.

</details>

<details>

<summary>Can other people see my conversations with hi?</summary>

No. Your conversations with **hi** are private and only visible to you.

</details>

<details>

<summary>Is hi available in all workspaces?</summary>

**hi** is available on plans that include the Hippoly Intelligence feature. Your workspace administrator can enable or disable **hi** in the workspace settings.
</details>


# Use hi

**hi** is available from several places in Hippoly. Where you open **hi** determines the context it starts with — this helps **hi** give you more relevant assistance right away.

## Open hi from the sidebar

Click on **hi** in the **Team members** section of the left sidebar. A conversation panel opens on the right side of the screen. This is the general-purpose mode — **hi** has access to your full workspace and can help you with anything.

## Open hi from a document

When you have a document open, you can access **hi** from the editor. **hi** automatically knows which document you're working on and can help you edit, review, summarize, or improve the content.

See [hi in documents](/using-hippoly/hi-your-assistant/hi-in-documents) for more details.

## Open hi from a meeting

In the meeting panel, you can open **hi** from the tools section. **hi** automatically knows which meeting you're working on and can help you with the agenda, minutes, and follow-up tasks.

See [hi in meetings](/using-hippoly/hi-your-assistant/hi-in-meetings) for more details.

## Open hi from a file

When previewing a file, you can ask **hi** to read and summarize it. **hi** will ask for your permission before accessing the file content.

See [hi in files](/using-hippoly/hi-your-assistant/hi-in-files) for more details.

## Start a conversation

When you open **hi**, you'll see a welcome screen with suggested prompts based on the current context. You can click one of the suggestions or type your own message in the input field.

**Example prompts from the workspace:**

* "What can you help me with?"
* "I want to create actions for the team"
* "Help me book a meeting"
* "I want to create a new policy"

## Confirmation before changes

Whenever **hi** is about to create or modify something in your workspace — such as a document, action item, meeting, or calendar event — it shows you a preview card with the details and asks you to confirm before proceeding. You can review, cancel, or confirm each action.

## Start a new conversation

Click the **New chat** button at the top of the **hi** panel to start a fresh conversation. Previous conversations are not carried over — each new chat starts from scratch.

{% hint style="info" %}
**hi** is an AI assistant and can make mistakes. Always review important information and confirm that created content is correct.
{% endhint %}


# What hi can do

**hi** is a versatile assistant that can help you across many areas of your workspace. This article gives a complete overview of **hi**'s capabilities.

## Create content

**hi** can create new items in your workspace. It always shows a preview and asks for your confirmation before creating anything.

| What hi can create           | Example prompt                                                      |
| ---------------------------- | ------------------------------------------------------------------- |
| **Documents**                | "Create a new board resolution about the dividend proposal"         |
| **Documents from templates** | "Create a document from the annual report template"                 |
| **Action items**             | "Create a task for Johan to update the financial report by Friday"  |
| **Personal tasks**           | "Add a personal reminder to review the contract before the meeting" |
| **Meetings**                 | "Book a board meeting for next Thursday at 10:00"                   |
| **Calendar events**          | "Add a calendar event for the company retreat on June 12"           |
| **Posts**                    | "Post an update about the new office policy"                        |
| **Agenda items**             | "Add a discussion point about the recruitment plan to the meeting"  |
| **Protocol items**           | "Add a decision item to the minutes about the approved budget"      |

## Read and summarize

**hi** can access and summarize workspace content when content access is enabled by your workspace administrator.

* **Documents** — summarize, extract key points, review for completeness or clarity.
* **Meeting agendas and minutes** — summarize discussion points, list decisions.
* **Files** — read and summarize uploaded files (PDFs, Word documents, etc.).
* **Posts** — find and summarize recent workspace discussions.

## Edit and improve text

**hi** can work directly with document content in the Hippoly Docs editor:

* Fix grammar and spelling
* Make text shorter or more concise
* Change the tone (formal or casual)
* Improve clarity
* Translate to another language
* Continue writing from where you left off

## Search and find

Ask **hi** to find specific content in your workspace:

* "Find the latest board meeting"
* "Show me the document about the dividend policy"
* "What actions are assigned to me?"
* "List all upcoming meetings"

**hi** returns reference cards that let you navigate directly to the item in Hippoly.

## Answer questions

**hi** can answer questions about your workspace content and provide general advice:

* "What was decided at the last board meeting?"
* "What are best practices for writing meeting minutes?"
* "Who is responsible for the budget report?"


# hi in documents

When you're working in the Hippoly Docs editor, **hi** can help you write, edit, and improve your document content. There are two ways to use AI assistance in documents: the **quick actions menu** for fast text edits and the **full hi chat** for more complex tasks.

## Quick actions

When you select text in the document editor, a menu appears with quick AI actions that are applied directly to the selected text:

* **Fix grammar** — corrects spelling and grammar errors in the selected text.
* **Make shorter** — rewrites the selected text to be more concise while keeping the meaning.
* **Translate** — translates the selected text into another language. Available languages include Swedish, English, German, French, Spanish, Finnish, Danish, and Norwegian.

These actions are applied directly in the document — no confirmation needed.

## Full hi chat from a document

You can also open a full conversation with **hi** while working on a document. When opened from the document context, **hi** knows which document you're working on and can help with more complex tasks.

**Example prompts:**

* "Summarize the document"
* "Check spelling and grammar"
* "Is anything missing or unclear?"
* "Make the tone more formal"
* "Help me write a conclusion"

**hi** can also **edit the document directly** — for example, if you ask **hi** to rewrite a section or add new content, the changes are applied live in the editor.

{% hint style="info" %}
Quick actions (fix grammar, shorten, translate) work on selected text. For broader changes, use the full **hi** chat to describe what you want.
{% endhint %}


# hi in meetings

**hi** can assist you throughout the meeting lifecycle — from preparing the agenda to writing minutes and creating follow-up tasks. When opened from a meeting, **hi** automatically knows which meeting you're working on.

## Prepare the agenda

Ask **hi** to help you build or improve the meeting agenda. **hi** can suggest agenda items based on a topic you describe, or help you refine existing items.

**Example prompts:**

* "Suggest agenda items for a quarterly board meeting"
* "Summarize the agenda"
* "Add a discussion point about the budget"

**hi** shows you a preview of the suggested agenda items and asks for your confirmation before adding them to the meeting.

## Write meeting minutes

After a meeting, ask **hi** to help you draft the meeting minutes. **hi** can create a protocol structure based on the agenda, or help you write specific sections.

**Example prompts:**

* "Help me write the protocol"
* "Create minutes based on the agenda"
* "Add a decision item about the recruitment plan"

## Create follow-up tasks

If decisions were made during the meeting, ask **hi** to turn them into action items that can be assigned and tracked.

**Example prompts:**

* "Create tasks from the decisions"
* "Create an action for Maria to prepare the budget report by May 15"

**hi** shows you a preview of each action item before creating it.

{% hint style="info" %}
**hi** can read the meeting agenda and protocol to understand the context. If your workspace administrator has disabled content access, **hi** can still help with general meeting questions but won't be able to reference the specific meeting content.
{% endhint %}


# hi in files

**hi** can read and summarize uploaded files in your workspace. This is useful when you need a quick overview of a long document or want to ask specific questions about its content.

## Read and summarize a file

{% stepper %}
{% step %}
Open the file preview by clicking on a file in the folder view.
{% endstep %}

{% step %}
Click the option to let **hi** read the file. **hi** will ask for your permission before accessing the file content.
{% endstep %}

{% step %}
Once **hi** has read the file, you can ask questions or request a summary.
{% endstep %}
{% endstepper %}

**Example prompts:**

* "Read and summarize this file"
* "What are the key points?"
* "Make a compliance review"
* "Make a GDPR review"

{% hint style="info" %}
**hi** can read text-based file formats. For files that cannot be read as text (such as images or scanned PDFs without OCR), **hi** may not be able to extract the content.
{% endhint %}

{% hint style="info" %}
File access requires that your workspace administrator has enabled workspace content access for **hi**. If content access is turned off, you'll see a message letting you know. See [Enable and configure hi](/using-hippoly/hi-your-assistant/enable-hi).
{% endhint %}


# Enable and configure hi

Workspace administrators can control whether **hi** is available in the workspace and whether it can access workspace content. These settings are found in the workspace administration panel.

{% hint style="info" %}
**hi** is available on plans that include the Hippoly Intelligence feature. If you don't see the settings described below, your current plan may not include **hi**.
{% endhint %}

## Enable Hippoly Intelligence

{% stepper %}
{% step %}
Go to **Workspace Settings**.
{% endstep %}

{% step %}
Find the **Hippoly Intelligence** section.
{% endstep %}

{% step %}
Turn on `Enable Hippoly Intelligence`. When enabled, **hi** becomes available to all workspace members in the team panel and across the workspace.
{% endstep %}
{% endstepper %}

## Allow workspace content access

By default, **hi** can answer general questions but cannot read or reference documents, files, or meetings in your workspace. To let **hi** access workspace content:

{% stepper %}
{% step %}
In the **Hippoly Intelligence** section of workspace settings, turn on `Allow workspace content access`.
{% endstep %}

{% step %}
When enabled, **hi** can use workspace content such as documents, files, and meetings to answer questions and perform tasks. This allows **hi** to summarize documents, help with meeting preparation, and create content based on existing workspace data.
{% endstep %}
{% endstepper %}

{% hint style="info" %}
Hippoly Intelligence is a secure assistant that does not share any information outside of Hippoly. Information shared with **hi** is used solely to process and respond to the user's specific query.
{% endhint %}

## What each setting controls

| Setting                            | Off                                                                            | On                                                                                      |
| ---------------------------------- | ------------------------------------------------------------------------------ | --------------------------------------------------------------------------------------- |
| **Enable Hippoly Intelligence**    | hi is hidden from the workspace. No one can use it.                            | hi is available in the team panel and across the workspace for all members.             |
| **Allow workspace content access** | hi can answer general questions but cannot read documents, files, or meetings. | hi can read and reference workspace content to give more relevant and specific answers. |


# Polls

Polls let you quickly gather input or make decisions by adding a simple vote to a post. It’s an easy way to involve your team and get instant feedback—directly within the conversation.

## Understand Polls

Polls in Hippoly are created as attachments to [posts](/using-hippoly/posts), making them part of the broader context and conversation. Once a poll is published, it’s visible to everyone in the workspace, and all members can cast their vote.

Polls are versatile and can be used for everything from finding a suitable meeting time to gathering input for more critical decisions. You can choose between single-option polls - where users select one answer - or multiple-option polls that allow participants to vote for several alternatives.

This makes polls a flexible and efficient way to engage your team and support informed decision-making.

<figure><img src="/files/WmSInqL2sd4q6kSEyHoM" alt=""><figcaption></figcaption></figure>

## Polls FAQ

<details>

<summary>Can I attach files to a poll? </summary>

No, it is currently not possible to attach files to a poll or to individual poll options.

</details>

<details>

<summary>How do I see who voted for what?</summary>

To see exactly who voted for what,  you need to open the [results overview dialog](/using-hippoly/polls/view-poll-result).

</details>


# Create poll

To create a poll follow these steps

{% stepper %}
{% step %}
Navigate to `Posts` in the main menu.&#x20;
{% endstep %}

{% step %}
Click the `Create poll`  button below the post input field.

<figure><img src="/files/wtSciT2cQdseNBOgrNkj" alt=""><figcaption></figcaption></figure>
{% endstep %}

{% step %}
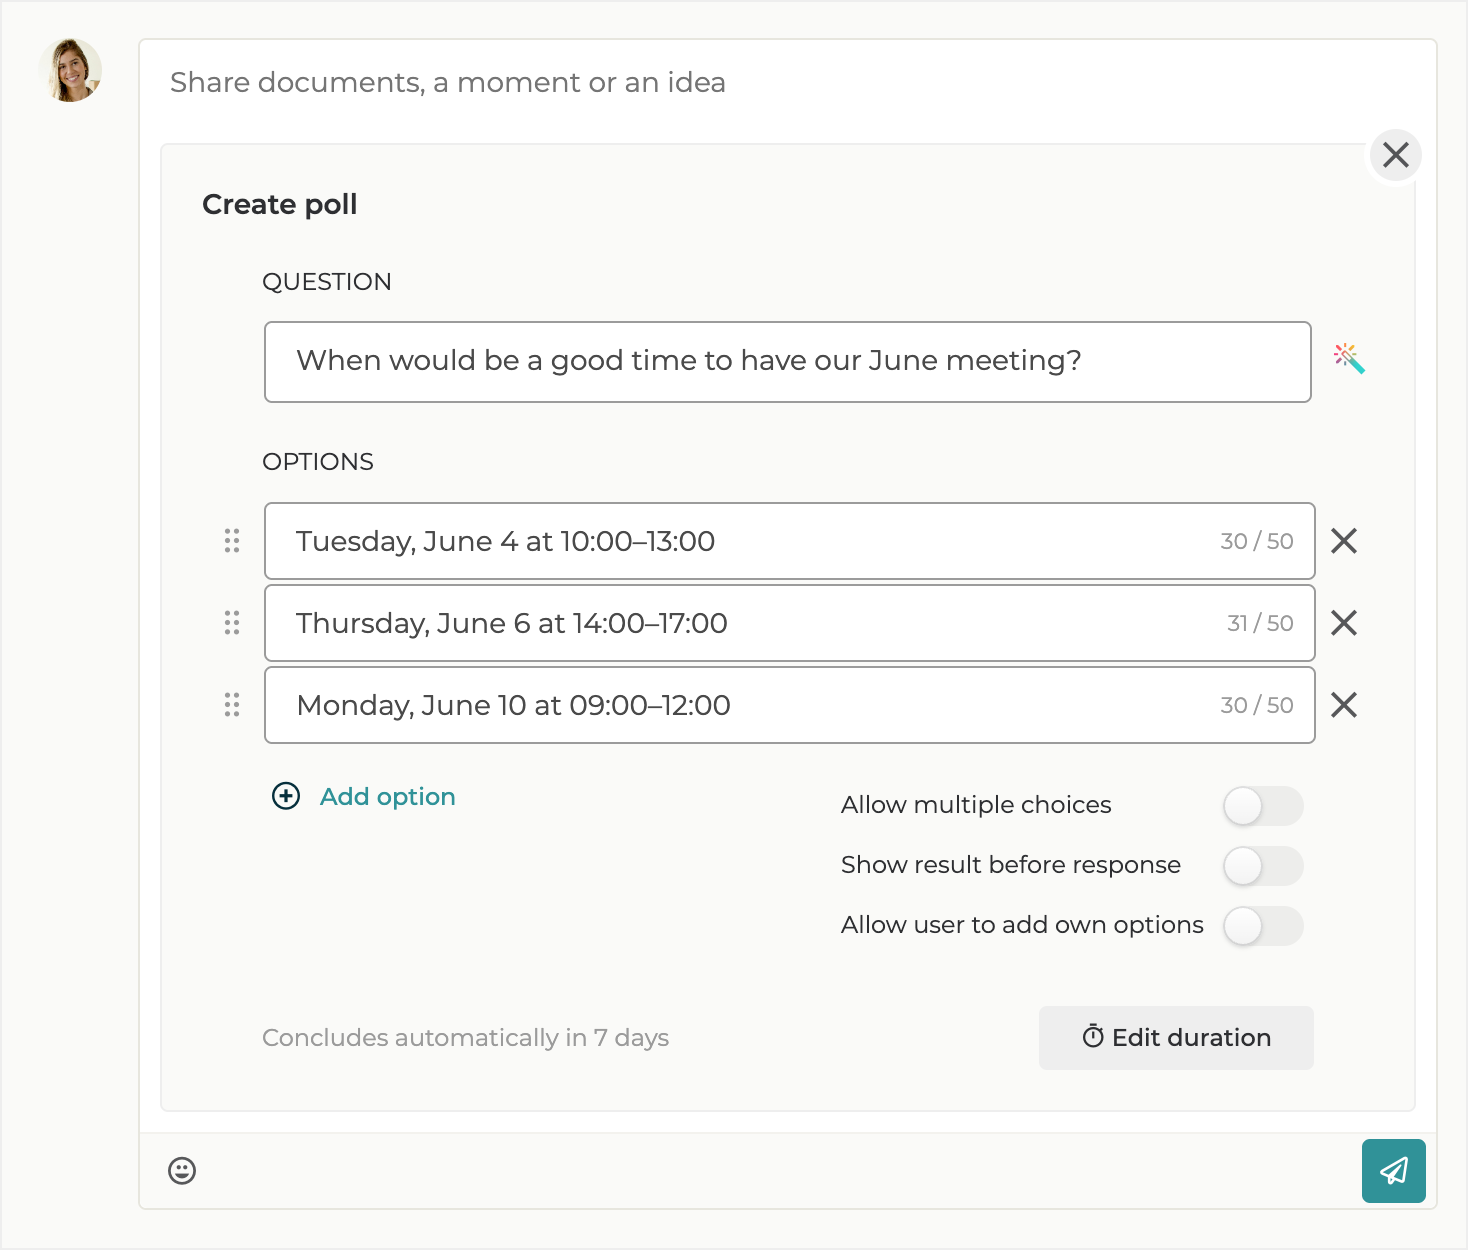
The create poll dialog will appear. Enter your question and add the answer options you'd like your team members to choose from.

<figure><img src="/files/OhnE60UGytvC7Il3IntM" alt=""><figcaption><p>Create poll</p></figcaption></figure>

There are a few settings you can configure for your poll:

* **Allow multiple choices:** If enabled, team members can select more than one answer option.
* **Show results before response:** If enabled, team members can see the results before submitting their own answer. If disabled, results will only be visible *after* each team member has submitted their vote.
* **Allow users to add their own options:** If enabled, team members can add new answer options to the poll. These options become visible to everyone and can be voted on by all users.
* **Edit duration:** By default, a poll remains open for 7 days. After that, voting is automatically closed and no further responses can be submitted. To change this, click the `Edit duration` button and set a timeframe that suits your needs.   &#x20;
  {% endstep %}

{% step %}
When you're happy with your poll, share it with your team by clicking the `Send post` button. All team members will be notified and can immediately start voting.
{% endstep %}
{% endstepper %}


# Edit poll

There are limited options for editing a poll after it has been posted.\
You cannot change the poll question or the answer options once it’s published. To make such changes, you’ll need to [delete the poll](/using-hippoly/polls/delete-poll) and create a new one.

However, you can still edit the post where the poll is attached, and you can also conclude the poll early - before the original set duration has ended.

To make any of these changes, follow these steps

{% stepper %}
{% step %}
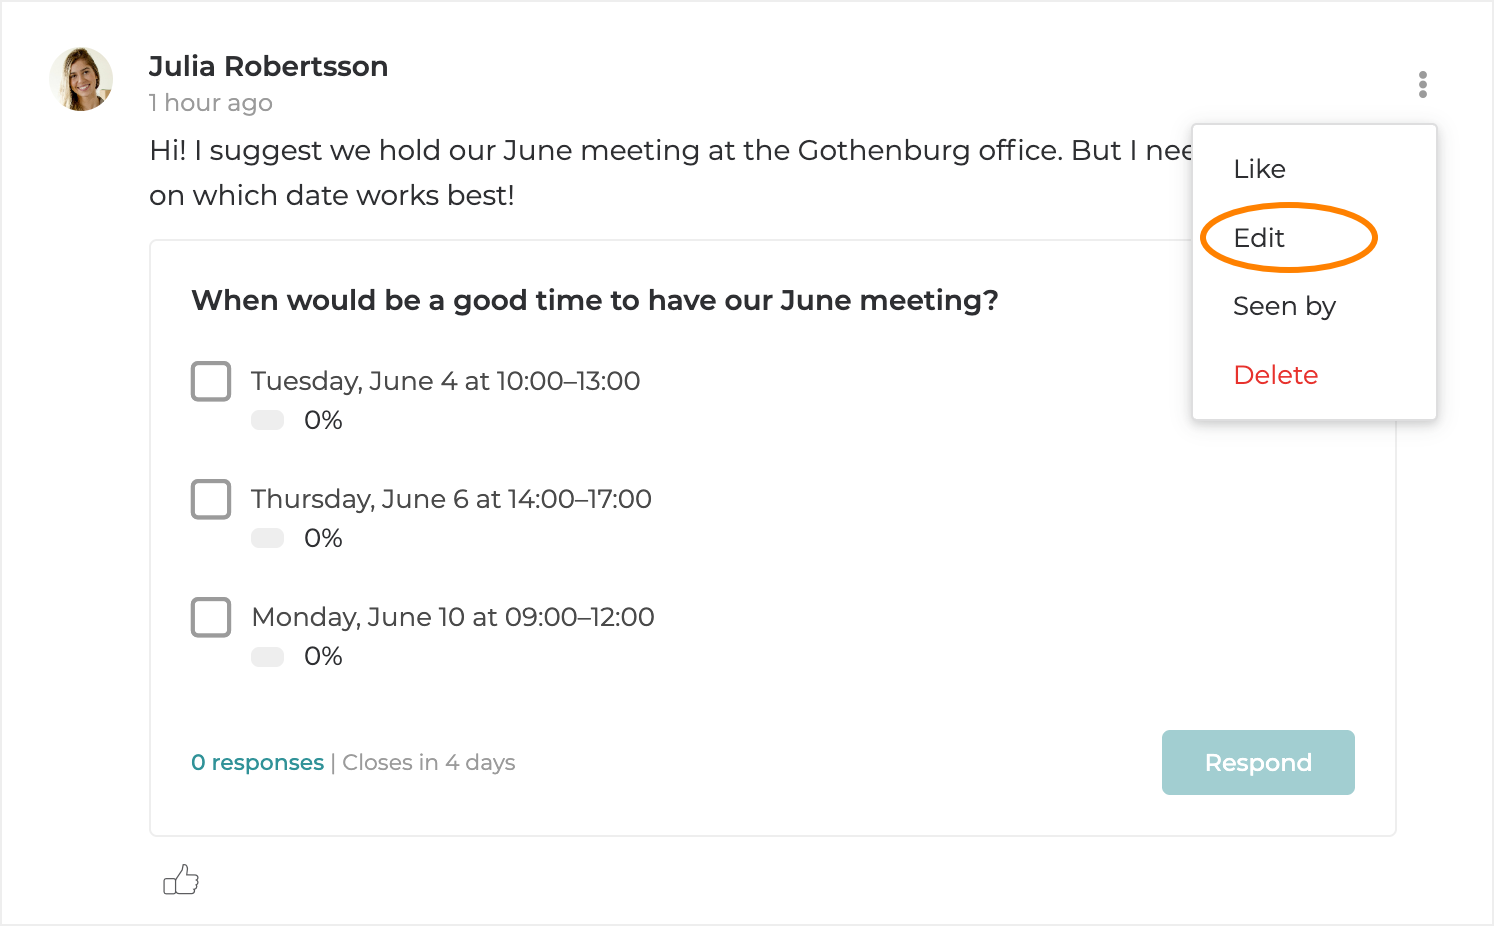
Go to your post and click the `Menu-icon` at the top right corner of the post.&#x20;
{% endstep %}

{% step %}
Select the `Edit`  menu option.&#x20;

<figure><img src="/files/XQQltuwaNpUo9k9jh9Ty" alt=""><figcaption><p>Edit post with poll</p></figcaption></figure>
{% endstep %}

{% step %}
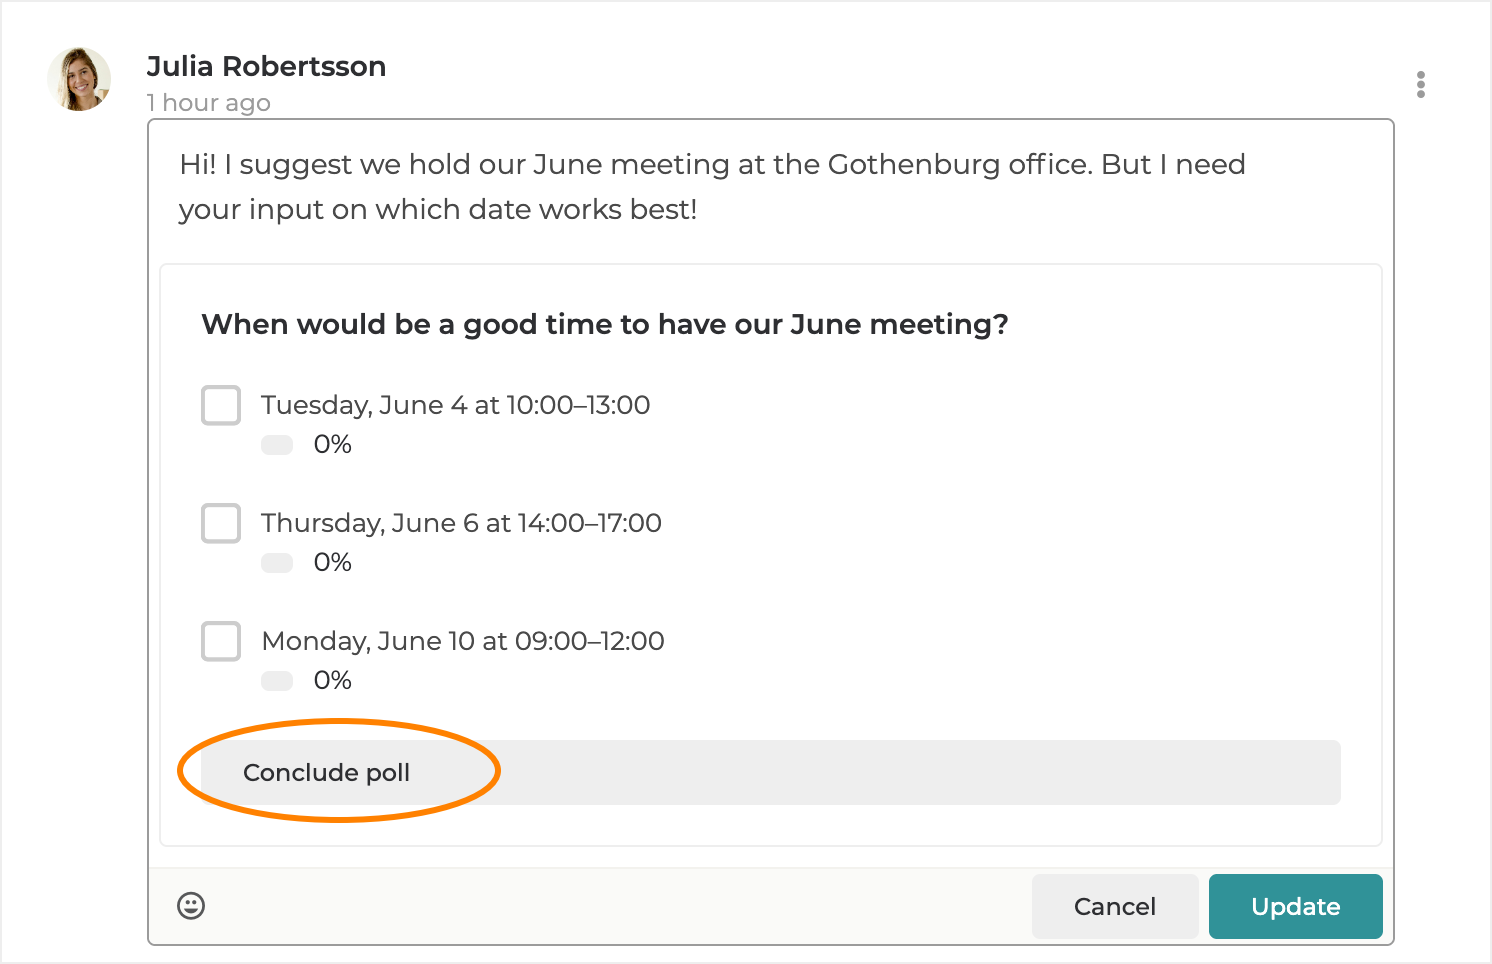
Now you can make changes to the post text or close the poll early by clicking the `Conclude poll` button.

<figure><img src="/files/PcuzTgF6kRcmsjMVrBdD" alt=""><figcaption><p>Post with poll edit mode</p></figcaption></figure>
{% endstep %}

{% step %}
Finally, click the `Update` button to save and publish your changes.&#x20;
{% endstep %}
{% endstepper %}


# Delete poll

To delete a poll, you need to delete the post it is attached to. To do, so follow these steps

{% stepper %}
{% step %}
Go to the post where the poll is attached and click the `Menu-icon` at the top right corner of the post.&#x20;
{% endstep %}

{% step %}
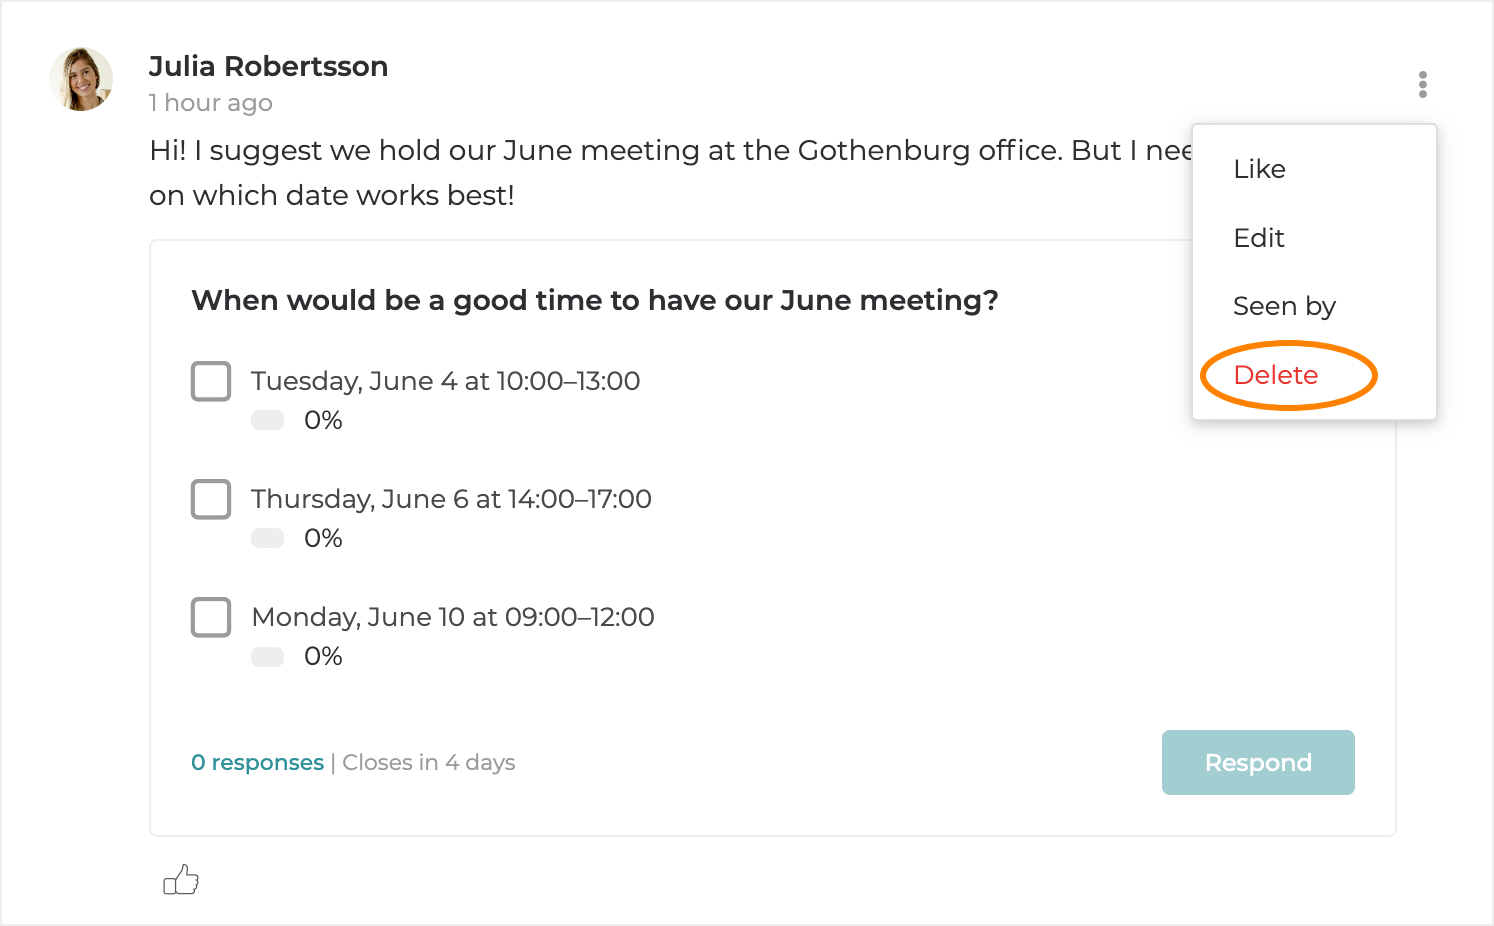
Click the `Delete` menu option.&#x20;

<figure><img src="/files/iN5Fppt6O7WTrqqxq762" alt=""><figcaption></figcaption></figure>
{% endstep %}

{% step %}
A confirmation dialog will appear. Click `Delete` to confirm the deletion.
{% endstep %}
{% endstepper %}


# Edit poll answer

If you need to update your submitted response to a poll, you can do so as long as the poll is still open and hasn't been concluded. To update your response, follow these steps

{% stepper %}
{% step %}
Go to the post where the poll is attached.
{% endstep %}

{% step %}
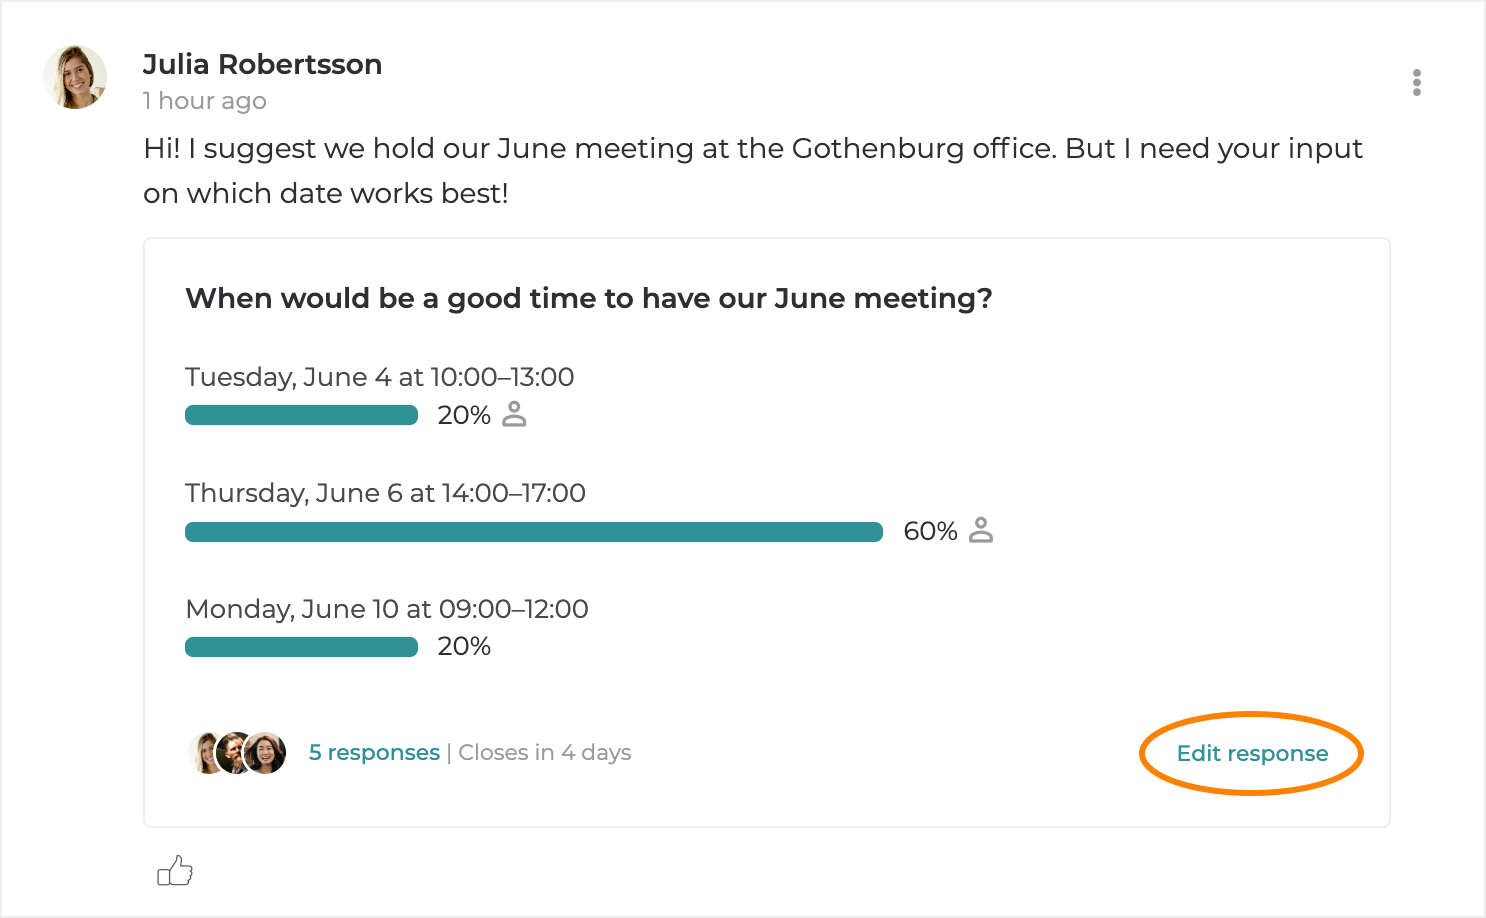
Click the `Edit response` button at the bottom right corner of the poll.&#x20;

<figure><img src="/files/zIK1kYtc4hdDaWh6QwK4" alt=""><figcaption><p>Edit poll reponse</p></figcaption></figure>
{% endstep %}

{% step %}
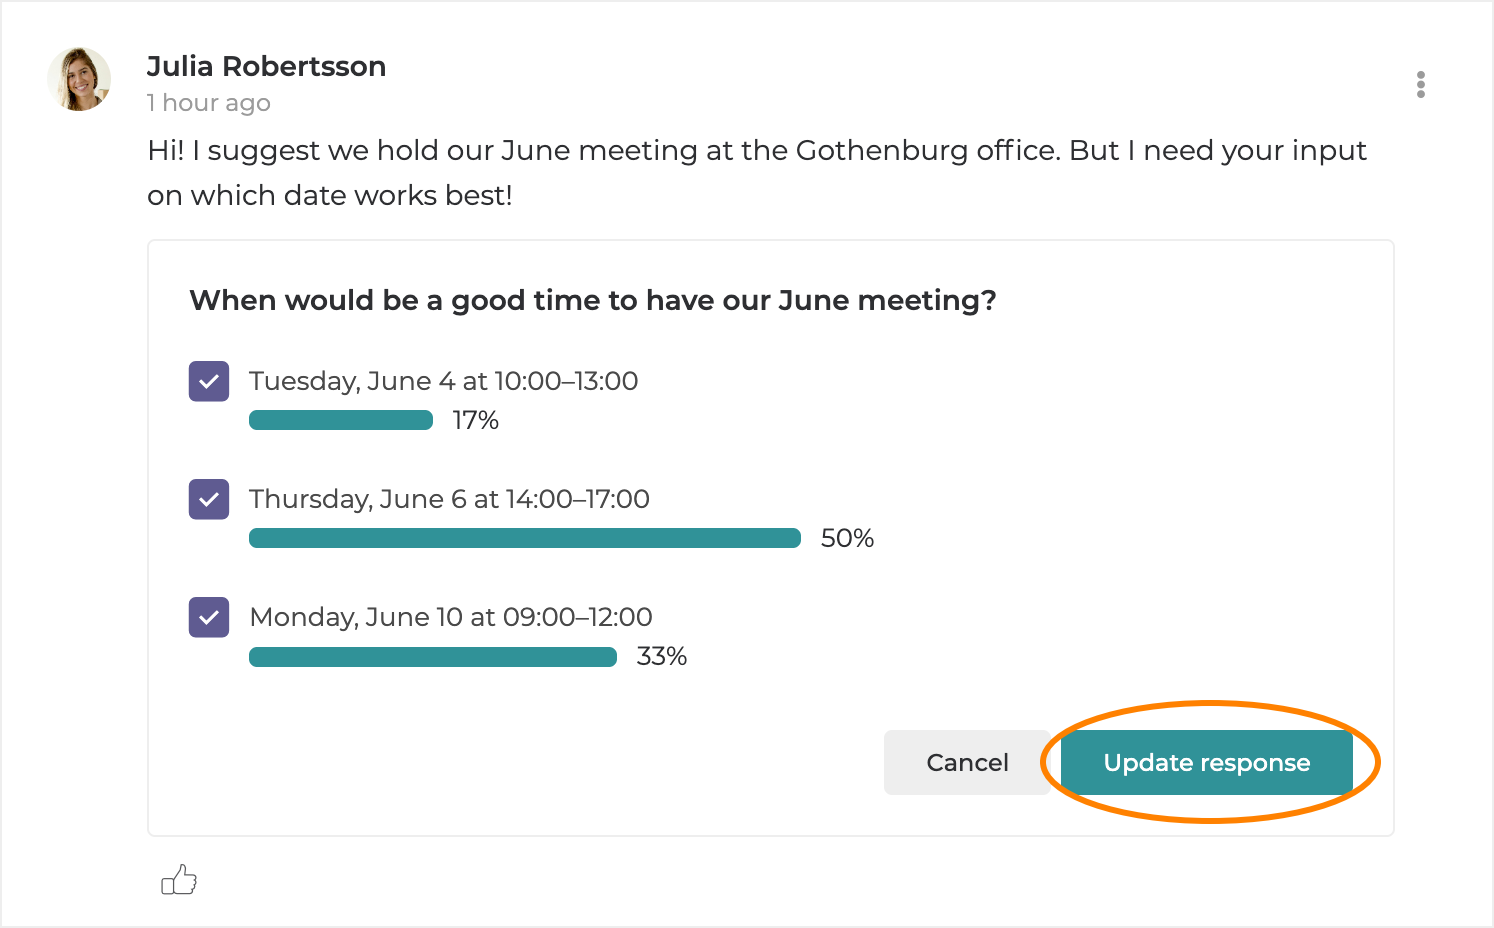
Make the changes you want to the answer options and click the `Update response` button to save your new vote.

<figure><img src="/files/JmZ8bv34wI0szmMrO2ie" alt=""><figcaption></figcaption></figure>
{% endstep %}
{% endstepper %}


# View poll result

A summary of the poll results is displayed for each poll directly in the posts feed. If you want to see more details - for example, who voted for what - you can open the full results overview. To do so, follow these steps

{% stepper %}
{% step %}
Go to the post where the poll is attached.
{% endstep %}

{% step %}
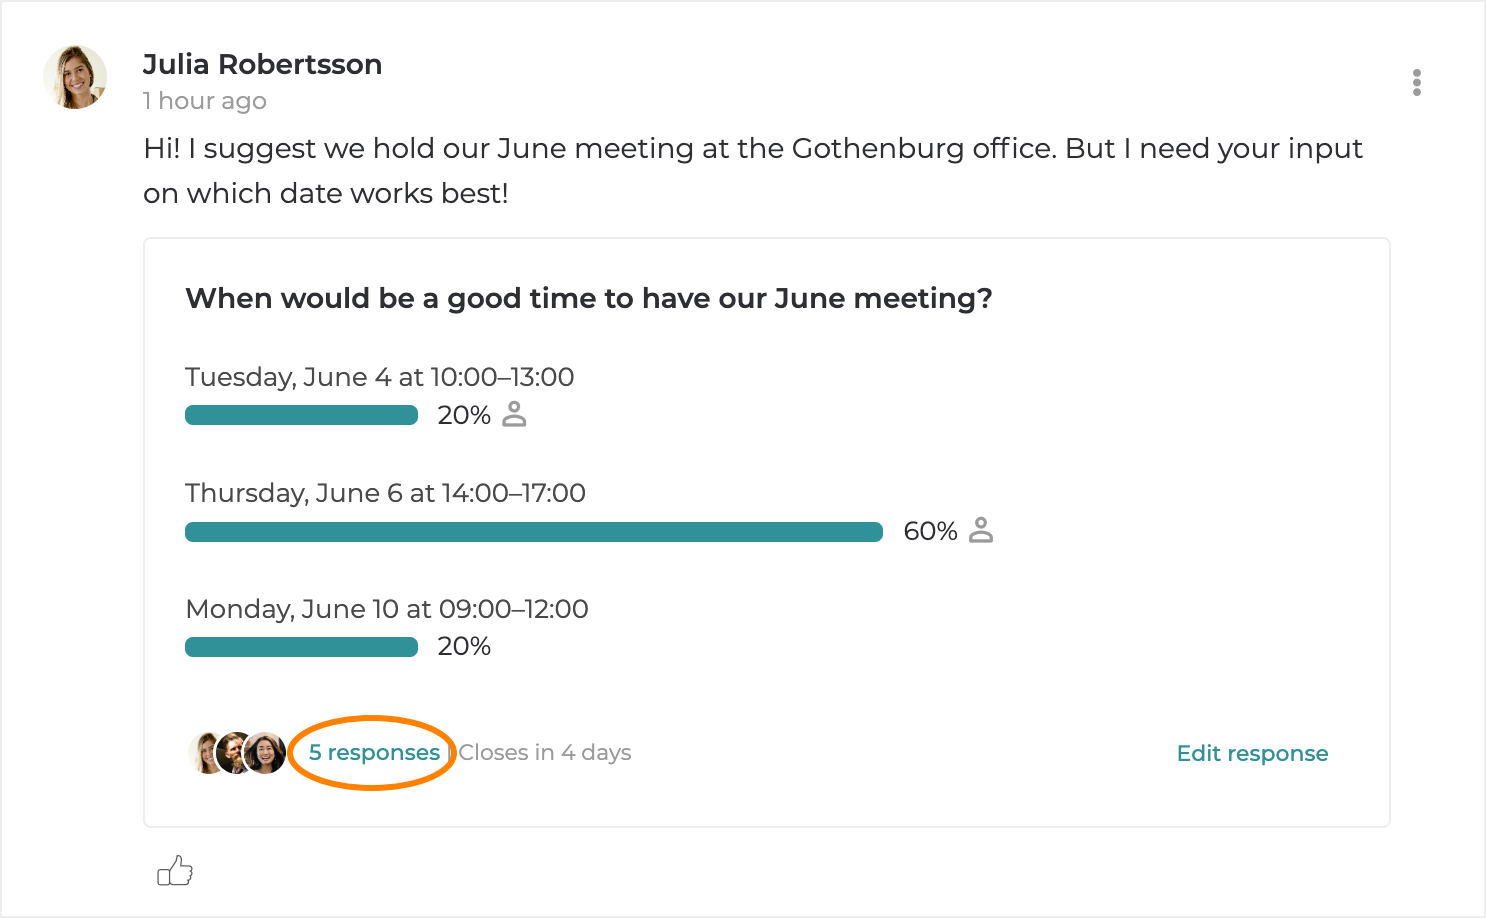
Click the `Responses` button at the bottom left corner of the poll.

<figure><img src="/files/3h4QrTqwLQetu961TaTk" alt=""><figcaption><p>View poll results</p></figcaption></figure>
{% endstep %}

{% step %}
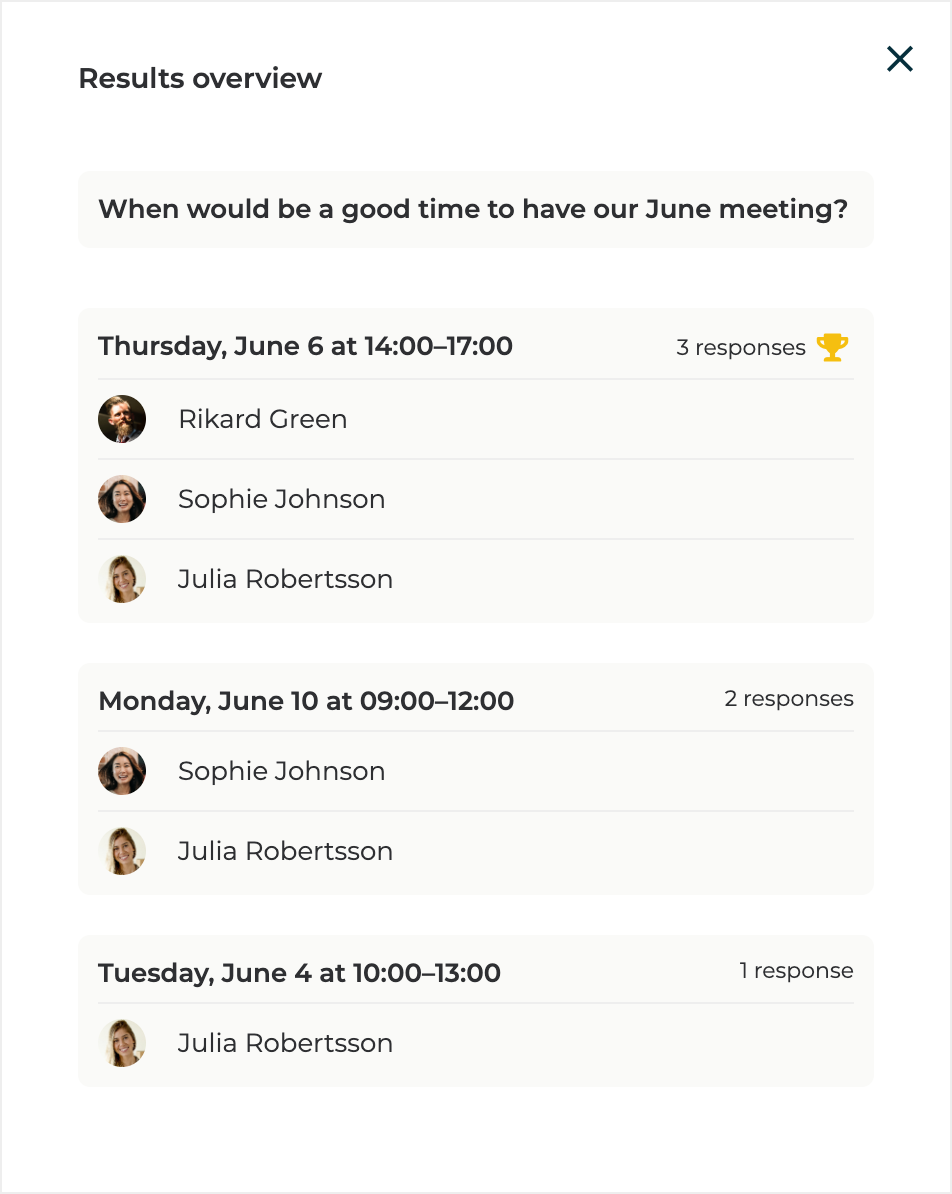
A dialog will appear showing the number of votes for each answer option, as well as who voted for what.

<figure><img src="/files/bNvTbKclTnpHbJm3aqyR" alt="" width="375"><figcaption><p>Poll results overview</p></figcaption></figure>
{% endstep %}
{% endstepper %}


# Direct messages

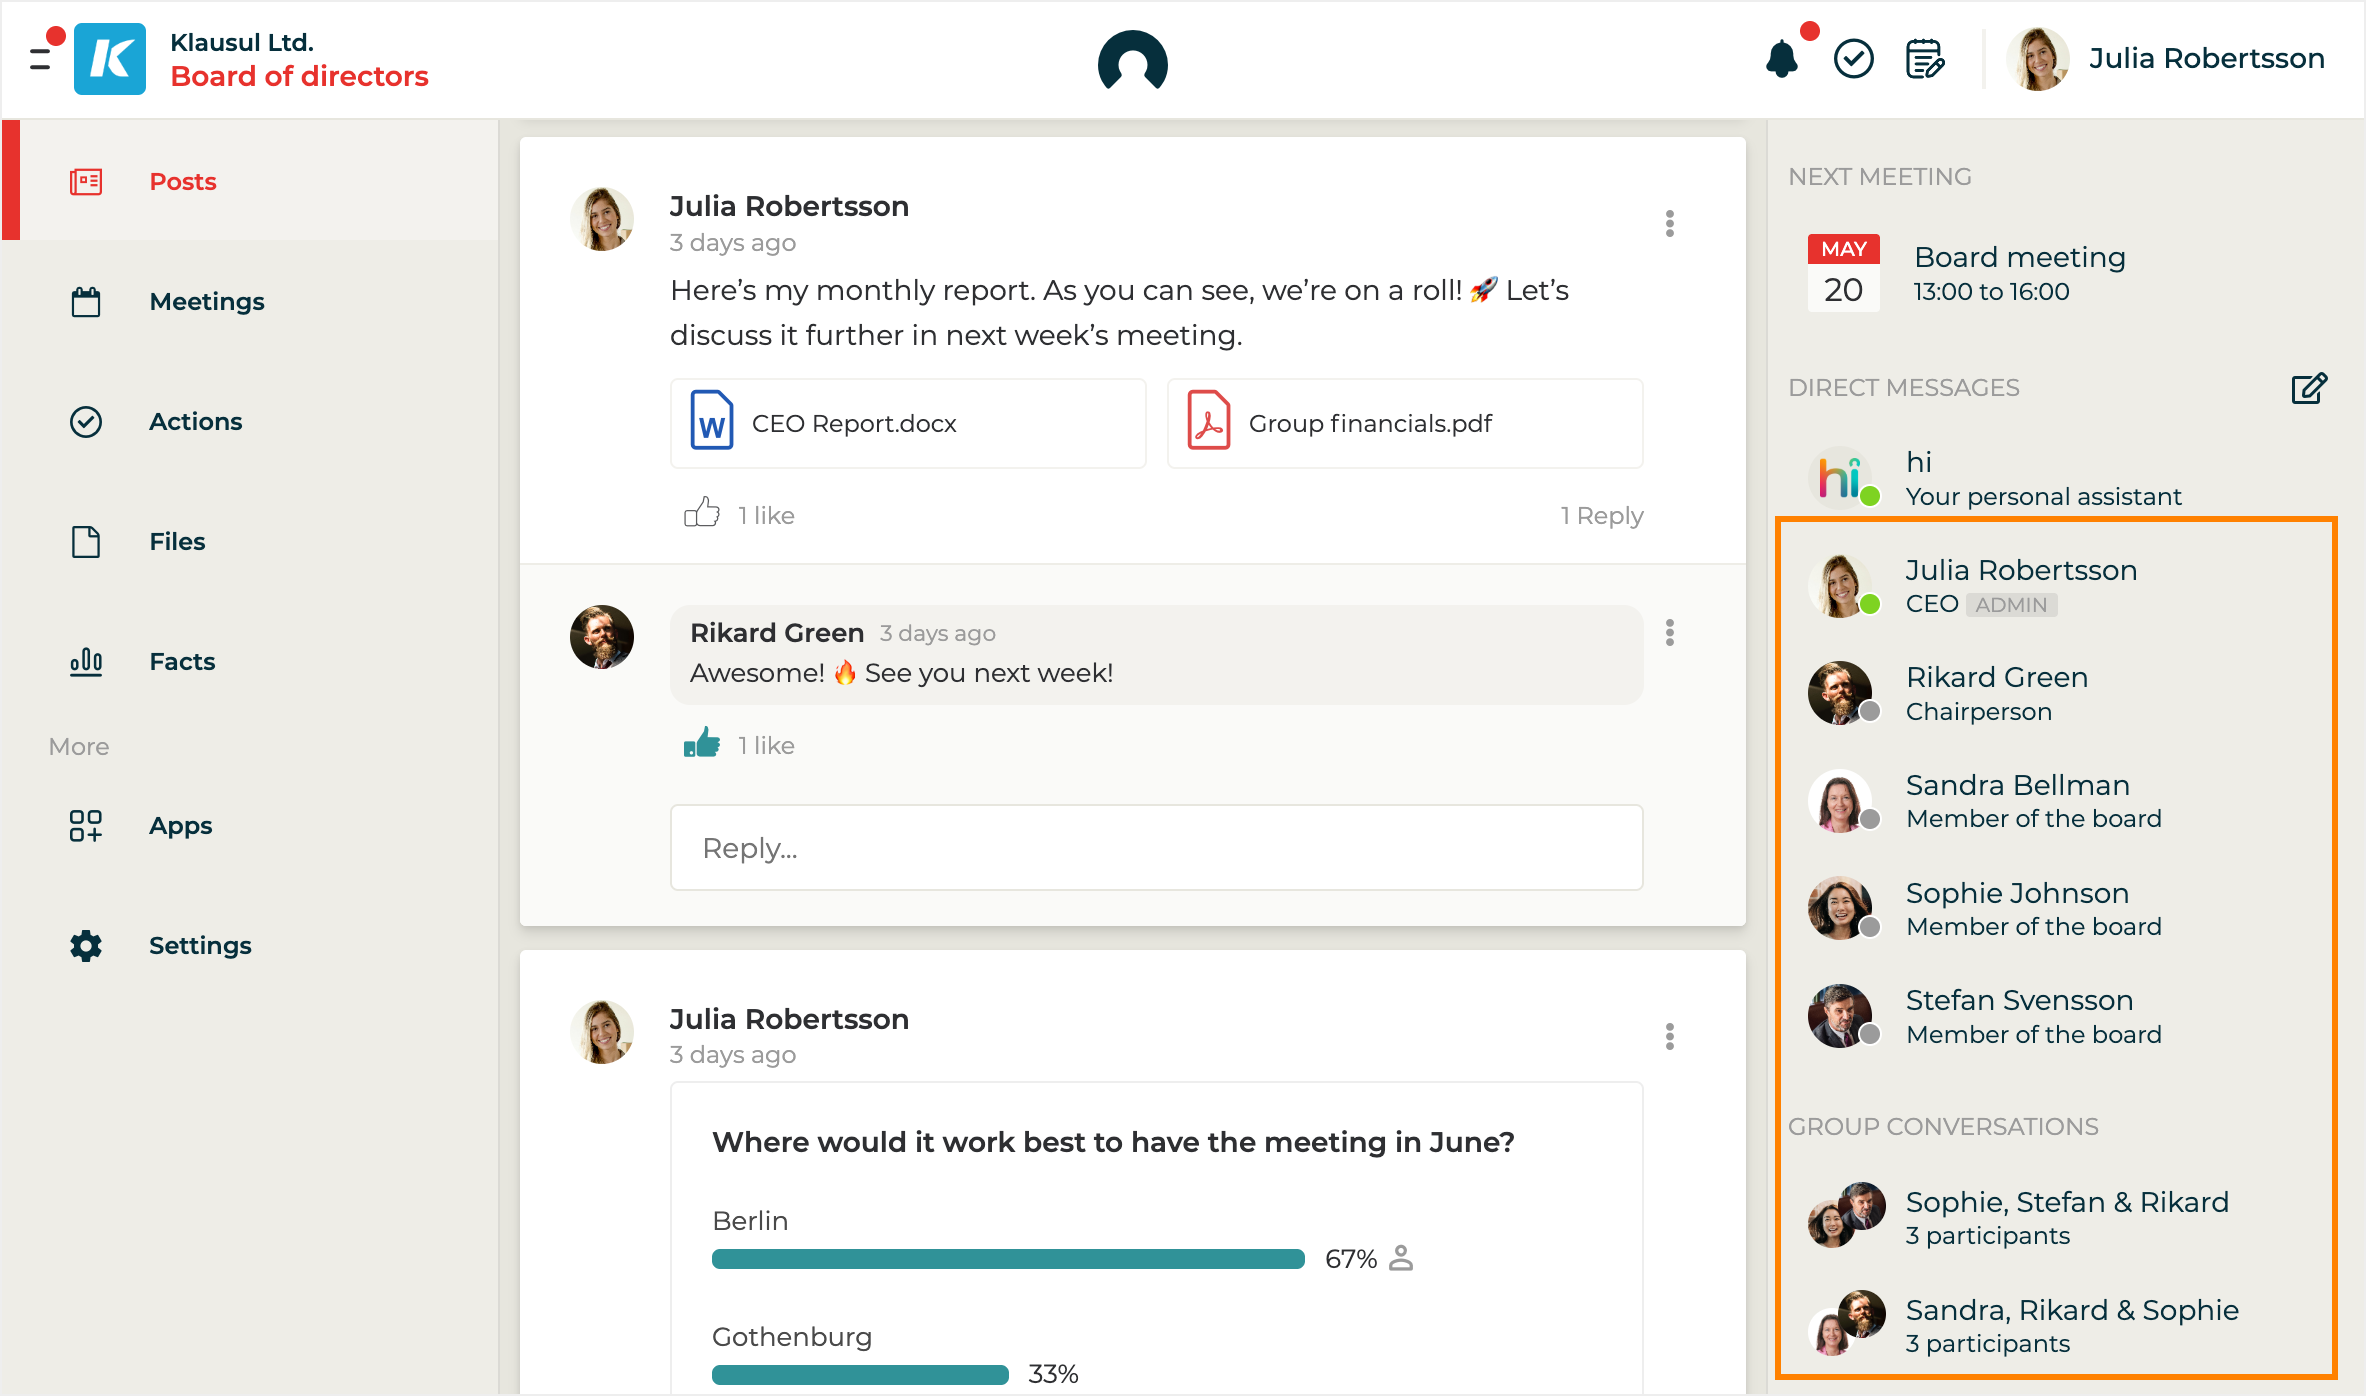
Direct Messages in Hippoly allow you to communicate and collaborate securely, one-to-one with individual team members or in groups - perfect when the whole team doesn't need to be involved.

## Understand Direct Messages

Direct Messages are a smarter alternative to emails and external chat tools for private conversations with individuals or small groups. Instead of scattered messages across different platforms, you can keep all communication secure, organised, and accessible directly within the Hippoly workspace.

You can [upload files and images directly in a Direct message conversation](/using-hippoly/direct-messages/files-in-direct-messages). Only the participants in that conversation can access the uploaded files, making it easy to collaborate in smaller groups without sharing content with the entire workspace.

**With the Hippoly mobile app** installed, you’ll always have access to your messages and receive push notifications so you never miss an important update.

**Use Direct Messages when you want to** communicate with a specific person or a smaller group. If you need to share something with your entire team it's better to use [Posts](/using-hippoly/posts).

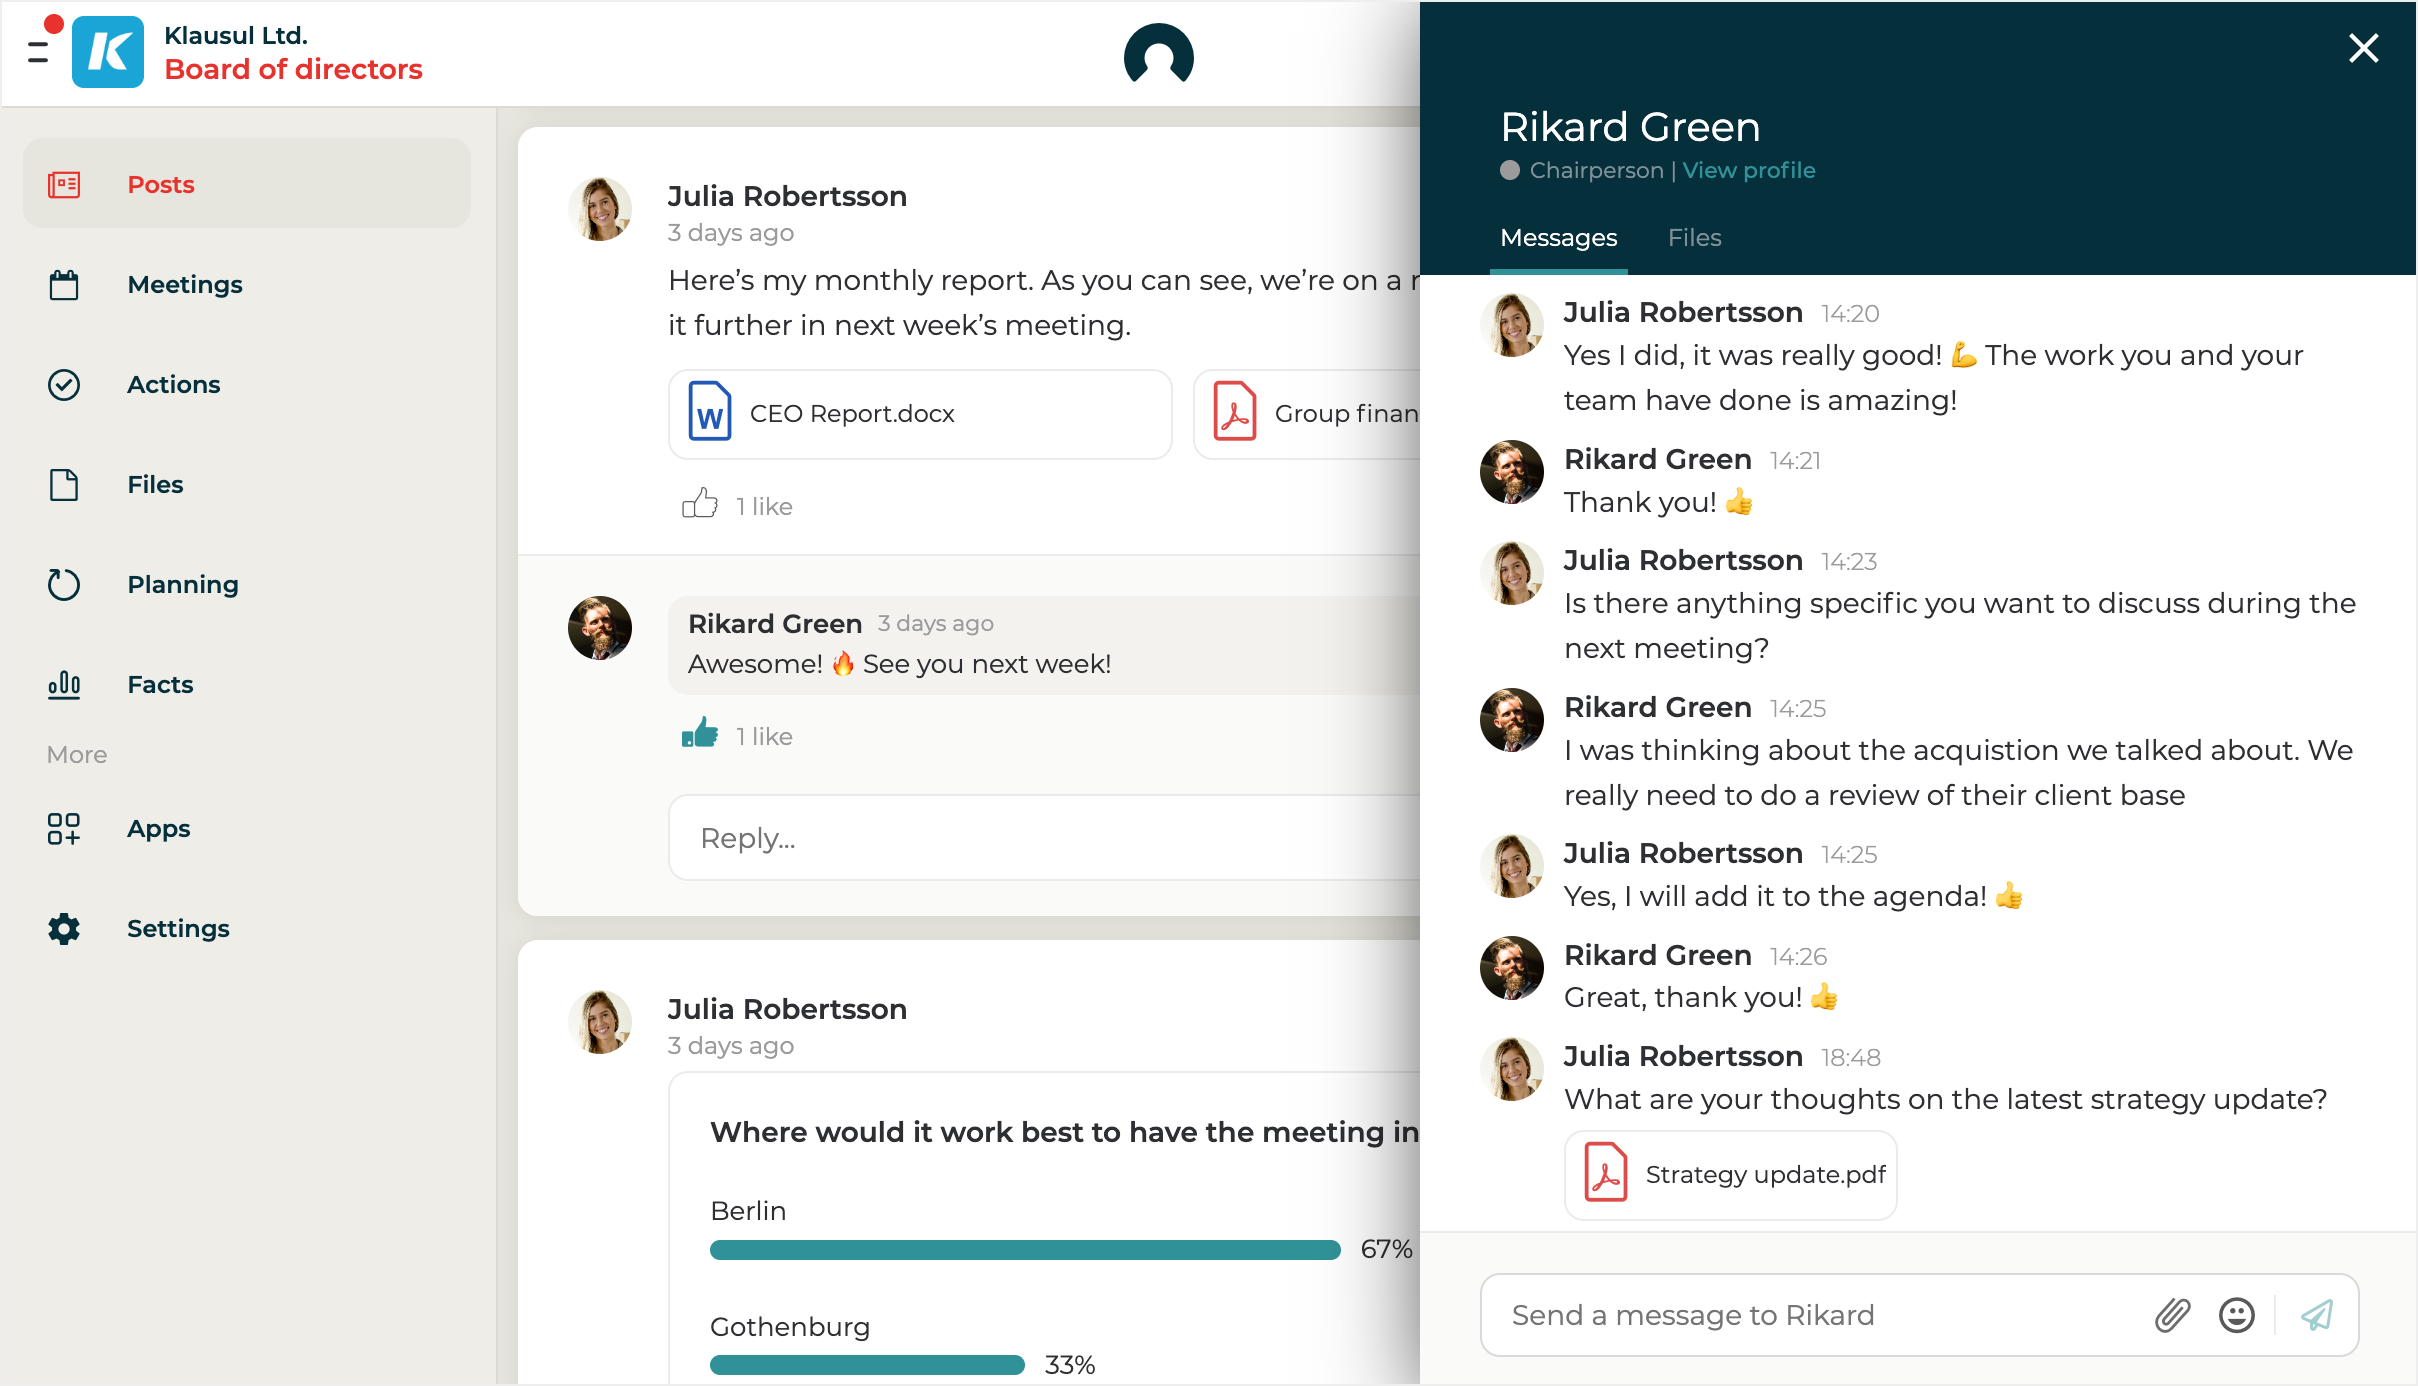
<figure><img src="/files/HmE7rnCNfbBHihIj8wXY" alt=""><figcaption><p>Direct messges in Hippoly</p></figcaption></figure>

## Direct Messages FAQ

<details>

<summary>Can I delete a direct message I sent by mistake?</summary>

**Yes.**

Move your cursor over the message and click the Trash-bin-icon.  [Learn more about deletion of direct messages.](/using-hippoly/direct-messages/delete-direct-message)

</details>

<details>

<summary>If I send a direct message, will the recipient be notified?</summary>

**Yes.**

The recipient will receive a notification in the app and, if they have the Hippoly mobile app installed, also via a push notification. If the recipient hasn’t read the message within 10 minutes, an email notification will be sent as well. [Learn more about notifications in Hippoly](/using-hippoly/notifications).&#x20;

</details>

<details>

<summary>Who can see files I upload to a Direct Message conversation?</summary>

Only the participants in that specific Direct message conversation can see the files you upload there.

The files are not visible to other users in the workspace unless you move them to a Shared folder.

</details>

<details>

<summary>Can I send direct messages cross my workspaces? </summary>

**No.**&#x20;

If you want to send a message to a user or a group in a specific workspace you need to navigate to that workspace first.&#x20;
</details>


# Send direct message

To send a direct message to another user in your workspace, follow these steps

{% tabs %}
{% tab title="Desktop" %}

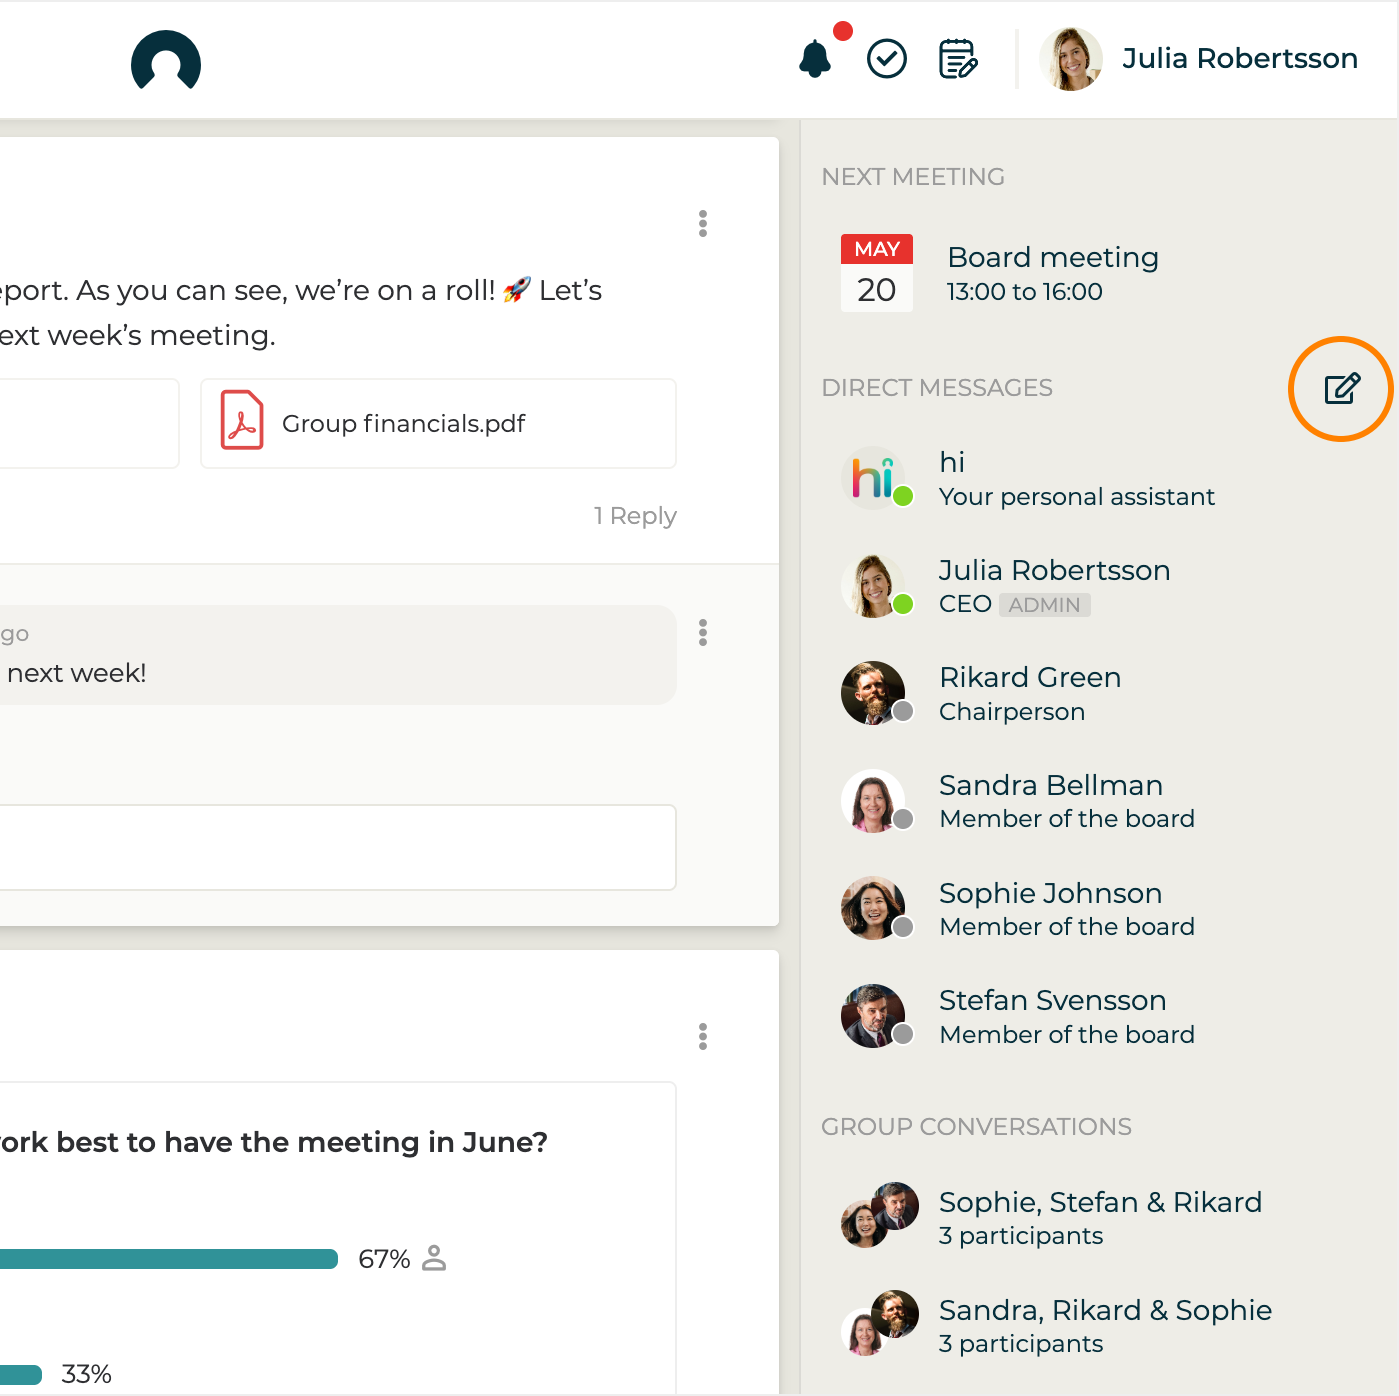
1. Click on the user or group you want to send a direct message to in team member panel to the right.&#x20;

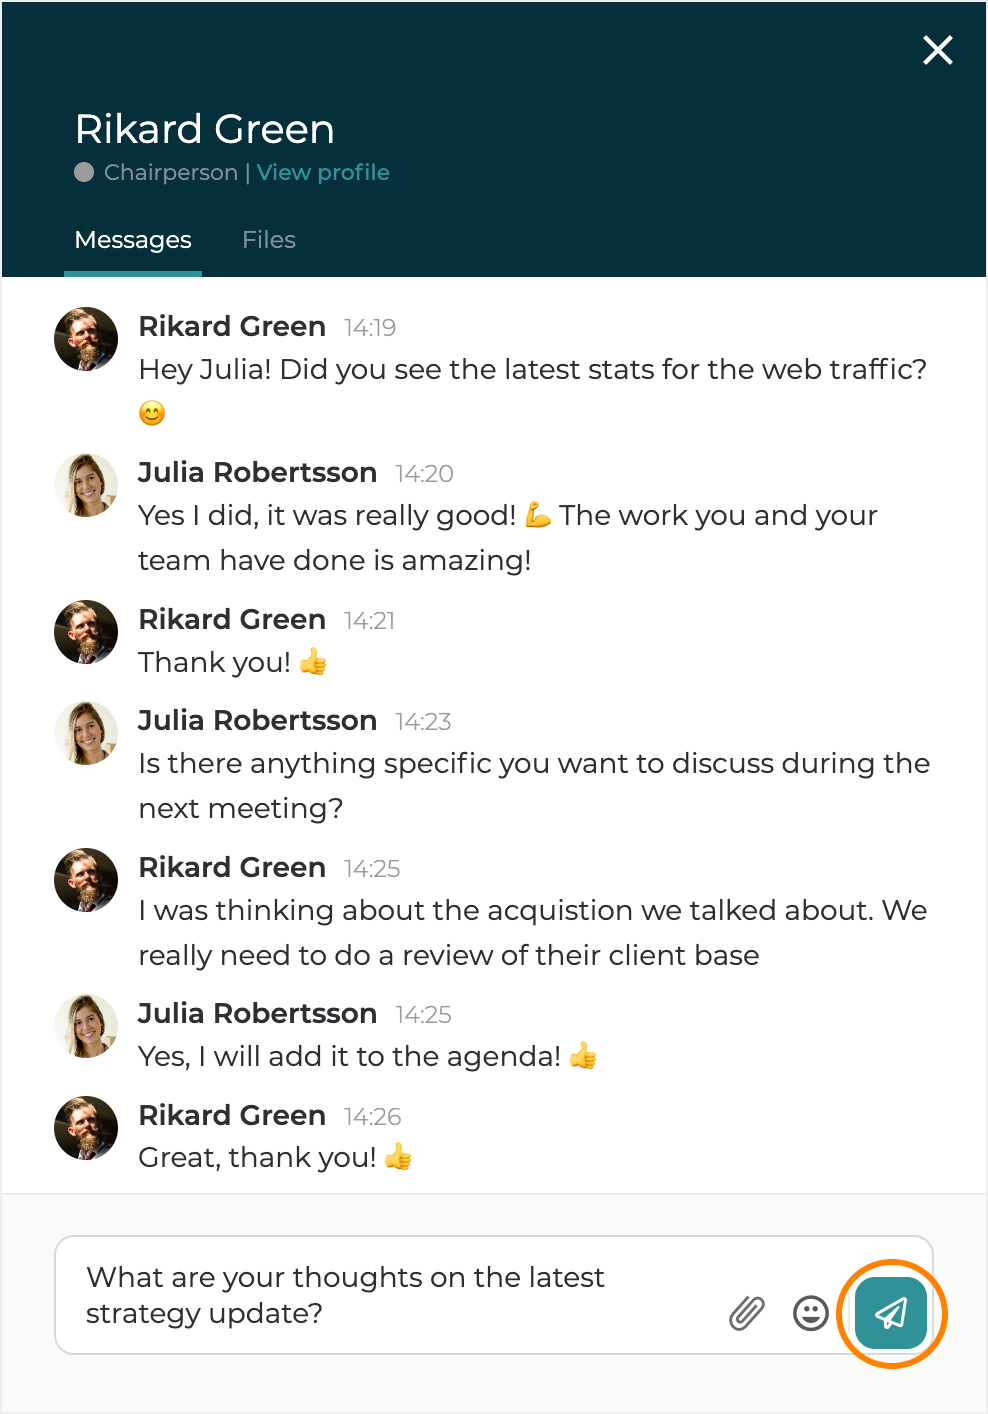
<figure><img src="/files/v7KOXvXzfBbFSfcwB3Yn" alt=""><figcaption><p>Send direct message</p></figcaption></figure>

2. A conversation panel will appear. Enter your message in the input field at the bottom of the panel. If needed, [add files to your message](/using-hippoly/direct-messages/files-in-direct-messages). Then click the `Send` button or press `Enter` on your keyboard.

<figure><img src="/files/J5YNPHj5ZLQ06zY8oM0Y" alt="" width="375"><figcaption></figcaption></figure>
{% endtab %}

{% tab title="Mobile" %}

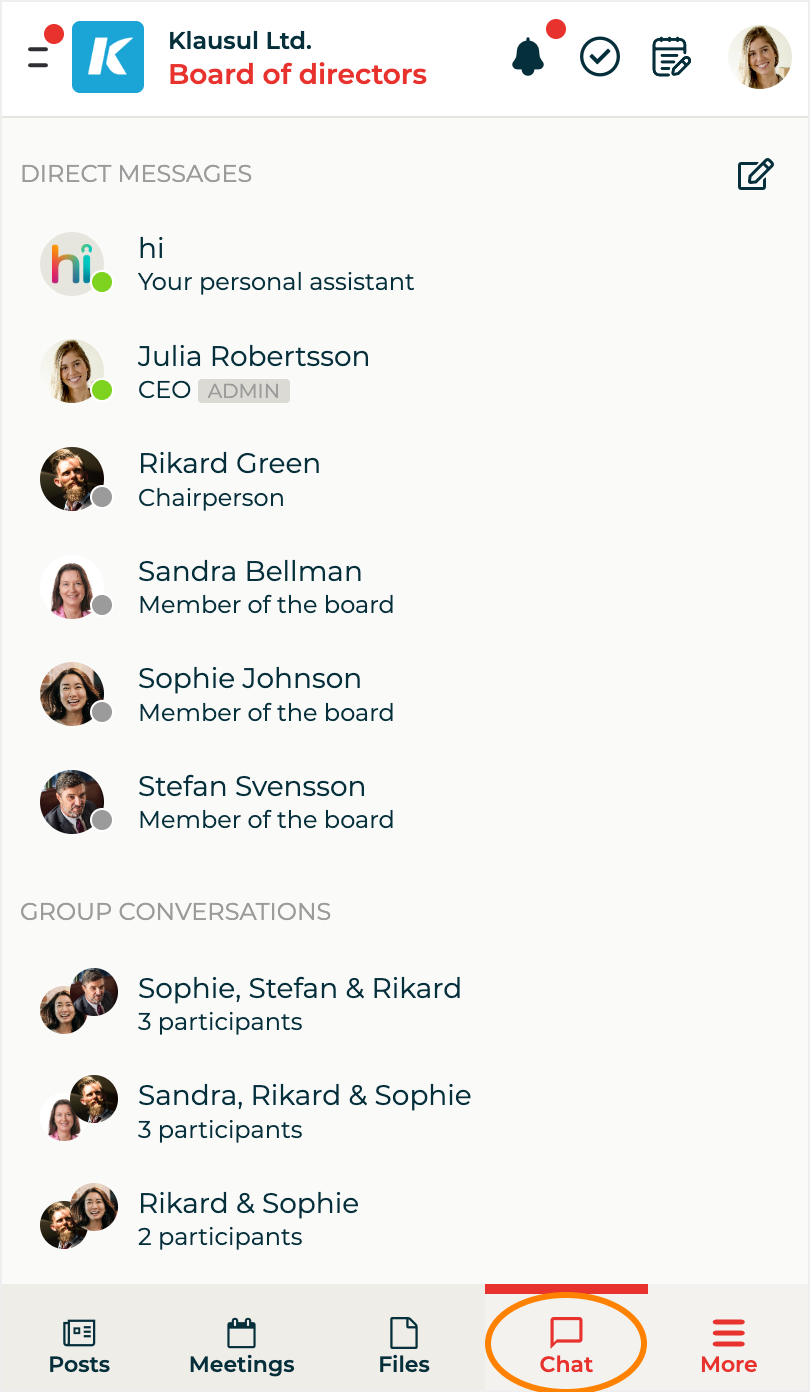
1. Navigate to the chat list by clicking the `Chat` menu option.&#x20;

<figure><img src="/files/sQByGbjVEotfHMWpD6Hd" alt="" width="375"><figcaption><p>Chat list</p></figcaption></figure>

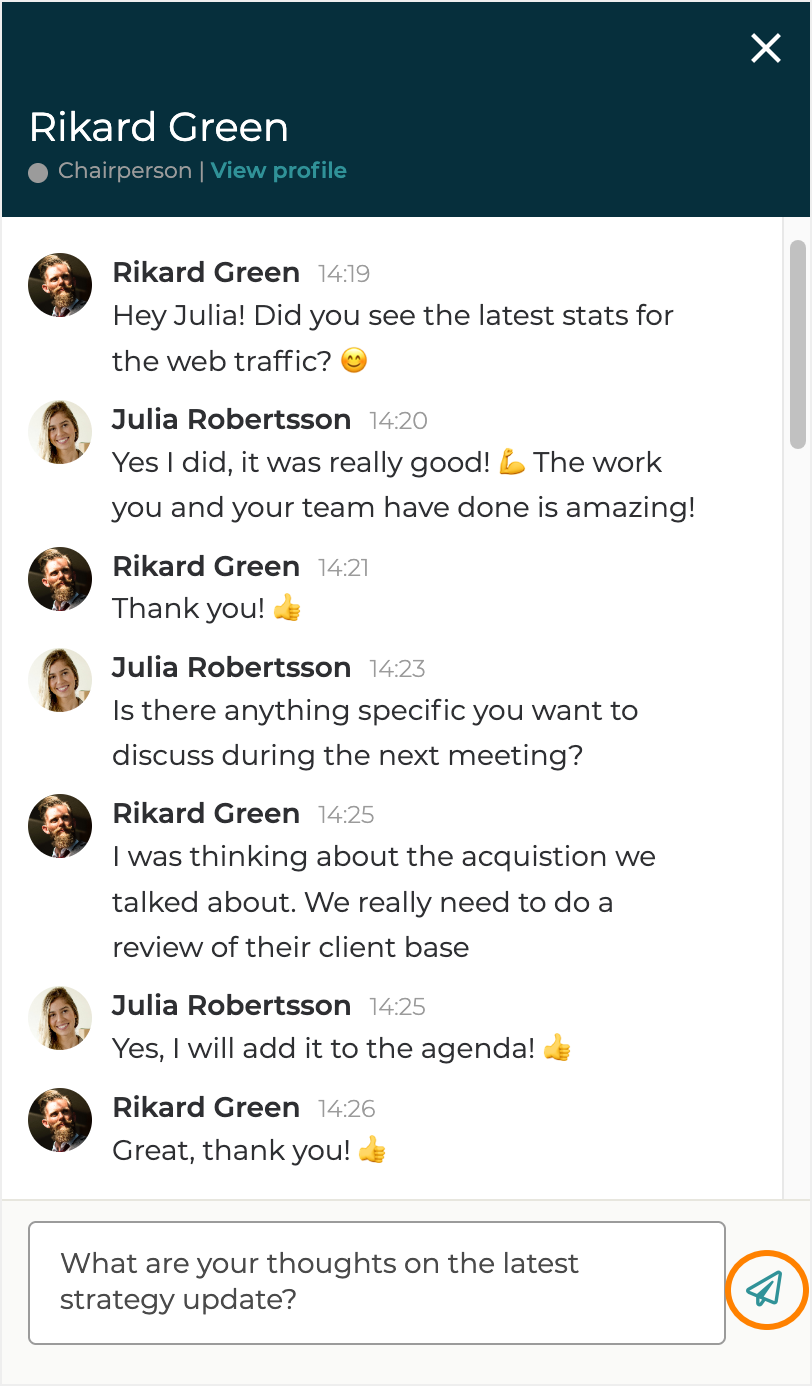
2. Click on the user or group you want to send a direct message to. A conversation panel will appear. Enter your message in the input field at the bottom of the panel. If needed, [add files to your message](/using-hippoly/direct-messages/files-in-direct-messages). Then click the `Send` button

<figure><img src="/files/cLFs1RxCyIxhGupRAVzB" alt="" width="375"><figcaption></figcaption></figure>
{% endtab %}
{% endtabs %}


# Files in direct messages

You can upload files and images directly to a Direct message conversation. This allows you to keep documents limited to a smaller group, instead of making them available to the entire workspace.

When you upload a file to a conversation, **only the participants in that conversation can access it.** This makes it ideal for focused collaboration, sensitive discussions, or early drafts that are not ready to be shared more broadly.

### Why use Files in Direct Messages

Use this when:

* You want to share information with only one person or a small group
* You are working on a draft before sharing it with the wider workspace
* The content should remain limited to specific participants

**If the document later needs to be shared with more users**, you can [move the file to a Shared folder](#move-file-in-conversation-to-a-shared-folder) in the workspace. Once moved, it becomes accessible to all workspace users.

You can also **link files** from [Shared folders](/using-hippoly/files-and-folders) into a Direct message conversation if you want to reference existing material without re-uploading it.

## Add file to a direct message

{% stepper %}
{% step %}
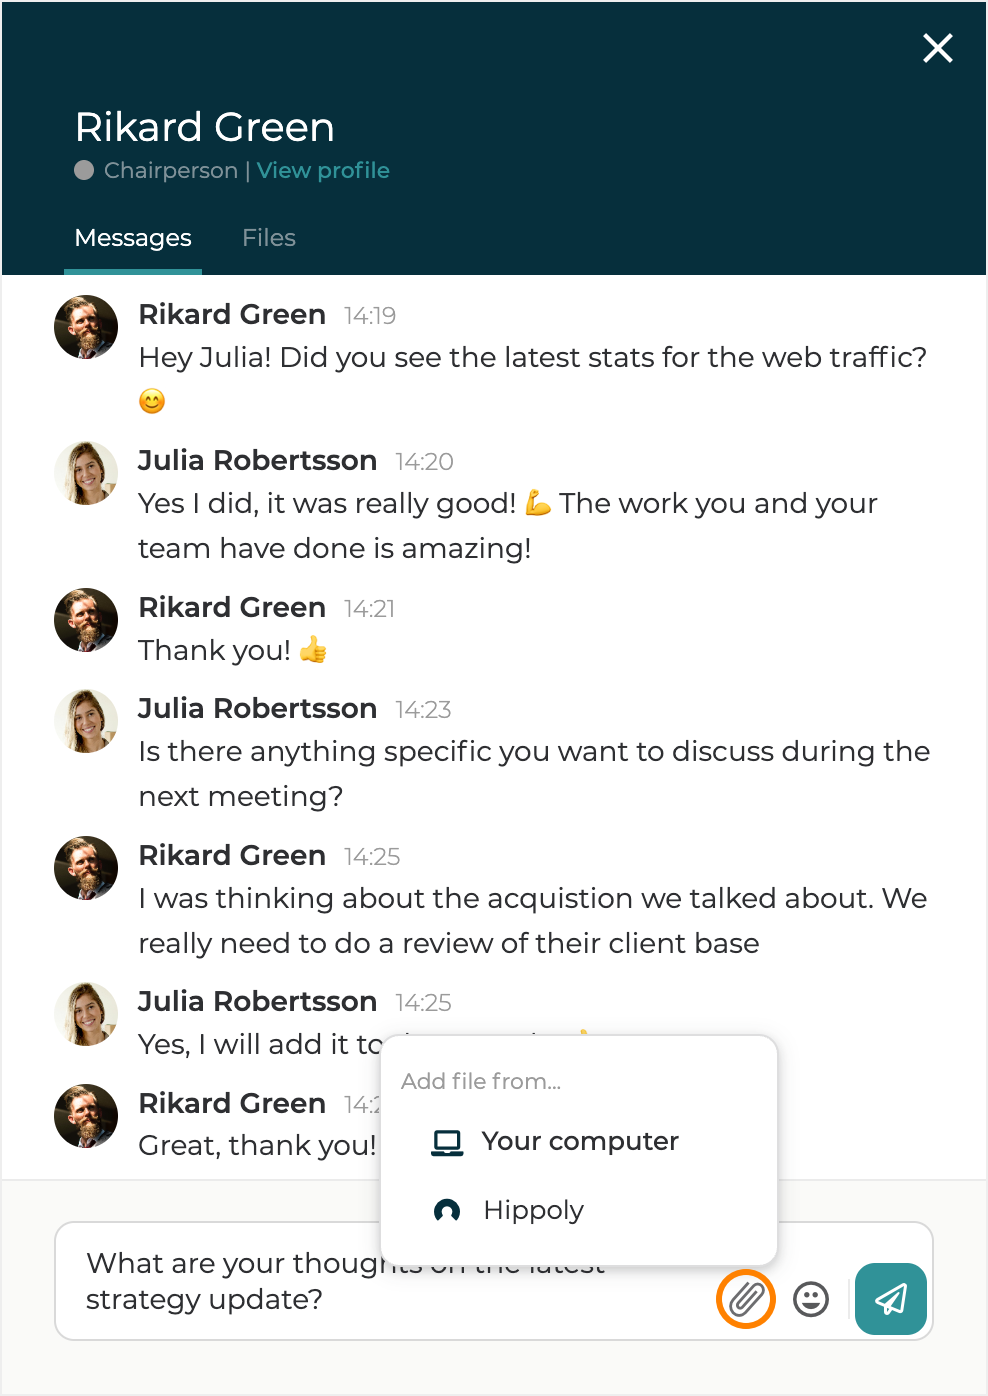
Click the `Add file` button in the message input field.&#x20;

<figure><img src="/files/pbXTjOiUCHZBkBLsbLut" alt="" width="375"><figcaption></figcaption></figure>
{% endstep %}

{% step %}
To upload a file, select `From your device` in the menu.

To link a file from a Shared folder in the workspace, select `From Hippoly`.
{% endstep %}

{% step %}
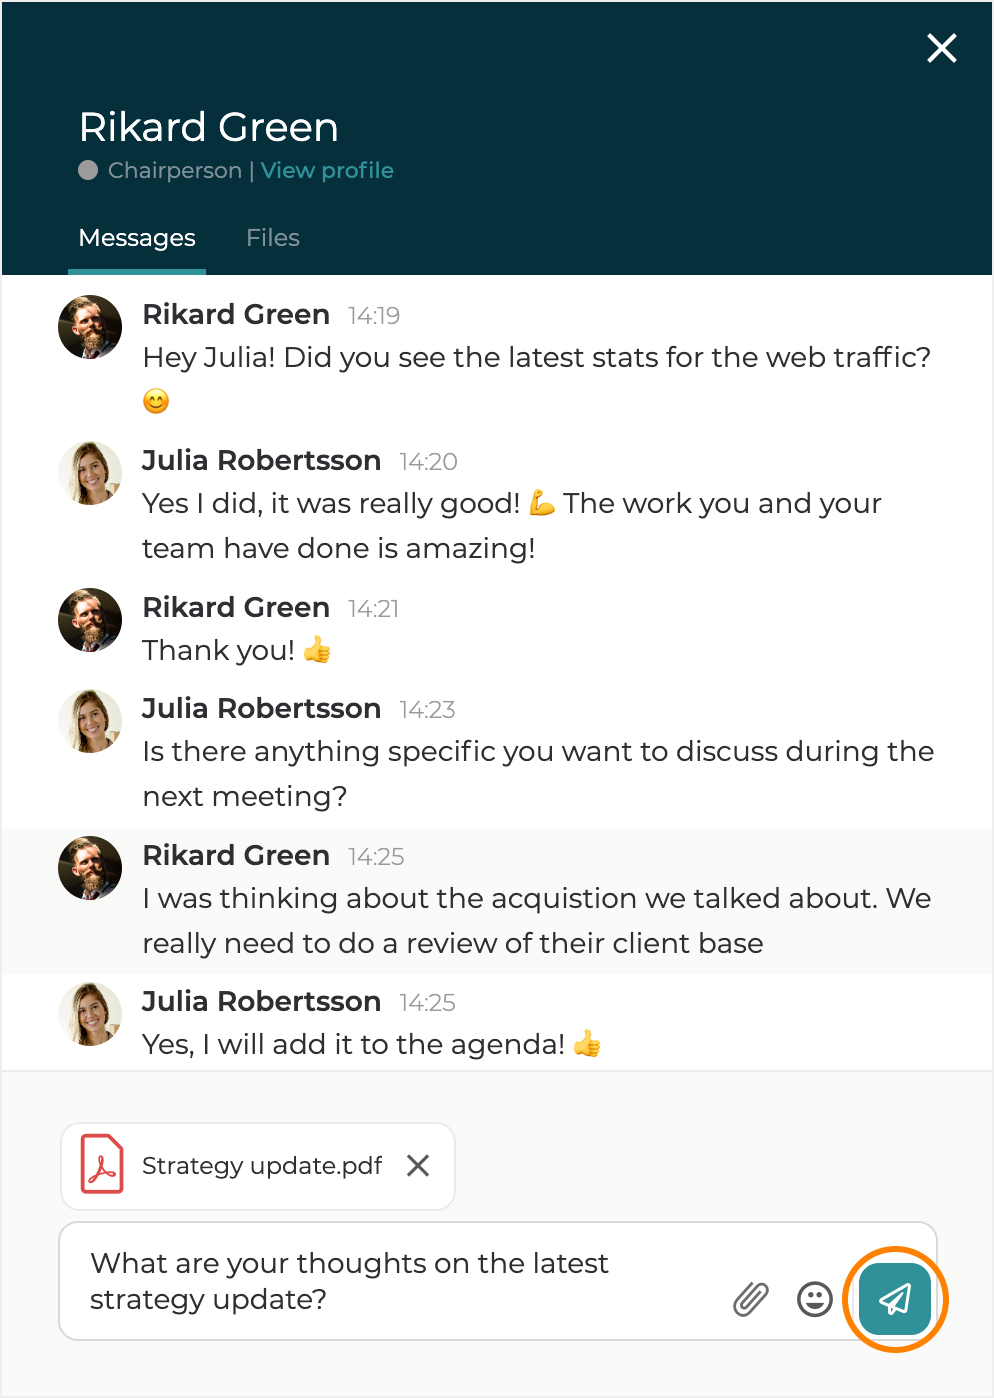
You can optionally add a text before sending the message.

<figure><img src="/files/UqxH5mCHRCEvE0cSogWS" alt="" width="375"><figcaption></figcaption></figure>
{% endstep %}

{% step %}
Click the `Send` button or press `Enter` on your keyboard.&#x20;
{% endstep %}
{% endstepper %}

## Move file in conversation to a shared folder

{% hint style="info" %}
**Note:** When you move a file from a Direct message conversation to a Shared folder, the file becomes accessible to all users in the workspace.
{% endhint %}

{% stepper %}
{% step %}
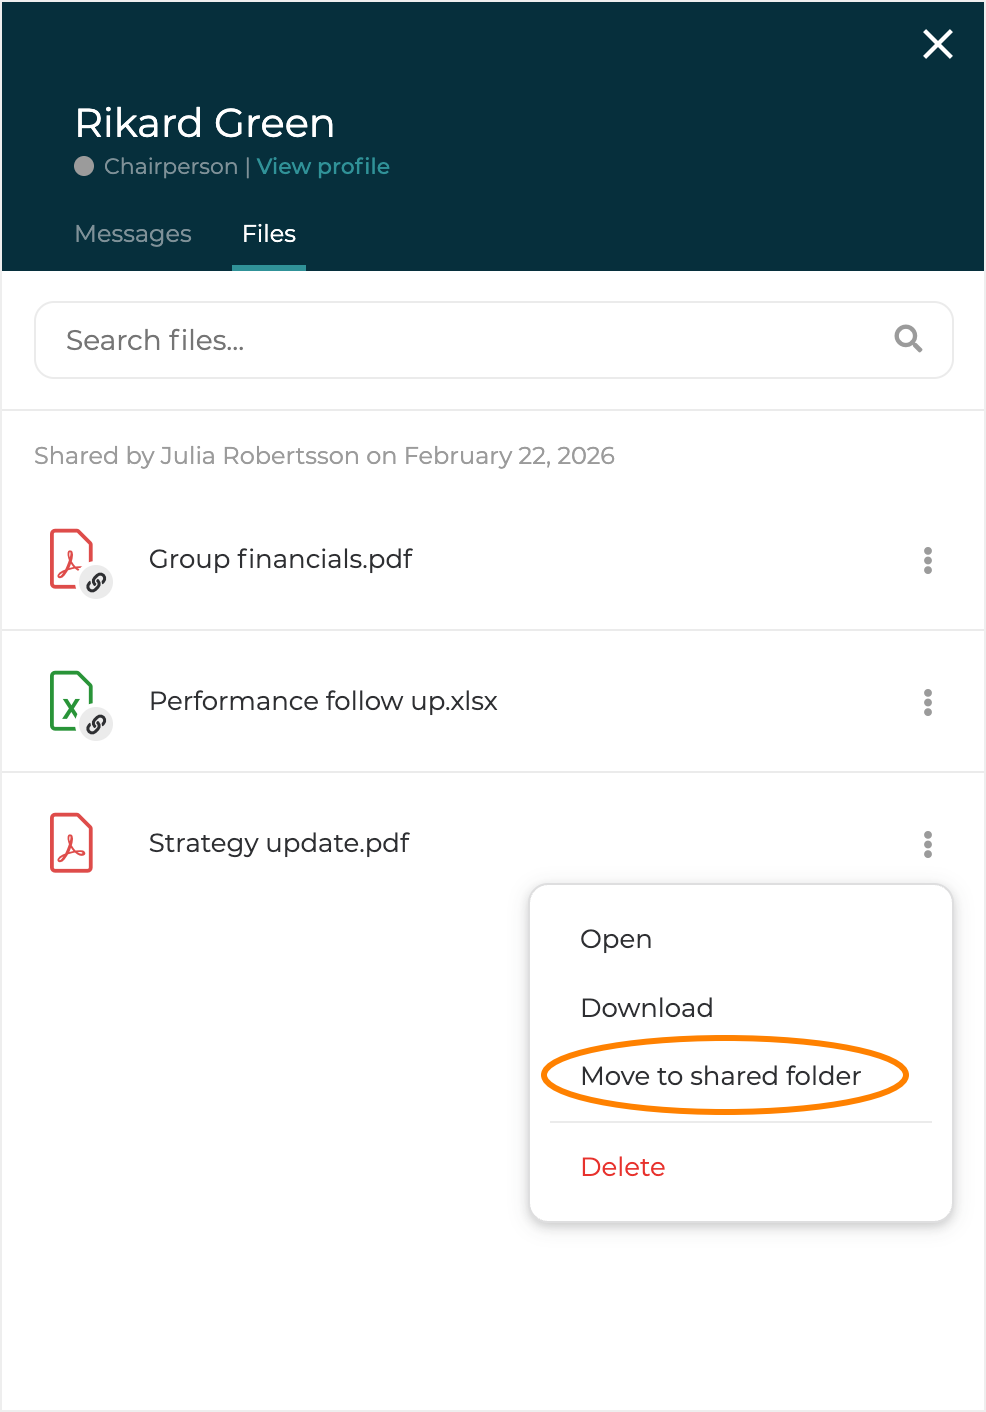
Click the `Files tab` in the conversation panel.
{% endstep %}

{% step %}
Click the `Menu-icon`  to the right of the file name.
{% endstep %}

{% step %}
Select the `Move to shared folder` menu option.

<figure><img src="/files/njUcvfNYwlIxlHzTXLMU" alt="" width="375"><figcaption></figcaption></figure>
{% endstep %}

{% step %}
Select the folder you want to move to in the dialog and click the `Move` button.
{% endstep %}
{% endstepper %}

## Remove file from a conversation

{% hint style="info" %}
**Note:** If you remove a file that was uploaded directly to the conversation, it is permanently deleted.

If you remove a file that is linked from a Shared folder, the file is not deleted from the folder. It is only unlinked from the conversation.
{% endhint %}

If you [delete the entire message](/using-hippoly/direct-messages/delete-direct-message), all files attached to that message are also removed from the conversation.

If you only want to remove a file but keep the text in the message, follow these steps.

{% stepper %}
{% step %}
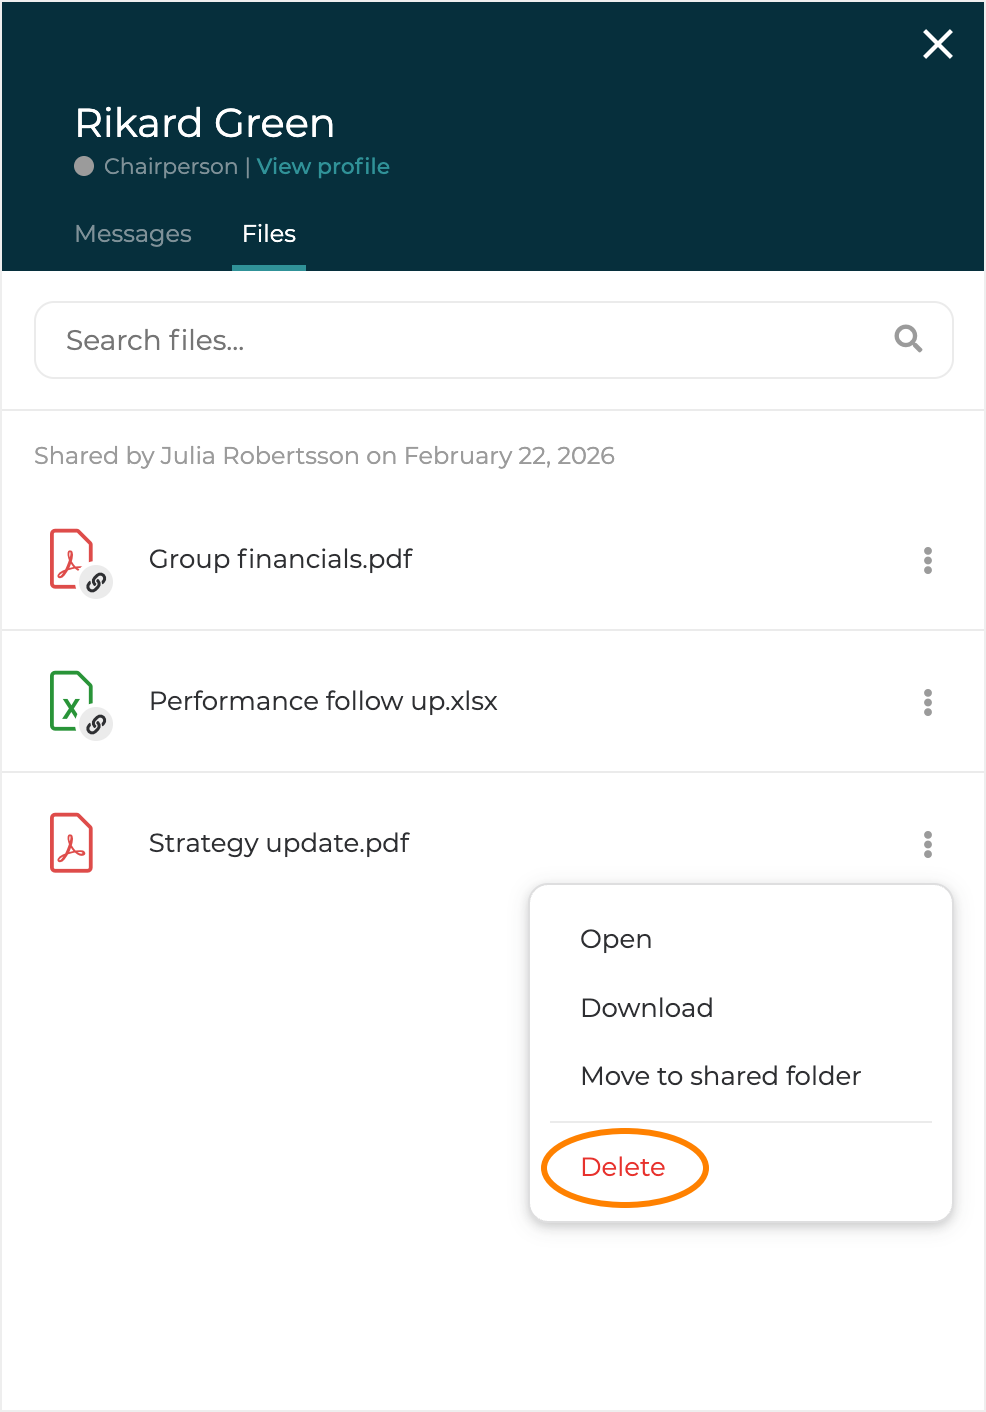
Click the `Files tab` in the conversation panel.
{% endstep %}

{% step %}
Click the `Menu-icon`  to the right of the file name.
{% endstep %}

{% step %}
Select the `Delete` menu option.

<figure><img src="/files/0qAXR4Ml9QAlmBLeqw0L" alt="" width="375"><figcaption></figcaption></figure>

{% endstep %}
{% endstepper %}


# Create message group

To create a direct message group, follow these steps

{% stepper %}
{% step %}
Click the `New message` button above the members list in the team member panel on the right.

<figure><img src="/files/2MQ2GRP6t10KfOZkDqnU" alt="" width="375"><figcaption><p>Create direct message group</p></figcaption></figure>
{% endstep %}

{% step %}
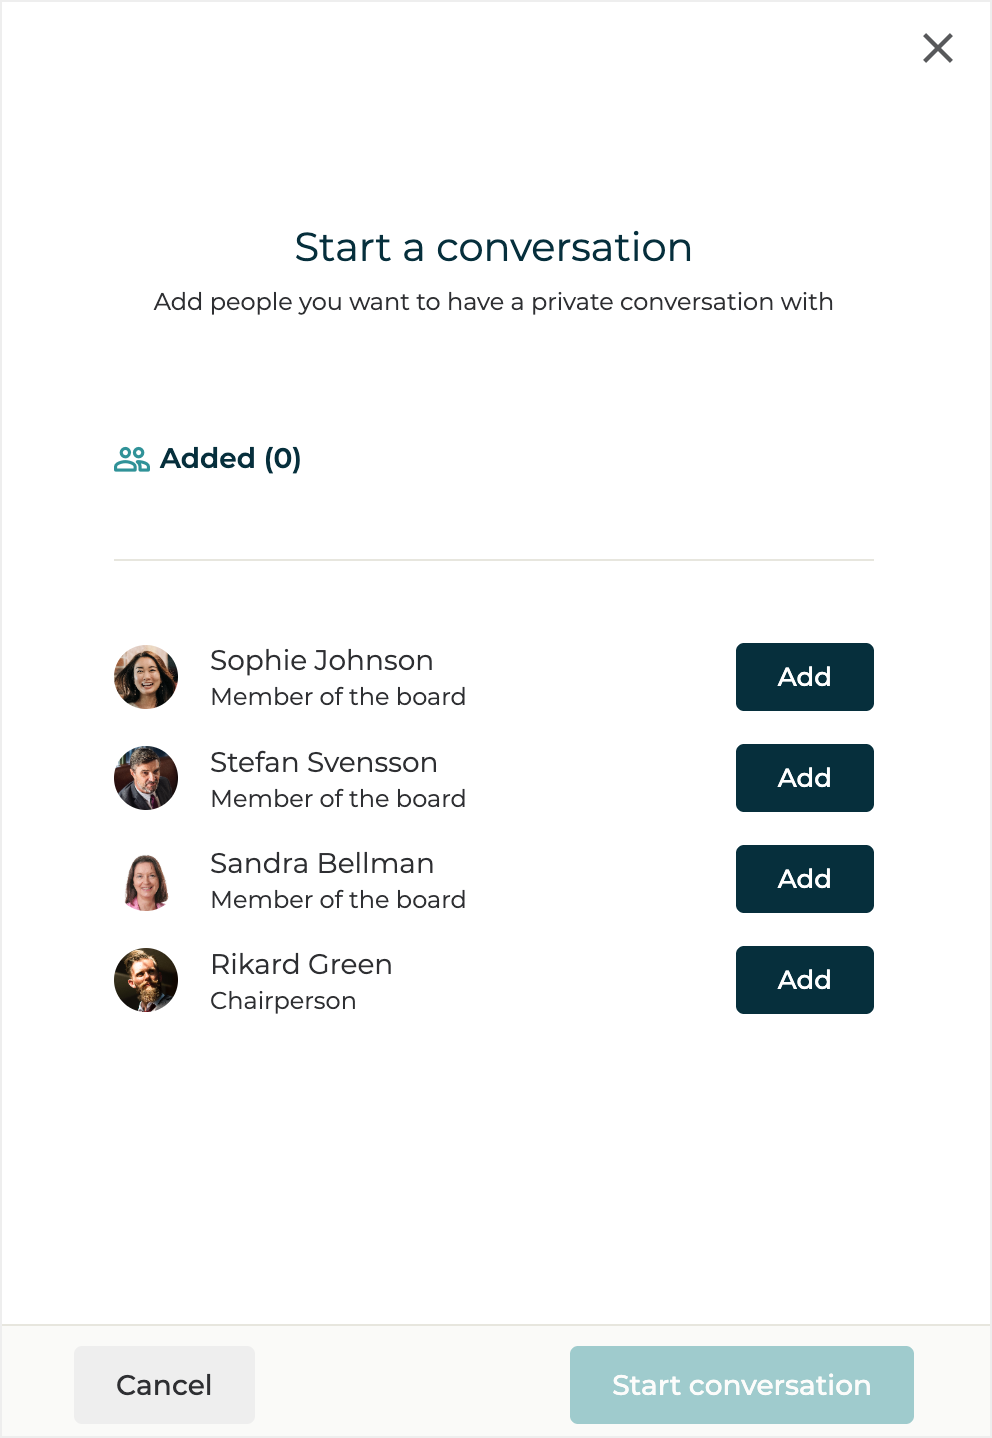
In the panel that appear, select the users you want to include in the group by clicking the `Add` button next to their names.

<figure><img src="/files/03Hpn1SUSxui3e5YuKlM" alt="" width="375"><figcaption><p>Add users to group conversation</p></figcaption></figure>
{% endstep %}

{% step %}
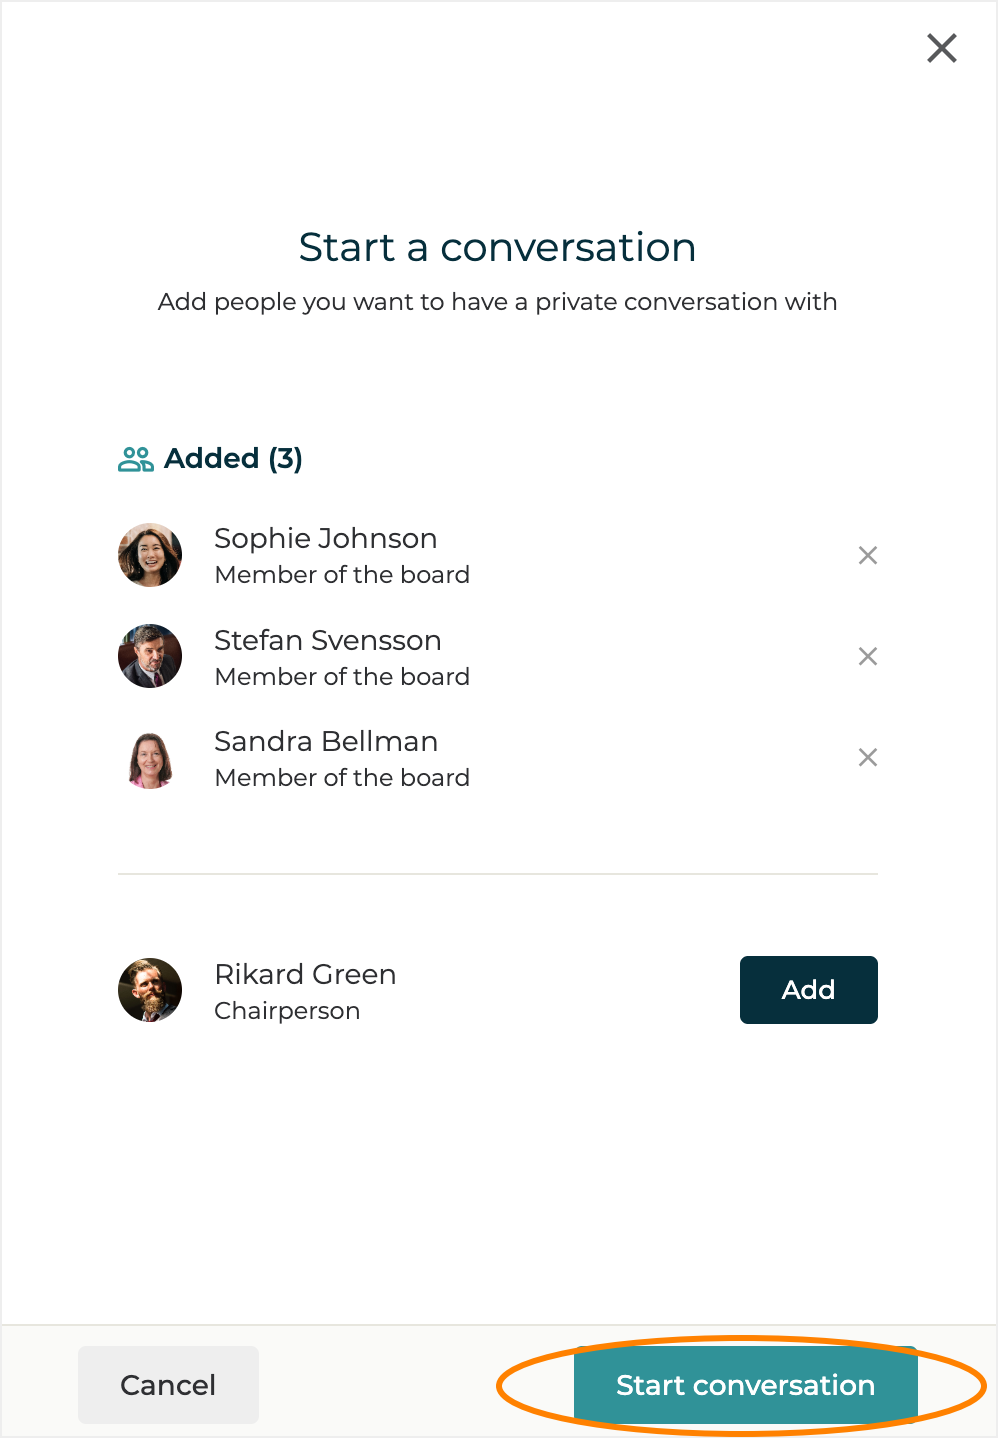
Click the `Start conversation` button at the bottom of panel. Your group is now created, and you can start [sending direct messages](/using-hippoly/direct-messages/send-direct-message) to it.  &#x20;

<figure><img src="/files/fSsnQRUdzHOC9vOTQxFs" alt="" width="375"><figcaption><p>Start group conversation</p></figcaption></figure>
{% endstep %}
{% endstepper %}

{% hint style="info" %}
**Note:** If you select users who are already part of an existing group, a new group will not be created. Instead, the existing conversation will open, and you can continue by sending new messages within that conversation.
{% endhint %}


# Delete direct message

If you need to delete a message you’ve sent, follow these steps

{% stepper %}
{% step %}
Navigate to the conversation where you sent the message.
{% endstep %}

{% step %}
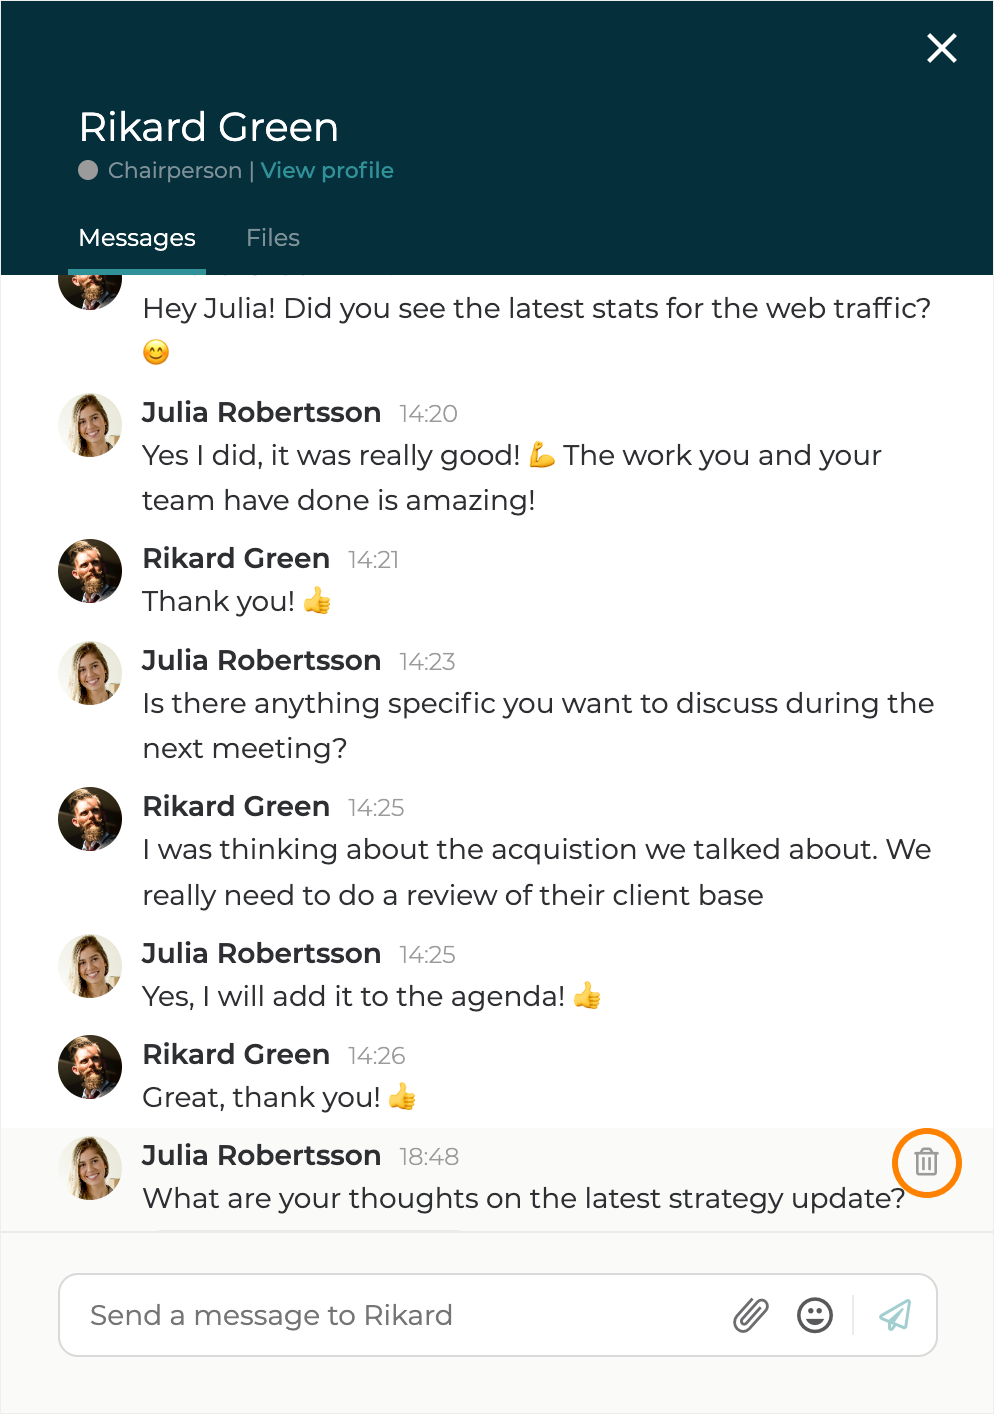
Move your mouse cursor over the message you want to delete and click the `Trash-bin-icon` that appears to the right of the message.&#x20;

<figure><img src="/files/pBgPxcDByoxLluMTv9Rr" alt="" width="375"><figcaption><p>Hover over a direct message to reveal the delete option</p></figcaption></figure>
{% endstep %}

{% step %}
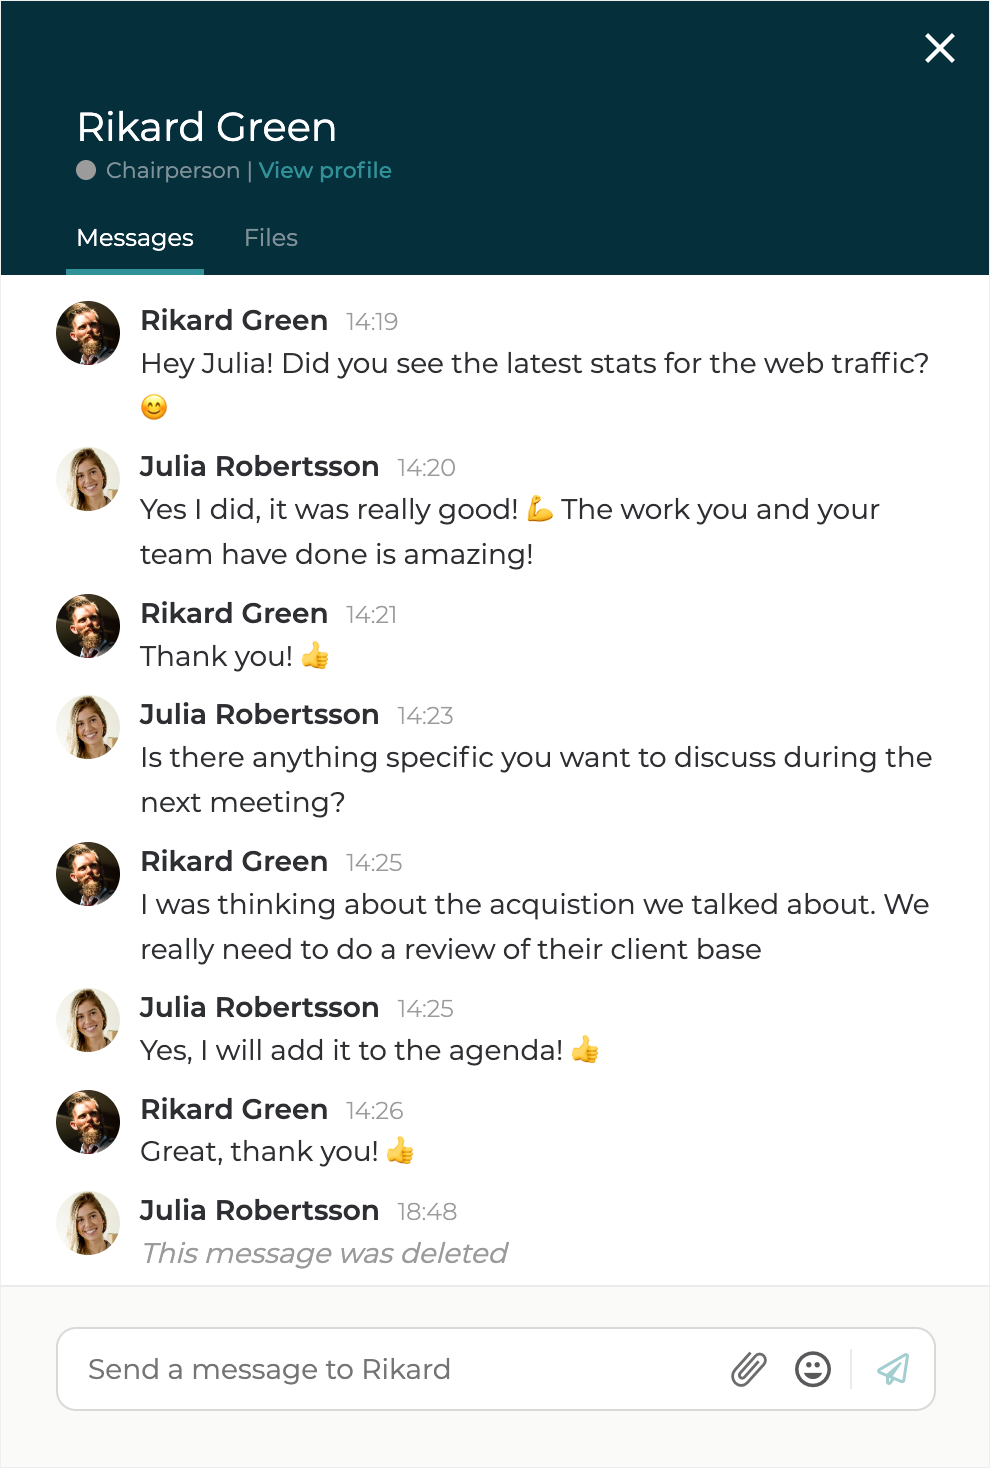
When the message is deleted, it will be replaced with the text *"This message was deleted."* This helps avoid confusing the user you sent the message to, preserves the flow of the conversation thread, and accounts for any notifications that were sent when the original message was delivered.

<figure><img src="/files/lhi7NlPDG5hvsLlCuu1O" alt="" width="375"><figcaption><p>Deleted direct message</p></figcaption></figure>
{% endstep %}
{% endstepper %}


# Meetings

Meetings in Hippoly cover the full meeting process end-to-end, from inviting participants and preparing materials to running the meeting, approving minutes and digitally e-signing the final version.

## **Understand Meetings**

Hippoly brings structure and clarity to every stage of the meeting. Agendas are easy to build and update, meeting materials are organised into a clear digital board pack, and participants always have access to the latest version of everything they need. When it’s time to meet, discussions, documentation and decisions stay in one place, and the meeting minutes can be created directly in Hippoly, reviewed and approved, and, if required, e-signed as part of the same end-to-end flow.

### What Meetings in Hippoly enable

Hippoly helps organisations plan, prepare, conduct and finalise meetings with structure and control. The meeting feature keeps all content, communication, documentation and decisions together, so participants can stay focused and informed before, during and after the meeting.

### Agenda creation and preparation

The **Agenda builder** in Hippoly makes it easy to [create clear, structured agendas for your meetings](/using-hippoly/meetings/create-and-edit-agenda#create-an-agenda). You can build a well-organised agenda with logical sections and items, and [attach the relevant meeting materials directly to each agenda point](/using-hippoly/meetings/create-and-edit-agenda#attach-files-to-agenda-items). This creates a complete digital board pack / board book, making it easy for board members and meeting participants to review documents and prepare effectively before the meeting.

If changes are needed, you simply update the agenda, even after it has been shared. The updated version is instantly available to all participants, so everyone always works from the latest and correct version of the meeting plan.

### Running the meeting

When it is time to meet, Hippoly supports both physical and digital meetings. If needed, you can run a **video meeting directly in Hippoly**, so discussions, material and collaboration stay in one place.

During the meeting, notes and decisions are efficiently captured, helping ensure accuracy and reducing manual follow-up work afterwards.

### Meeting minutes and approval

[Meeting minutes are created directly in Hippoly](/using-hippoly/meetings/create-and-edit-meeting-minutes#create-minutes). You can:

* Create minutes based on the agenda
* Reuse minutes structure from a previous meeting
* Write minutes from scratch if needed
* Create minutes with the help of AI

Once the secretary completes the minutes, the approval process happens inside Hippoly. The people responsible for approving can review the document, leave comments and request changes if needed. This creates a transparent and controlled approval flow without separate email threads or document versions.

If your organisation requires formally signed minutes, the approved document can be **e-signed directly in Hippoly** with just a click, using the same secure Scrive-powered e-signing as for other documents.

### End-to-end control

With Meetings in Hippoly, the full lifecycle of a meeting is handled in one place:

* Create and share the agenda
* Ensure participants are fully prepared with clear agendas and a complete digital board pack / board book
* Conduct the meeting
* Create and approve meeting minutes
* Optionally e-sign minutes digitally

Everything remains securely stored, traceable and easy to access later, supporting good governance, compliance and efficient board work.

## Meetings FAQ

<details>

<summary>Who can create Meetings?</summary>

All Workspace Members can create meetings. The user who create a meeting get the role of organiser and can edit the meeting settings and agenda.&#x20;

</details>

<details>

<summary>Why don't everyone in the team see all Meetings?</summary>

The default setting of a Workspace is that users only see Meetings where they are added as a Participant. If you want everyone to be able to see all Meetings within the workspace you can turn this on under [Workspace Settings](/administration/workspace-administration).&#x20;

</details>

<details>

<summary>Who can edit and upload document to a meeting agenda?</summary>

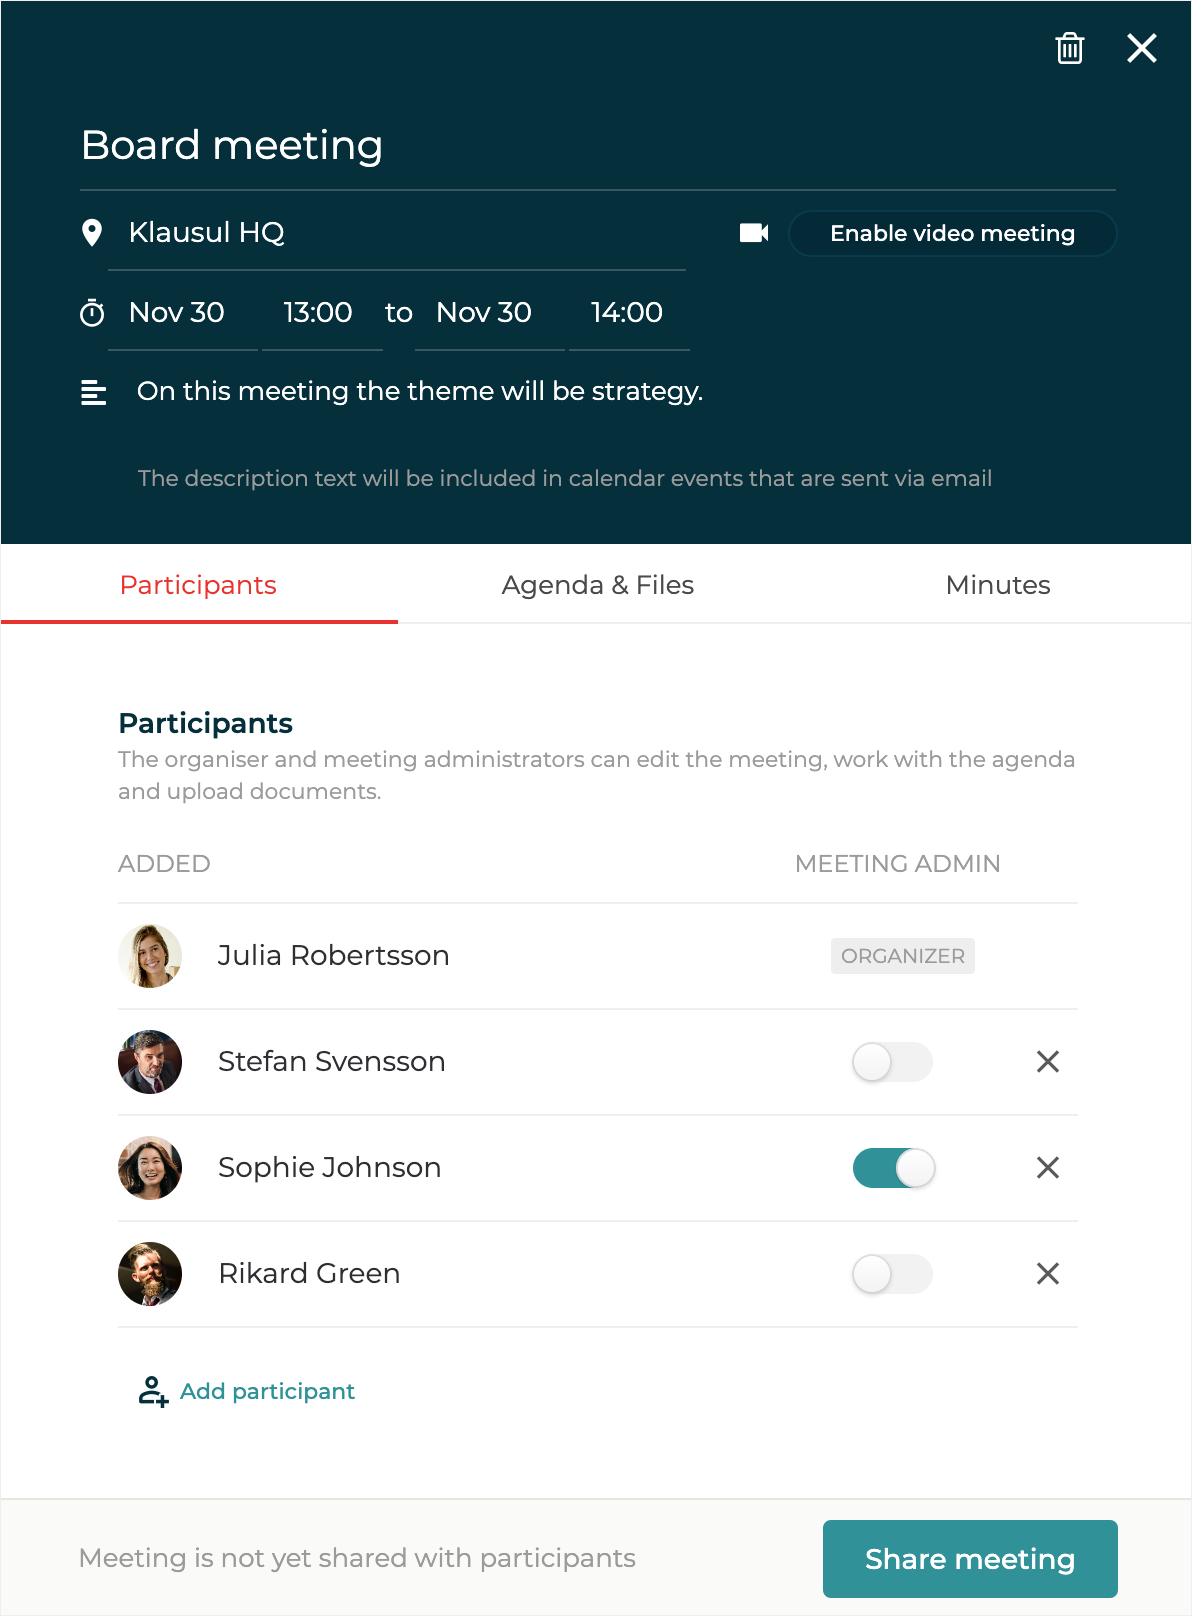
The Meeting Organiser and Workspace Administrators can edit, upload documents and share meeting agendas. However, if you need anyone else from your team to be able to contribute to the agenda you can [make a person Meeting Administrator](/using-hippoly/meetings/manage-meeting-participants#make-participant-meeting-administrator)*.*&#x20;

</details>

<details>

<summary>Can I co-create an agenda with other users? </summary>

**Yes**. You can co-create an agenda with other users, as long as they are assigned as [Meeting admins](/using-hippoly/meetings/manage-meeting-participants#make-participant-meeting-administrator).
</details>


# Create and share meeting

{% stepper %}
{% step %}
Navigate to `Meetings` in the Main menu
{% endstep %}

{% step %}
Click the `New Meeting` button
{% endstep %}

{% step %}
Add a **Meeting Title**, **Location**, **Date** and **Time**

<figure><img src="/files/T11XTesSFomaN02yaN1E" alt="" width="375"><figcaption></figcaption></figure>
{% endstep %}

{% step %}
If you want, you can also add a **description**, for example the theme or purpose of the Meeting.
{% endstep %}

{% step %}
Select the people you want to invite to the Meeting. By default, all workspace users are included. To remove someone, click the `X`  button to the right of their name.
{% endstep %}

{% step %}
If you want any participant to be able to edit the meeting, the agenda and upload files switch on the `Meeting Admin Toggle` for that person.&#x20;
{% endstep %}

{% step %}
Click the `Share meeting` button to invite the added participants to the Meeting.

A dialog will appear asking if you also want to send calendar events by email (recommended). This will update the the participants personal calendars (in the same way as if you would have sent the meeting invitation form your desktop calendar program, such as outlook, Mac Calendar etc).

<figure><img src="/files/dvO4wfrhKLA7l7Tb7h4n" alt="" width="375"><figcaption></figcaption></figure>

{% hint style="info" %}
Email invitations include the meeting title, location, time and description. You should therefore not have any sensitive information in these fields as e-mail is not a secure method of communication.
{% endhint %}
{% endstep %}

{% step %}
Confirm the sharing by clicking `Share`.
{% endstep %}

{% step %}
Participants will receive an email where they can RSVP (Accept, Reject or say Maybe) and the meeting will automatically be added to their personal calendars.  You as an Organiser will also receive an email to keep your calendar up to date.&#x20;
{% endstep %}
{% endstepper %}

### Turn off email calendar events

If you don’t want to send calendar events by email when sharing a Meeting, turn off the `Calendar Event toggle` in the confirmation dialog. This can be useful, for example, if your team is new to Hippoly and Meeting invitations have already been sent through another calendar system.

<figure><img src="/files/XDubLa1xJUGTDMEILpEF" alt="" width="375"><figcaption></figcaption></figure>

{% hint style="info" %}
**Note:** If you create a past Meeting (a Meeting with a date and time set in the past), no email calendar events will be sent.
{% endhint %}

### Share meeting and agenda in one go

While it’s most common to schedule a Meeting first so everyone gets it into their calendar, and then share the Agenda and supporting files closer to the meeting date, you can also do everything in one go. If your Agenda and materials are already prepared, Hippoly allows you to create the Meeting, build the Agenda, and share it with participants in a single step.

If you want to share an agenda together with the meeting follow theses steps.

{% stepper %}
{% step %}
**Create the Meeting** as described earlier in this article, but don’t share it yet.
{% endstep %}

{% step %}
Click the `Agenda & Files` tab and [create your agenda](/using-hippoly/meetings/create-and-edit-agenda).
{% endstep %}

{% step %}
When you're satisfied with the Agenda, click `Share agenda`  in the agenda builder.

A dialog will appear where you confirm the sharing.

<figure><img src="/files/1G0R3jJWXBQZpWsLVeg5" alt="" width="375"><figcaption></figcaption></figure>
{% endstep %}

{% step %}
Confirm the sharing by clicking the `Share` button.

{% hint style="info" %}
If you haven’t turned off any of the toggles in the confirmation dialog, a calendar event and an email informing participants that the Agenda is available will be sent out.
{% endhint %}
{% endstep %}
{% endstepper %}


# Update meeting details

If a Meeting is Shared and you want to update **Title**, **Location**, **Date**, **Time** or **Description**, follow these steps.&#x20;

{% stepper %}
{% step %}
Navigate to the Meeting
{% endstep %}

{% step %}
Click the `Pen-icon`  button at the top right corner of the Meeting Panel

<figure><img src="/files/lJMayDP8o9otdBVTUP7R" alt="" width="375"><figcaption></figcaption></figure>

{% endstep %}

{% step %}
Make your changes
{% endstep %}

{% step %}
Click the `Update` button in the Meeting Panel footer
{% endstep %}

{% step %}
A confirmation dialog will appear. If you don't want to send out an updated calendar event by mail to the Meeting Participants of any reason, you can turn `Calendar Event Toggle` off.&#x20;

<figure><img src="/files/2XCn9uni2LdQf2QRm4HJ" alt="" width="375"><figcaption></figcaption></figure>
{% endstep %}

{% step %}
Click the `Upate` button in the dialog to confirm your changes.
{% endstep %}
{% endstepper %}


# Manage meeting participants

## Add participant

If you want to add a Participant to an already Shared Meeting, follow these steps.

{% stepper %}
{% step %}
Navigate to the Meeting.
{% endstep %}

{% step %}
Select the `Participants` tab.
{% endstep %}

{% step %}
Click the `Add participant` button at the bottom of the list of Participants.

<figure><img src="/files/RZ5usTK5lRWZidQ5VLdQ" alt="" width="563"><figcaption></figcaption></figure>
{% endstep %}

{% step %}
Click the `Add` button to the right of the person you want to add. A email Calendar Event will automatically be sent out to the added person.
{% endstep %}
{% endstepper %}

## Add external guest

An external guest is someone who is not a user in the workspace but still needs to attend all or part of the Meeting. You can invite external guests just like any other attendee, and they will receive a meeting invitation by email. If a video meeting link has been added, it will also be included in the calendar event.

{% hint style="info" %}
**Note:** External guests cannot access the Meeting, the Meeting Agenda or Meeting Files inside Hippoly.
{% endhint %}

{% stepper %}
{% step %}
Navigate to the Meeting.
{% endstep %}

{% step %}
Select the `Participants` tab.
{% endstep %}

{% step %}
Click the `Add external guest` button. If you don’t see it, click `Add participant` first.

<figure><img src="/files/ZZQNIDRqunhovtUBCjud" alt="" width="563"><figcaption></figcaption></figure>
{% endstep %}

{% step %}
In the dialog that appears, enter the guest’s **full name** and **email address**. If you want, you can also include a private message in the invitation.

<figure><img src="/files/DaA544fGwgfsghl6XTkB" alt="" width="375"><figcaption></figcaption></figure>
{% endstep %}

{% step %}
Click the `Add` button in the dialog. A email Calendar Event will automatically be sent out to the added person.
{% endstep %}
{% endstepper %}

## Remove participant

If you want to remove a Participant from a Shared Meeting, follow these steps.

{% stepper %}
{% step %}
Navigate to the Meeting.
{% endstep %}

{% step %}
Select the `Participants` tab.
{% endstep %}

{% step %}
Click the `Menu` button located to the right of Participant's name.

<figure><img src="/files/CR8Akh1F0mStTopp6Unr" alt="" width="563"><figcaption></figcaption></figure>
{% endstep %}

{% step %}
Select `Remove participant` from the Menu. If the participant has already received a Calendar Event via email, they will automatically be notified by a new email that the Meeting has been canceled.
{% endstep %}
{% endstepper %}

## Make participant meeting administrator

To allow Participants to edit the Meeting, the Meeting Agenda and upload Files, assign them as a Meeting Administrator. Follow these steps to do so.

{% stepper %}
{% step %}
Navigate to the Meeting.
{% endstep %}

{% step %}
Select the `Participants` tab.
{% endstep %}

{% step %}
Switch on the `Meeting admin toggle` located to the right of the Participant's name.

<figure><img src="/files/xutEYHv7yAak8Bchosf3" alt="" width="563"><figcaption></figcaption></figure>
{% endstep %}
{% endstepper %}

## Resend meeting invitation to participant

There may be occasions when you need to resend the Meeting Invitation and Calendar Event to a Participant. This could be necessary if the Participant did not receive the initial invitation, has changed their email address, or for other reasons. Follow theses steps to do so.

{% stepper %}
{% step %}
Navigate to the Meeting.
{% endstep %}

{% step %}
Select the `Participants` tab.
{% endstep %}

{% step %}
Click the `Menu` button located to the right of Participant's name.

<figure><img src="/files/ilcRJT2Jqyr9hegtD3i2" alt="" width="563"><figcaption></figcaption></figure>
{% endstep %}

{% step %}
Select `Resend invitation` from the Menu. A new Calendar Event will automatically be sent by email.&#x20;
{% endstep %}
{% endstepper %}


# Delete meeting

{% hint style="danger" %}
**Warning:** Deletion of a Meeting will also delete files uploaded to it, the Agenda and Meeting Minutes. Deletion of a Meeting cannot be undone.&#x20;
{% endhint %}

## Delete meeting

To be able to delete a Meeting you need to be either the Organiser, Meeting Administrator or Workspace Administrator.

{% hint style="info" %}
**Note:** If the Meeting you want to delete has Signed Meeting Minutes attached to it, you will not be able to delete it without first delete the Meeting Minutes separately.&#x20;
{% endhint %}

{% stepper %}
{% step %}
Navigate to the Meeting
{% endstep %}

{% step %}
Click the `Trash-bin` button at the top right corner of the Meeting Panel&#x20;

<figure><img src="/files/6EGefudzRoEKK0wsSGao" alt="" width="375"><figcaption></figcaption></figure>
{% endstep %}

{% step %}
A confirmation dialog will appear. Click `Delete meeting` to confirm the deletion. If it is a Shared future Meeting and the Participants have received a Calendar Event via email, they will automatically be notified by a new email that the Meeting has been canceled.

<figure><img src="/files/XZglWMqsOy5UJtDTwTN6" alt="" width="375"><figcaption></figcaption></figure>
{% endstep %}
{% endstepper %}


# Create and edit agenda

{% hint style="info" %}
To create and work with the agenda, you must be the Meeting organiser or a Meeting admin. If you’re the organiser and want to co-create the agenda with others, make sure they are assigned as [Meeting admins](/using-hippoly/meetings/manage-meeting-participants#make-participant-meeting-administrator).
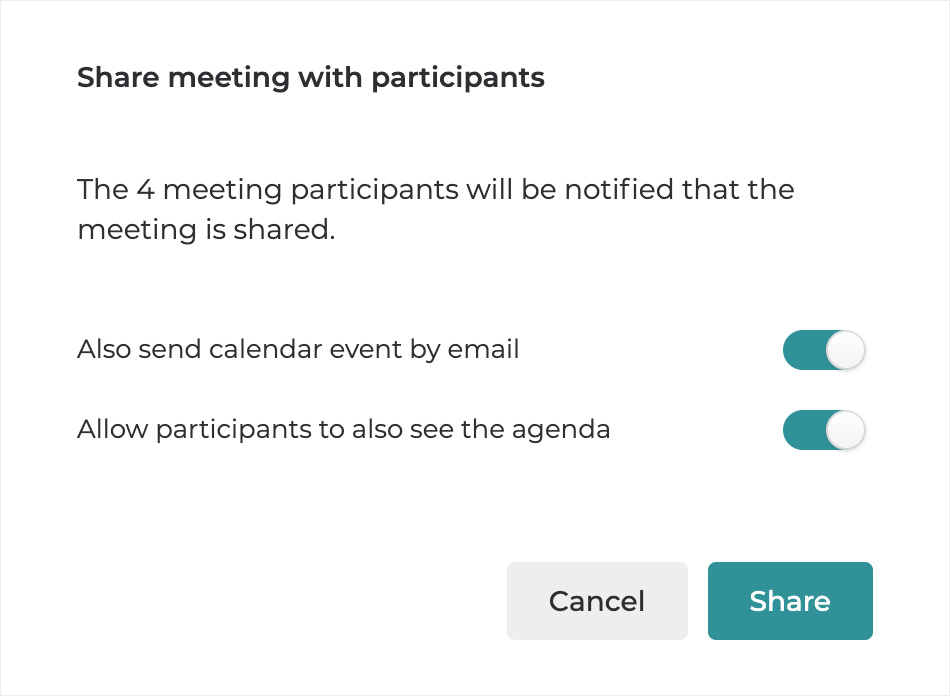
{% endhint %}

{% stepper %}
{% step %}

## Create an agenda

Open the **Meeting panel** and select the `Agenda & Files` tab.

You can start building your Agenda in four different ways. No matter which option you choose, you’ll still have full flexibility to tailor the document to your Meeting’s needs.

* Blank agenda document
* From built in templates
* From an agenda created in a previous meeting
* With help from AI

{% tabs %}
{% tab title="Blank document" %}

1. Click `New empty agenda`  &#x20;

<figure><img src="/files/TExodPvWyl8tDrcfzKZf" alt="" width="375"><figcaption><p>New blank agenda document</p></figcaption></figure>

2. A **draft** agenda document will be created and opened in the agenda builder. You are now ready to start adding agenda items.
   {% endtab %}

{% tab title="From template " %}
Hippoly offers various built-in agenda templates to save time. The available templates vary depending on the organization and workspace type.&#x20;

1. Click `Create from template`&#x20;

<figure><img src="/files/s39lyUFpY6kabwcOgFnH" alt="" width="375"><figcaption><p>Create agenda from template</p></figcaption></figure>

2. Click on a `Template`&#x20;

<figure><img src="/files/dBaDyR3MAlqh1oRP6r7N" alt="" width="375"><figcaption><p>Select agenda template</p></figcaption></figure>

2. A **draft** agenda document will be created and opened in the agenda builder. You are now ready to start editing the agenda and adding or removing agenda items.
   {% endtab %}

{% tab title="From a previous agenda" %}
To save time, you can create a new agenda by duplicating one from a previous meeting. All content, except for files attached to the original agenda, will be copied to the new one.

1. Click `Use agenda from a previous meeting` .

<figure><img src="/files/3zQc1mGlhK22x0gOEsim" alt="" width="375"><figcaption><p>Create by duplicating a previous agenda</p></figcaption></figure>

2. All previous meetings you have access to and that have a **shared** agenda will be listed. Click on the `Meeting` you want to duplicate the agenda from.

<figure><img src="/files/ValykgUw8CuEzDGrV8AC" alt="" width="375"><figcaption><p>Select the meeting to duplicate agenda from</p></figcaption></figure>

3. A **draft** agenda document will be created and opened in the agenda builder. You are now ready to start editing the agenda and adding or removing agenda items.
   {% endtab %}

{% tab title="With AI" %}
If you want Hippoly to suggest an agenda for a specific meeting topic, follow this steps.&#x20;

1. Click `Suggest agenda using AI` .

<figure><img src="/files/LiFNhkLnyGq39HpQZfje" alt="" width="375"><figcaption><p>Create agenda using AI</p></figcaption></figure>

2. In the dialog that appear, write a short description of what the meeting will be about and click `Suggest` .

<figure><img src="/files/Qc8U5gWfWISAGxzpUsIQ" alt="" width="563"><figcaption><p>Suggest agenda dialog with meeting description example</p></figcaption></figure>

3. A **draft** agenda document with suggested content will be created and opened in the agenda builder. You can now start editing the agenda and adding or removing agenda items. If the suggested content doesn't meet your needs, you can [delete the agenda](/using-hippoly/meetings/delete-agenda) and start over.
   {% endtab %}
   {% endtabs %}

{% endstep %}

{% step %}

## Add, move and remove agenda items

An agenda consists of agenda items, each requiring a **title** and optionally including an assigned **responsible person**, **time allocation**, **description**, and **attached files**.

1. **To add a new agenda item** click the **`+`**  button at the bottom of an existing item.
2. Give the the agenda item a **title** and optionally add information to the other fields.&#x20;

<figure><img src="/files/jyWYzi8WXmZe36OhjfDy" alt="" width="563"><figcaption></figcaption></figure>

**Agenda items can be moved** up and down within the agenda document. To move a agenda item do as follow.

1. Move the cursor over the item you want to move.
2. Click the `Move item up` or `Move item down` buttons located at the top right corner of the agenda item.

<figure><img src="/files/cFeFCg7sMbtwST3yB0Bs" alt="" width="563"><figcaption><p>Move agenda item up and down</p></figcaption></figure>

Agenda items can be structured in a two level hierarchy. **To convert an agenda item to a sub-item** follow these steps.

1. Move the cursor over the item you want to make a sub-item.
2. Click the `Make sub-item` button located at the top left corner of the agenda item. &#x20;

<figure><img src="/files/iPljbh7dCZvJoCYdvO0A" alt="" width="563"><figcaption><p>Indent agenda item to make sub-item</p></figcaption></figure>

<figure><img src="/files/WNFrEgwdbTsGnxgOr5LP" alt="" width="563"><figcaption><p>Agenda item indented as sub-item</p></figcaption></figure>

Sometimes you might want to **remove one or more agenda items** from the agenda document. To remove an agenda item follow these steps.

1. Move the cursor over the item you want to remove.
2. Click the `Remove item` button located at the top right corner of the agenda item. &#x20;

<figure><img src="/files/sw8xkCiMIvGiGYhHJcCH" alt="" width="563"><figcaption><p>Remove agenda item from document</p></figcaption></figure>
{% endstep %}

{% step %}

## Assign responsibility and time allocation

{% hint style="info" %}
**Choosing a Responsible person and setting Time allocation is optional** and are purely informational and do not trigger any automated processes.
{% endhint %}

1. Click the `Responsible` label on the agenda item and select the person who are responsible from the drop-down list.
2. Click the `Time` label on the agenda item and select the time you want to allocate for the specific item in the drop-down list.&#x20;
   {% endstep %}

{% step %}

## Add a description to agenda items

Adding a description to an Agenda item helps clarify discussion or decision points. You can [format the text and include images, links,](#description-text-formatting) and other relevant details.

{% hint style="info" %}
If you at a later stage chooses to base the Meeting minutes on the Agenda, the Agenda item title and description will be transferred to the minutes document. This allows you to begin drafting the Meeting minutes while building the Agenda.
{% endhint %}
{% endstep %}

{% step %}

## Attach files to agenda items

Attaching files to agenda items improves structure and readability for participants. You can upload files from your device or reference files already stored in your workspace.

1. Click the `Add file` button located to the right of the item title.
2. Select if you want to upload or referencing an already uploaded file to the agenda item.\
   You can also upload files by dragging and dropping them from your device onto the agenda item.

<figure><img src="/files/SQ6qQyAbSHXuXtq2070B" alt="" width="563"><figcaption><p>Adding files to agenda item</p></figcaption></figure>
{% endstep %}

{% step %}

## Share the agenda

When you're satisfied with the Agenda, it’s time to share it with the Meeting participants. To do so, click the `Share Agenda` button in the top-right corner of the Agenda builder.
{% endstep %}
{% endstepper %}

## Description text formatting

Adding a description to an agenda item helps clarify discussion or decision points. You can format this text, including images and links. To format, follow these steps.

1. Mark the text that you want to format.
2. A toolbar will appear on the agenda item
3. Select the formatting option you like to apply on your text. You can choose **Bold**, **Italic**, **Underline**, **Ordered list** and **Unordered list.**

<figure><img src="/files/jYcFKWaW0OX6RJhACgAe" alt="" width="563"><figcaption><p>Formatting toolbar on an agenda item</p></figcaption></figure>

4. Click the `Image` button in the toolbar if you want to upload and insert an image inline with the description text.
5. Write or paste a URL in the description text to create a clickable link.

## AI suggested agenda sub-items&#x20;

For meetings with complex topics that need to be divided into smaller discussion points, Hippoly can assist by suggesting agenda sub-items using AI. This comes handy especially when you're short on ideas. Follow these steps to get sub-item suggestions.

1. Move the cursor over the `+`  button at the bottom of an existing item.
2. Click the `Suggest sub-items` button

<figure><img src="/files/UoGqz0PYr5u9mjf3Yc1u" alt="" width="563"><figcaption><p>Suggest sub-items using AI</p></figcaption></figure>

3. A dialog will appear with the item's text pre-filled in the input field, serving as the basis for the suggestions. You can modify this text to add more details.

<figure><img src="/files/oJiZgyBXTe1H290lG6tm" alt="" width="563"><figcaption><p>Suggest sub-items dialog</p></figcaption></figure>

4. Click the `Suggest` button.
5. Five to six AI-generated suggestions will be added to the agenda as sub-items. You have the option to edit or remove any suggestions that don't meet your needs.

## Keyboard shortcuts

Keyboard shortcuts in the Agenda Builder are tailored to enhance efficiency and productivity. The following are some useful shortcuts.

{% tabs %}
{% tab title="Mac" %}
`Enter` to **create a new agenda item** while focused on an item title field.

`Shift + Enter` to **create a new agenda item** while focused on an item description field.

`Tab` to **create sub-item** while focused on an empty item title field.

`Shift + ↑` to **move agenda item up** in the document while focused on the item's title field.

`Shift + ↓` to **move agenda item down** in the document while focused on the item's title field.

`Command(⌘) + b` to **bold** text item in the description field.

`Command(⌘) + u` to **underline** text in the item description field.

`Command(⌘) + i` to **italicize** text in the item description field.
{% endtab %}

{% tab title="PC" %}
`Enter` to **create a new agenda item** while focused on an item title field.

`Shift + Enter` to **create a new agenda item** while focused on an item description field.

`Tab` to **create sub-item** while focused on an empty item title field.

`Shift + ↑` to **move agenda item up** in the document while focused on the item's title field.

`Shift + ↓` to **move agenda item down** in the document while focused on the item's title field.

`Ctrl + b` to **bold** text item in the description field.

`Ctrl + u` to **underline** text in the item description field.

`Ctrl + i` to **italicize** text in the item description field.
{% endtab %}
{% endtabs %}


# Update shared agenda


# Download agenda

If you would like to download the Agenda as a .pdf file to your device, follow these steps.&#x20;

{% stepper %}
{% step %}
Open the agenda.
{% endstep %}

{% step %}
Click the `Download` button at the top right corner of the agenda document.

{% hint style="info" %}
If the agenda includes attached files, these won't be included in the downloaded agenda. You'll need to download these files separately.
{% endhint %}

<figure><img src="/files/o7MhdZpGDqWB31dcE0os" alt="" width="563"><figcaption><p>Download agenda as pdf</p></figcaption></figure>
{% endstep %}
{% endstepper %}


# Delete agenda

To be able to delete an agenda, you must be a **Meeting Organiser** or **Meeting Administrator**, and the agenda must be in editing mode.&#x20;

{% stepper %}
{% step %}
Open the agenda in the Agenda Builder.
{% endstep %}

{% step %}
Ensure the agenda is in **edit mode**. If not, click the `Edit` button at the top left corner of the Agenda Builder.
{% endstep %}

{% step %}
Click the `Trash bin` button at the top right corner.

<figure><img src="/files/Rtl5AONQCumpTvrr9fK0" alt="" width="563"><figcaption><p>Delete agenda</p></figcaption></figure>
{% endstep %}

{% step %}
A confirmation dialog will appear. Click `Delete` to confirm the deletion.

<figure><img src="/files/TMgUO6O0sDQdpkZ9mPSy" alt="" width="375"><figcaption><p>Delete agenda confirmation</p></figcaption></figure>

{% hint style="warning" %}
**Note:** Once deleted, an agenda cannot be restored, but any **files uploaded** to it will remain. To delete these files, use the Meeting and Files tab in the Meeting panel. Alternatively, you can reattach them to a new agenda.
{% endhint %}
{% endstep %}
{% endstepper %}


# Create and edit meeting minutes

{% hint style="info" %}
The user who creates the Minutes document **automatically becomes the Meeting Secretary**. [This can be changed later if needed](#change-meeting-secretary).
{% endhint %}

{% stepper %}
{% step %}

## Create minutes

Open the **Meeting panel** and select the `Minutes` tab.

You can start creating your Minutes in four different ways.

* Blank document
* Based on the meeting agenda (most common)
* Copy minutes from a previous meeting
* With help from AI

{% tabs %}
{% tab title="Blank document" %}
Creates a blank document where you add all Minutes sections and notes from scratch.

<figure><img src="/files/Am5pg26ZJ6aPHm1LwfSX" alt="" width="375"><figcaption></figcaption></figure>
{% endtab %}

{% tab title="Based on meeting agenda" %}
Creates a document where all Agenda items become Minutes sections. Any description text from the Agenda items is also copied into the Minutes sections. You can remove or add Minutes sections if needed.

{% hint style="info" %}
To create Minutes based on the Agenda, the Agenda must be **shared** and not in draft status.
{% endhint %}

<figure><img src="/files/jcQm74fHGJ2NnOP7zciL" alt="" width="375"><figcaption></figcaption></figure>
{% endtab %}

{% tab title="Copy from a previous meeting" %}
Creates a document by copying the Minutes from a previous Meeting. All Minutes sections and text will be copied.

{% hint style="info" %}
It is only possible to copy previous Meeting Minutes **that have been shared** and are no longer in draft status.
{% endhint %}

1. Click `Copy minutes from a previous meeting` .

<figure><img src="/files/zzcwWIRh8rWnVUeWyFCf" alt="" width="375"><figcaption></figcaption></figure>

2. All previous Meetings you have access to and that have **shared** Minutes will be listed. Click the `Meeting` you want to copy the Minutes fro&#x6D;**.**

<figure><img src="/files/CWZjQ6k7snp6cxmg9J6T" alt="" width="375"><figcaption></figcaption></figure>
{% endtab %}

{% tab title="With help from AI" %}
This option allows you to create a Minutes document by simply adding a short description of what was discussed or decided during the Meeting.

1. Click `Suggest minutes` .

<figure><img src="/files/Jz0VrMFj0mRT7gIVDQtr" alt="" width="375"><figcaption></figcaption></figure>

2. In the dialog that appear, write a short description of what was discussed or decided and click `Suggest` .

<figure><img src="/files/Xb068ua6DKkwDTTYJP7d" alt="" width="375"><figcaption></figcaption></figure>
{% endtab %}
{% endtabs %}

Regardless of which option you choose to create the Minutes, the document will open in the Minutes editor. **The document will have draft status**, meaning that only you, as the Meeting Secretary, can see it until you choose to share it with the Meeting participants.
{% endstep %}

{% step %}

## Manage attendance

In the attendance section, you record who was present at the Meeting, including full attendees and any guests participating in specific Agenda items. This ensures that the Minutes accurately reflect who took part in the Meeting.

### Edit attendance

Click the `Edit attendance` button to open the **Attendande dialog**.

<figure><img src="/files/ozYbTckpxSQVgpTDCXly" alt="" width="563"><figcaption></figcaption></figure>

### Absent or Present

All participants invited to the Meeting are automatically listed as present if they accepted the invitation or replied “maybe,” and as absent if they declined. To change this, use the `Attending` toggles.

<figure><img src="/files/cxMSM9AAI9lKLuyufxYz" alt="" width="563"><figcaption></figcaption></figure>

### Show titles

If you want attendees titles to be shown in the attendance section, use the `Title` toggle. Titles are fetched from the title each user has in the workspace and are managed by workspace administrators. However, if needed, you can edit the titles for each individual Minutes document.

<figure><img src="/files/qoB9ij2hO9JerVvNqHIv" alt="" width="563"><figcaption></figcaption></figure>

### Change the order of attendees

If you want to change the order in which attendees appear in the attendance section, click the `Drag handle` to the right of an attendee and drag them to the desired position.

<figure><img src="/files/sdya1McpIrtQQqTTK6qP" alt="" width="563"><figcaption></figcaption></figure>

### Add external attendee

If you want to add an external attendee to the attendance section, click the `Add external attendee` button.

<figure><img src="/files/E0o0bU0n6uUPHytySrMG" alt="" width="563"><figcaption></figcaption></figure>

In the dialog that appears, enter the person’s **full name**, optionally add a reason for their attendance, and then click the `Add` button.

<figure><img src="/files/yRGI23qs9LlpDYV2MqH4" alt="" width="375"><figcaption></figcaption></figure>

If you need to edit or remove an external attendee, use the `Edit` or `Remove` buttons.

<figure><img src="/files/DnldCfMJw3GzDGdndGN2" alt="" width="563"><figcaption></figcaption></figure>

### Hide a participant from the attendance section

If you want to hide an invited user from the attendance section, you can do so by using the `Hidden` toggles.

<figure><img src="/files/Jzq46jOEVRVzPGwvMCbc" alt="" width="563"><figcaption></figcaption></figure>

### Hide entire attendance section

If you want to hide the entire attendance section from the Minutes document, use the `Hide entire attendance section` toggle located in the **Edit attendance menu**.

<figure><img src="/files/gd2ItKXXbe9XUQKmx69V" alt="" width="563"><figcaption></figcaption></figure>
{% endstep %}

{% step %}

## Write minutes

A minutes document consists of sections, each with a **title** and a block for the **minutes notes**. Use the `arrow keys` on your keyboard to seamlessly navigate through the document’s sections.

In a sections notes block, you write the Minutes text for that section. You can format the text by selecting it. A toolbar will appear where you can choose the formatting you want to apply, such as **Bold**, **Italic**, **Underline**, **Ordered list,** or **Unordered list**. You can also insert **images** into the section using the menu. In addition to the menu options, you can use common keyboard shortcuts that you’re familiar with from other text editors.

<figure><img src="/files/a0gAztXVWFD6XnGtW6xq" alt="" width="563"><figcaption></figcaption></figure>

### Write Minutes text with AI

If you’ve jotted down notes during the Meeting and are now turning them into a readable Minutes document, you can use AI to help formalise the text.

1. Move the cursor over the `+` button at the bottom of an existing item.
2. Click the `Suggest text for this section` button

<figure><img src="/files/tBsFgyQDN90zrUSzS8kH" alt="" width="563"><figcaption></figcaption></figure>

3. A dialog will appear with the sections's title and notes text pre-filled in the input field, serving as the basis for the suggestions. You can modify this text to add more details.

<figure><img src="/files/aHuNlpXEKXKrSdxsT2wz" alt="" width="563"><figcaption></figcaption></figure>

4. Click the `Suggest` button.
5. A new block with suggested text will be added to the section. You can use it as is, or use it as a base and edit it to fit your needs. If you don’t want to use the suggested text, simply delete it.

<figure><img src="/files/V3Z5ZnjYEkgNeYUFEeQY" alt="" width="563"><figcaption></figcaption></figure>

### Add, move and remove minutes sections

**To add a new section** click the `+` button at the bottom of an existing section.

<figure><img src="/files/GuHhETQvvbkxdHLHSzgz" alt="" width="563"><figcaption></figcaption></figure>

Sections can be structured in a two level hierarchy. **To convert an section to a sub-subsection** Click the `Make sub-section` button.

<figure><img src="/files/tkdTDUHfcyHg7Oxc2qYd" alt="" width="563"><figcaption></figcaption></figure>

A converted section will appear as an indented subsection to the section above.

<figure><img src="/files/aataYVpMuKjM0FtinnWT" alt="" width="563"><figcaption></figcaption></figure>

Use the `Move item up` or `Move item down` buttons to reorder sections within the document.

<figure><img src="/files/K4gYI71hsNMjQoMPBLq9" alt="" width="563"><figcaption></figcaption></figure>

To delete a section, use the `Trash bin` button. A confirmation dialog will appear where you need to **confirm** the deletion.

<figure><img src="/files/t9Q4ReY5G8R78D6Zk6bJ" alt="" width="563"><figcaption></figcaption></figure>
{% endstep %}

{% step %}

## Next steps: share, approve or e-sign

Once you’re satisfied with the Minutes, you can move on to the final steps. You can share the document with the Meeting participants, manage any approval or review needed and, if required, complete the process by e-signing the Minutes.

Click the `Manage minutes` button in the top-right corner of the **Minutes editor** and choose how you want to proceed from the menu.

<figure><img src="/files/faMbbTx6XEa8vMjBZ3dO" alt="" width="563"><figcaption></figcaption></figure>

### Share minutes

Until the Minutes are shared, they are only visible to the Secretary. Once shared, all Meeting participants can view them, but only the Secretary can edit the document. As the Secretary, you can choose to share the Minutes at any time. If you share them during the Meeting while writing, participants will be able to see your live edits.

### Unshare minutes

If you, as the Secretary, have shared the Minutes and for some reason want to unshare them, you can do so by clicking the `Manage minutes` button and selecting the `Make minutes private` option.

<figure><img src="/files/N9eJi15pxsGyYZKYR9DU" alt="" width="563"><figcaption></figcaption></figure>

### Share for review and approval

If you want to share the Minutes for review and approval, select that option in the **Manage minutes menu**. To learn more about this process, continue reading the [Approve meeting minutes](/using-hippoly/meetings/approve-meeting-minutes) article.

### E-sign minutes

If you want to e-sign the Minutes, select that option in the **Manage minutes menu**. To learn more about this process, continue reading the [Send meeting minutes for e-signing](/using-hippoly/meetings/e-sign-meeting-minutes) article.
{% endstep %}
{% endstepper %}

## Change Meeting Secretary

The user who creates the Minutes document for a Meeting automatically becomes the Secretary, and any Meeting participant can take on this role. Sometimes the Secretary needs to be changed, and the process is simple. **It must be initiated by the user who will take over the Secretary role**, and only that user can perform the change.

{% stepper %}
{% step %}
To take over as Secretary, open the **Meeting panel** and select the `Minutes` tab.
{% endstep %}

{% step %}
Click the `Make me Secretary` button.

<figure><img src="/files/cLsQXtngeBdPqyKHLsY4" alt="" width="563"><figcaption></figcaption></figure>
{% endstep %}

{% step %}
You are now the Meeting Secretary and can edit and manage the Minutes.
{% endstep %}
{% endstepper %}

## Upload minutes document

If you have written your Minutes in another application, such as Word or Google Docs, you can upload the document to your Hippoly Meeting. The file must be a PDF, and the file size cannot exceed 10 MB.

{% hint style="info" %}
**Note:** If you have created a minutes document in Hippoly using the built-in editor, you cannot upload a minutes file for the same meeting unless you first [delete the existing minutes document](/using-hippoly/meetings/delete-meeting-minutes).
{% endhint %}

{% stepper %}
{% step %}
Open the **Meeting panel** and select the `Minutes` tab.
{% endstep %}

{% step %}
Click the `Select file` button

<figure><img src="/files/xAvvyHDrnRFWAVGbz45c" alt="" width="563"><figcaption></figcaption></figure>
{% endstep %}

{% step %}
Select the minutes file you want to upload from your device and confirm.

<figure><img src="/files/pjI51hTnQtvnyNHXGFBN" alt="" width="563"><figcaption></figcaption></figure>
{% endstep %}

{% step %}
The minuts are now uploaded to the meeting and you can, if you want, [initiate e-signing of the uploaded minutes file](/using-hippoly/meetings/e-sign-meeting-minutes).
{% endstep %}
{% endstepper %}


# Approve meeting minutes


# E-sign meeting minutes

E-signing meeting minutes works differently from signing regular files or Hippoly Docs. The signing flow is accessed from the **meeting panel** rather than the folder view, and you can optionally include attachments such as supporting documents and files from the meeting.

{% hint style="info" %}
If you want to e-sign a regular file or a Hippoly Doc, see [Send for e-signing](/using-hippoly/e-signing/e-sign-files-and-docs).
{% endhint %}

## Before you start

Before meeting minutes can be e-signed, the following must be in place:

* The **meeting minutes** (protocol) must have been created in the meeting.
* If your organisation uses an approval flow, the minutes should be approved before signing. Any ongoing review is automatically cancelled when the signing process starts.

## Start the signing flow

{% stepper %}
{% step %}
Navigate to the meeting and open the **Protocol** panel.
{% endstep %}

{% step %}
Click the `Sign` action on the protocol. Hippoly generates a PDF of the meeting minutes.
{% endstep %}

{% step %}
A preview of the generated PDF is shown so you can verify the content before sending it for signing.
{% endstep %}

{% step %}
You can include supporting documents from the meeting as part of the signing package. Only files that can be converted to PDF are included. This is useful when the minutes reference specific documents that the signers need to see together with the protocol.
{% endstep %}

{% step %}
Add the people who need to sign the minutes:

* **Workspace members:** search by name and select from the list.
* **External parties:** enter the person's name and email address.

For each signer, select a [signing method](/using-hippoly/e-signing/signing-methods) that determines how they verify their identity.
{% endstep %}

{% step %}
By default all signers can sign in parallel. If signatures need to happen in a specific sequence, enable `Set signing order` and arrange the signers in the desired order.
{% endstep %}

{% step %}
Review the settings and click `Send for signing`. The protocol status changes to **Signing** and all signers are notified.
{% endstep %}
{% endstepper %}

## After signing completes

When all signers have signed:

* The protocol status changes to **Signed**.
* The signed PDF is stored as a permanent file in the meeting folder, accessible to all meeting participants.
* The minutes can no longer be edited.

You can track the signing progress and send reminders from the [signing management view](/using-hippoly/e-signing/manage-signing-process).


# Download meeting minutes

If you would like to download the Minutes as a PDF file to your device, follow these steps.&#x20;

{% stepper %}
{% step %}
Open the Minutes document.
{% endstep %}

{% step %}
Click the `Download` button at the top right corner of the Minutes document.

<figure><img src="/files/ledgIitRLHk7kuEAMSnr" alt=""><figcaption></figcaption></figure>
{% endstep %}
{% endstepper %}


# Download signed meeting minutes


# Delete meeting minutes

To be able to delete a Minutes document, you must be the **Meeting Secretary**, and the Minutes must be in editing mode.&#x20;

{% stepper %}
{% step %}
Open the document in the **Minutes editor**.
{% endstep %}

{% step %}
Ensure the Minutes is in **edit mode**. If not, click the `Edit` button at the top left corner of the  editor.
{% endstep %}

{% step %}
Click the `Trash bin` button at the top right corner.

<figure><img src="/files/Svs6dz93AU30FmO2UAok" alt=""><figcaption></figcaption></figure>
{% endstep %}

{% step %}
A confirmation dialog will appear. Click `Delete` to confirm the deletion.

<figure><img src="/files/0DfmJ6rqon0GWxBFzZJV" alt="" width="375"><figcaption></figcaption></figure>

{% hint style="warning" %}
**Note**: Once deleted, the Meeting Minutes document cannot be restored. However, the signed Minutes PDF can be restored.
{% endhint %}
{% endstep %}
{% endstepper %}


# Create past meeting


# Calendar wheel


# Meeting statuses


# Meeting roles and permissions

## Roles

There are different roles a user can have for a meeting.

| **Role**                 | **Description**                                                                                                                |
| ------------------------ | ------------------------------------------------------------------------------------------------------------------------------ |
| Meeting Organiser        | The user who create a meeting will automatically be the Organiser                                                              |
| Meeting Admin            | Meeting Participants can be assigned as Meeting Admins. This grants them the same permissions for the Meeting as the Organiser |
| Meeting Participant      | Users added as Participants to a meeting                                                                                       |
| Meeting Secretary        | The user who create the Minutes for a meeting will automatically get the role of Secretary                                     |
| Meeting Minutes Reviewer | Participants appointed by the Secretary as Minutes Reviewer                                                                    |

## Permissions

Meeting Permissions are determined by the user's Role. Refer to the table below for detailed information on which Role is required for specific permissions.

{% hint style="info" %}
**Note:** Workspace administrators **will have the same permissions as the Organiser** on all meetings within the workspace.&#x20;
{% endhint %}

<table data-header-hidden><thead><tr><th width="383"></th><th></th></tr></thead><tbody><tr><td><strong>Permission</strong></td><td><strong>Role</strong></td></tr><tr><td>Create meeting</td><td>Workspace user</td></tr><tr><td>Edit meeting</td><td>Organiser or Meeting Admin</td></tr><tr><td>Upload files to meeting</td><td>Organiser or Meeting Admin</td></tr><tr><td>Create agenda</td><td>Organiser or Meeting Admin</td></tr><tr><td>Edit agenda</td><td>Organiser or Meeting Admin</td></tr><tr><td>View draft agenda</td><td>Organiser or Meeting Admin</td></tr><tr><td>Share agenda</td><td>Organiser or Meeting Admin</td></tr><tr><td>View meeting</td><td>Meeting Participant</td></tr><tr><td>View shared agenda</td><td>Meeting participant</td></tr><tr><td>Create minutes</td><td>Meeting participant</td></tr><tr><td>Edit minutes</td><td>Meeting Secretary</td></tr><tr><td>View draft minutes</td><td>Meeting Secretary</td></tr><tr><td>View shared minutes</td><td>Meeting participant</td></tr><tr><td>View minutes under review</td><td>Meeting Secretary or Selected Reviewer</td></tr><tr><td>Create Review Comments</td><td>Meeting Secretary or Selected Reviewer</td></tr><tr><td>View minutes under signing</td><td>Meeting participant</td></tr><tr><td>View signed minutes</td><td>Meeting participant</td></tr><tr><td>Share minutes for review</td><td>Meeting Secretary</td></tr><tr><td>Share minutes</td><td>Meeting Secretary</td></tr><tr><td>Start e-signing of minutes</td><td>Meeting Secretary</td></tr><tr><td>Manage minutes e-signing</td><td>-</td></tr><tr><td>Change Meeting Secretary</td><td>Meeting participants?</td></tr><tr><td>Delete meeting minutes</td><td>Meeting Secretary, Organiser, Meeting admin</td></tr><tr><td>Upload minutes created outside Hippoly</td><td>Meeting Participants</td></tr><tr><td>Start e-signing of uploaded minutes</td><td>Meeting Participants</td></tr><tr><td>Manage e-signing of uploaded minutes</td><td>-</td></tr><tr><td>Delete uploaded minutes</td><td>-</td></tr><tr><td>Delete Meeting</td><td>Organiser or Meeting Admin</td></tr><tr><td>Delete Agenda</td><td>Organiser or Meeting Admin</td></tr></tbody></table>


# Docs

Docs lets you create, edit, and collaborate on rich text documents directly in your workspace, with real-time editing, version history, and built-in e-signing.

## **Understand Docs**

Docs is a collaborative document editor built into your workspace. It lets your team write, review, and approve documents without leaving Hippoly, so the latest version and the signed copy live in one place.

![Collaborative document editing in Hippoly](/files/OKsyVM9haMvls7uWIDZi)

Documents in Hippoly go through a clear lifecycle. A new document starts as a **Draft** that only you and the people you invite can see. When it's ready, you share it with the rest of the workspace and it becomes **Shared**. If the document needs to be formally approved, it can be **e-signed** directly in Hippoly and after signing it's locked as read-only, and anyone with access can download the signed PDF.

### What Docs enables

* **Write together in real time.** See your collaborators' cursors and edits as they type, so there's no need to pass documents back and forth.
* **Control visibility with drafts.** Work privately with a few invited editors before sharing a document with everyone in the workspace.
* **Manage versions safely.** [Start a new version](/using-hippoly/hippoly-docs/update-shared-doc#start-a-new-version) of an already shared document without affecting what the rest of the workspace sees until you're ready to [share the changes](/using-hippoly/hippoly-docs/update-shared-doc#share-changes).
* **Review full history.** Every version is saved automatically. You can browse earlier versions, see what changed, and [restore a previous version](/using-hippoly/hippoly-docs/version-history) if needed.
* **E-sign directly in Hippoly.** [Send the document for signing](/using-hippoly/hippoly-docs/e-sign-document) without leaving the workspace. Once signed, the signed PDF is stored alongside the document.
* **Work from templates.** Start from a blank page or pick one of the built-in templates. You can also [save your own documents as templates](/using-hippoly/hippoly-docs/save-as-template) for the rest of the team to reuse.
* **Organise inside folders.** Documents live in [folders](/using-hippoly/files-and-folders) just like files, so you can move them around and use them in [meetings](/using-hippoly/meetings), attach them to [posts](/using-hippoly/posts) and more.

## Docs FAQ

<details>

<summary>Who can see a document I create?</summary>

New documents start as **Drafts**, which means only you and the people you explicitly invite as collaborators can see them. When you're ready to let everyone in the workspace see the document, you [share it](/using-hippoly/hippoly-docs/share-document) and it becomes **Shared**. See [document statuses](/using-hippoly/hippoly-docs/document-statuses) for more details.

</details>

<details>

<summary>Can I edit a document that's already been shared?</summary>

**Yes**. On a shared document, you can [start a new version](/using-hippoly/hippoly-docs/update-shared-doc#start-a-new-version). The changes you make are only visible to you and your collaborators until you [share the changes](/using-hippoly/hippoly-docs/update-shared-doc#share-changes). Everyone else continues to see the previously published version.

</details>

<details>

<summary>What happens to a document when it's signed?</summary>

Once a document has been [e-signed](/using-hippoly/hippoly-docs/e-sign-document), it becomes **read-only**. No one can make further changes to the content, not even the original creator of the document. The signed PDF is stored with the document and can be downloaded by anyone with access.

</details>

<details>

<summary>Can I recover a document I deleted by mistake?</summary>

**No.** Deleting a document is permanent and can't be undone. If you only want to roll back recent changes rather than remove the whole document, use [version history](/using-hippoly/hippoly-docs/version-history) instead. See [delete document](/using-hippoly/hippoly-docs/delete-doc).

</details>

<details>

<summary>What happens if two people edit a document at the same time?</summary>

Everyone works on the same live version. You'll see each collaborator's avatar and cursor in the editor, and changes are synced in real time, so there's no need to reload or pass the document back and forth. See [edit document](/using-hippoly/hippoly-docs/edit-doc).

</details>

<details>

<summary>Can I use a document in a meeting?</summary>

**Yes**. When building a meeting agenda, you can attach a document to an agenda item. See [attach files to agenda items](/using-hippoly/meetings/create-and-edit-agenda#attach-files-to-agenda-items).

</details>


# Create document

Every new document in Hippoly starts as a **draft** that only you and anyone you choose to invite can see. You can start from a blank page or use a previously saved template.

{% stepper %}
{% step %}
Navigate to the **folder** where you want the new document to live, then click the `New` button and select the `New document` option from the menu.

![New document menu](/files/30dYOdo5AtRdsEwNWFMy)
{% endstep %}

{% step %}
Give the document a name and click the `Create document` button.

If there are previously saved templates in your workspace, you will have the option to choose from one of those or create a blank document before naming it.

![Choose a template](/files/S8l5hc9lr0wYt1lTtFox)
{% endstep %}

{% step %}
The new document is created as a **draft**, visible only to you until you [share it with the rest of the workspace members](/using-hippoly/hippoly-docs/share-document) or [invite collaborators to the draft](/using-hippoly/hippoly-docs/invite-collaborators).
{% endstep %}
{% endstepper %}


# Edit document

The Docs editor gives you a familiar set of text-editing tools. You can format text, create lists and tables, add images and links, and collaborate with others in real time.

## Enter edit mode

When you [create a new document](/using-hippoly/hippoly-docs/create-doc), it opens automatically in edit mode. For existing documents, click the `Edit` button in the top toolbar to [start a new version](/using-hippoly/hippoly-docs/update-shared-doc#start-a-new-version). While in edit mode, you'll see:

* An **Editing** label indicating the document is in edit mode
* A live save indicator showing when your changes have been saved
* A toolbar with the available editing tools

![Document in edit mode](/files/LYbpXG847QtAK06jQFKQ)

{% hint style="info" %}
Hippoly Docs saves your changes automatically and there's no manual save button. When the indicator shows **Saved**, your work is safely stored.
{% endhint %}

## Format text

Select the text you want to format, then use the buttons in the toolbar at the top of the editor.

* **Headings and paragraph style:** use the style dropdown to switch between paragraph text and Heading 1, 2, or 3.
* **Bold**, *Italic*, Underline and ~~Strikethrough~~: apply basic text styles.
* **Alignment:** align paragraphs left, center, or right.
* **Clear formatting:** remove all formatting from the selected text.
* **Undo / Redo:** step backwards or forwards through your recent changes.

## Lists

Use the toolbar to turn the current paragraph into a **bullet list** or an **ordered list**.

## Tables

1. Click the `Insert table` button in the toolbar.
2. When the cursor is inside a table, additional buttons appear to let you **add or remove rows and columns**, **merge or split cells**, or **delete the whole table**.

## Images

Click the `Insert image` button in the toolbar, then choose an image from your device to add it inline with the document text.

## Links

Links in Hippoly Docs can point to the web or to another document or file inside your workspace.

1. Select the text you want to turn into a link, then click the `Insert link` button in the toolbar.
2. In the link dialog, choose one of the tabs:
   * **Web link:** paste a URL into the field.
   * **File in Hippoly:** pick another document or file in your workspace to link to.
3. Click `Insert` to add the link.

To edit or remove an existing link, click the link in the document and use the link dialog.

## Real-time collaboration

When more than one person is editing the same document, you'll see their avatars in the top-right corner of the editor and their cursors where they are currently typing. Changes are synced live, so there's no need to reload or refresh.

![Real-time collaboration in document editor](/files/laYl8lsfJe0uisvYazJp)


# Invite collaborators to draft

Collaborators are the people you invite to see and work on a draft document together with you.

{% stepper %}
{% step %}
Open the document and click the `dropdown arrow` next to the **Share** button and select `Invite to draft`.

![Invite to draft menu](/files/GEkg2vhNSNOCTLiLO6yI)
{% endstep %}

{% step %}
In the dialog, add the users you want to collaborate with and click the `Invite` button.

{% hint style="info" %}
The current list of collaborators is always shown in the dialog when you open it. You can change who have access to the **draft** at any time, by removing them from the list.

**Note:** The user who have cretaed the document will always be listed and can't be romved from the collaborator list.
{% endhint %}
{% endstep %}
{% endstepper %}


# Share document

Sharing a document takes it from a private **Draft** to a **Shared** document that everyone in the workspace can see. Do this once the document is ready for the whole team.

{% stepper %}
{% step %}
Open the draft document you want to share.
{% endstep %}

{% step %}
Click the `Share with everyone` button in the top-right corner of the editor.
{% endstep %}

{% step %}
Confirm the action in the dialog. The document is shared with the workspace and its status changes from **Draft** to **Shared**. Everyone in the workspace can now open and read it.
{% endstep %}
{% endstepper %}

{% hint style="info" %}
Need to make changes after sharing? You can [start a new version](/using-hippoly/hippoly-docs/update-shared-doc#start-a-new-version) to edit the document without affecting what everyone else sees until you're ready to [share the changes](/using-hippoly/hippoly-docs/update-shared-doc#share-changes).
{% endhint %}

{% hint style="info" %}
Working on a draft? You can [invite specific users as collaborators](/using-hippoly/hippoly-docs/invite-collaborators) before sharing it with everyone in the workspace.
{% endhint %}


# Update document

A shared document is visible to everyone in the workspace and is read-only by default. Anyone with view access can edit it by starting a new version.

Starting a new version creates a working copy that's only visible to users participating in the editing. The rest of the workspace continues to see the current shared version until the new version is shared.

## Start a new version

{% stepper %}
{% step %}
Open the shared document you want to update.
{% endstep %}

{% step %}
Click the `Edit` button in the top toolbar. A new version is created as a working copy.

![Edit shared document](/files/HV9cYcpgkaJZBOyOewHT)

{% hint style="info" %}
If someone else has already started a new version, clicking `Edit` will add you as a collaborator on their version instead of starting a new one.
{% endhint %}
{% endstep %}

{% step %}
The document now shows an **Editing** label in the header. Your changes are only visible to you and the other collaborators, everyone else continues to see the currently shared version.
{% endstep %}

{% step %}
If you want to work on the new version together with others, invite them as collaborators by clicking the `dropdown arrow` next to the **Share** button and selecting `Invite to edit`.
{% endstep %}
{% endstepper %}

## Share changes

When the new version is ready, sharing the changes replaces the currently shared version with your updated content. After sharing, the new content is visible to everyone in the workspace.

{% hint style="info" %}
Sharing changes button is only available to **editors** of the new version in progress.
{% endhint %}

{% stepper %}
{% step %}
Open the document that has a new version in progress. You'll see the **Editing** label indicating that a new version is being worked on.
{% endstep %}

{% step %}
Click the `Share with everyone` button in the top-right corner of the editor.
{% endstep %}

{% step %}
Confirm the action in the dialog. The new version becomes the active shared version and is now visible to everyone in the workspace. Previous versions remain available in the [version history](/using-hippoly/hippoly-docs/version-history).
{% endstep %}
{% endstepper %}

## Discard new version changes

If the changes you made while working on a new version are not needed, for example you were just testing something out or a different approach is needed, you can discard them. The document reverts to the last shared version and the new version changes are removed.

{% hint style="warning" %}
Discarding new version changes is permanent. All edits made in the current new version will be deleted and can't be recovered.
{% endhint %}

{% stepper %}
{% step %}
Open the document with the new version in progress.
{% endstep %}

{% step %}
Click the `dropdown arrow` next to the **Share** button and select `Discard changes`.

![Discard changes menu](/files/SpmEdCoLYXbps1Fm1L2X)
{% endstep %}

{% step %}
Confirm the action in the dialog. The new version changes are removed and the document reverts to the currently shared version.
{% endstep %}
{% endstepper %}

## Update a signed document

Once a document has been signed, it's locked and converted to a signed PDF to preserve the signatures in a exportable format. Because of this, you can't start a new version of it the same way as with an unsigned document.

To make changes, create a new editable copy of the signed document instead. The copy starts as an unsigned draft that you can edit and share like any other document. The original signed PDF remains unchanged and stays available in the workspace.

{% stepper %}
{% step %}
Go to `Files` in the main menu.&#x20;
{% endstep %}

{% step %}
Navigate to the **folder** where the signed document is located.
{% endstep %}

{% step %}
Click the **menu icon** and select `Create editable copy`.

<img src="/files/XRGmT13u8f0VyMrjZDOo" alt="Signed document in folder" width="563">
{% endstep %}

{% step %}
A **draft** copy is created in the same folder, visible only to you. Make your updates and share it with the rest of the workspace when you're ready.
{% endstep %}
{% endstepper %}


# Version history

Hippoly keeps a full history of every version of your document. You can browse earlier versions, see what changed between them, restore and download a previous version if needed.

## Open version history

When viewing a document, click the `Details` button in the right toolbar and select the **Versions tab** in the panel. A list of versions is shown in chronological order, with the user who shared each change and when it was made.

![Details button](/files/CtsEyteUcyTMdLYnQ54m)

## View a previous version

Click a version in the list to open it in the editor. A banner at the top reminds you that you're viewing a previous version rather than the current content of the document.

To return to the latest version, click the `Latest version` button in the banner.

## See what changed

Hippoly can show you what changed compared to the previous version.

{% stepper %}
{% step %}
Open the version history.
{% endstep %}

{% step %}
Click the **menu icon** on the version you want to compare and select `Show what changed`.

<img src="/files/xnliJd3r9rxQeA2NI8Kq" alt="Version history list" width="375">
{% endstep %}

{% step %}
The version will open in the editor with insertions and deletions highlighted word-by-word

![Changes highlighted between versions](/files/XCiW6wcLVWCVJ5kakHWs)
{% endstep %}
{% endstepper %}

## Restore a previous version

If you want to bring back an earlier version of the document, you can restore it. Restoring does not delete the newer versions, it creates a new version with the restored content as the starting point.

{% stepper %}
{% step %}
Open the version history.
{% endstep %}

{% step %}
Click the **menu icon** on the version you want to restore and select `Restore` .
{% endstep %}

{% step %}
Confirm the action in the dialog. A new version is created with the content of the restored version. All previous versions remain in the history.
{% endstep %}
{% endstepper %}

## Download a previous version

You can download previous versions of a document at any time.

{% stepper %}
{% step %}
Open the version history.
{% endstep %}

{% step %}
Click the **menu icon** on the version you want to download and select `Download` .
{% endstep %}

{% step %}
The document will be downloaded as a PDF-file to your device.
{% endstep %}
{% endstepper %}


# E-sign document

Hippoly Docs supports e-signing directly in the workspace, using the same secure Scrive-powered e-signing as files and meeting minutes. Once a document is signed, it's locked as read-only and a signed PDF is stored alongside it.

{% hint style="info" %}
E-signing a document requires that your workspace has e-signing enabled and has available signing credits. Check with your workspace administrator if you're not sure.
{% endhint %}

{% stepper %}
{% step %}
Open the document you want to send for signing. The document should be ready for signing — once the signing flow starts, no more changes can be made.
{% endstep %}

{% step %}
Click the `Sign` action. If the document is still a draft, Hippoly will remind you that it's about to be shared as part of the signing flow.
{% endstep %}

{% step %}
Follow the prompts to add the signers and any additional signing options, then confirm. Hippoly sends the signing request.
{% endstep %}

{% step %}
While signing is in progress, the document shows a **Signing** indicator. Once all signers have signed, the document status changes to **Signed** and the signed PDF is stored alongside the document.
{% endstep %}
{% endstepper %}

## After signing

A signed document is **read-only** — no one can edit its content. You can still download the signed PDF and view the document's [version history](/using-hippoly/hippoly-docs/version-history). See [Download document](/using-hippoly/hippoly-docs/download-document) to get the signed PDF.


# Document templates

If you regularly create documents with the same structure, for example a board resolution, a report or a project brief, you can save an existing document as a template. Templates are available to everyone in the workspace the next time they [create a document](/using-hippoly/hippoly-docs/create-doc).

## Create document template

Document templates are created by saving an existing document as a template.

{% stepper %}
{% step %}
Go to `Files` in the main menu.
{% endstep %}

{% step %}
Navigate to the **folder** where the document you want to use as template is located.
{% endstep %}

{% step %}
Click the **menu icon** to the right of the document name and select `Save as template`.
{% endstep %}

{% step %}
Give the template a clear name and an optional description so other workspace members know when to use it, then click `Save`.
{% endstep %}
{% endstepper %}

The template is now available in the template picker when anyone in the workspace [creates a new document](/using-hippoly/hippoly-docs/create-doc).

## Update document template name and description

{% stepper %}
{% step %}
Go to `Files` in the main menu.
{% endstep %}

{% step %}
Click the `New` button and select the `New document` option from the menu.
{% endstep %}

{% step %}
In the **Create new document** dialog, click the **pen icon** on the template you want to rename.

<img src="/files/ZcjCRPqoCNSzEEvHH7N3" alt="Rename template" width="563">
{% endstep %}

{% step %}
A dialog appears where you can edit the template name and/or description. Make your changes and click `Save` to confirm.
{% endstep %}
{% endstepper %}

## Update document template content

Template content can't be edited directly. To update it, create a new document from the current template, make your changes, and save it as a new template. If you no longer want the old template to be used, remember to delete it.

## Delete document template

{% stepper %}
{% step %}
Go to `Files` in the main menu.
{% endstep %}

{% step %}
Click the `New` button and select the `New document` option from the menu.
{% endstep %}

{% step %}
In the **Create new document** dialog, click the **trash-bin icon** on the template you want to delete.

<img src="/files/jrz7VdnRZXhbK3JldJ7o" alt="Delete template" width="563">
{% endstep %}

{% step %}
Confirm the deletion in dialog.
{% endstep %}
{% endstepper %}


# Document statuses

Every document in Hippoly has a status that controls who can see it and who can make changes. Understanding the three statuses makes it easier to work with drafts, shared documents, and signed documents.

## Draft

A **Draft** is only visible to the person who created it and to the collaborators they've invited. Drafts are the right place to prepare a document before the rest of the workspace sees it.

* Only the creator and invited collaborators have access to a draft.
* Collaborators can edit, share and invite additional collaborators to the draft.
* Drafts don't appear for users who are not invited as collaborators.

When you're ready to let everyone in the workspace see the document, you [share it](/using-hippoly/hippoly-docs/share-document) and it becomes **Shared**.

## Shared

A **Shared** document is visible to everyone in the workspace. Anyone in the workspace can open the document and read it, but also make changes to it. To make changes you first [start a new version](/using-hippoly/hippoly-docs/update-shared-doc#start-a-new-version), which creates a working copy visible only to you and your collaborators until you [share the changes with everyone](/using-hippoly/hippoly-docs/update-shared-doc#share-changes).

## Signed

When a document has been [e-signed](/using-hippoly/hippoly-docs/e-sign-document), its status becomes **Signed**. Signed documents are **read-only** PDFs and no one can edit them, not even the original author. However, anyone in the workspace with access to the document can [create a new editable copy](/using-hippoly/hippoly-docs/update-shared-doc#start-a-new-version) from the PDF.


# Download document

You can download any Hippoly document as a PDF. For signed documents, the download gives you the legally signed PDF that was produced by the e-signing flow.

## Download from folder

{% stepper %}
{% step %}
Go to `Files` in the main menu.
{% endstep %}

{% step %}
Navigate to the **folder** where the document is located.
{% endstep %}

{% step %}
Click the **menu icon** to the right of the document name and select `Download` .

<img src="/files/pIRM93ebiUHVvck5MLea" alt="Document menu in folder" width="563">
{% endstep %}

{% step %}
The document will be downloaded as a PDF-file to your device.
{% endstep %}
{% endstepper %}

## Download from document viewer

{% stepper %}
{% step %}
Open the document you want to download.
{% endstep %}

{% step %}
Click the `Download` button in the top right corner.

![Download button in document viewer](/files/Hz4DWT2rex5SQVCxHNNH)

Hippoly generates a PDF of the current document and downloads it through your browser.
{% endstep %}
{% endstepper %}


# Rename document

## Rename from folder

{% stepper %}
{% step %}
Go to `Files` in the main menu.
{% endstep %}

{% step %}
Navigate to the **folder** where the document is located.
{% endstep %}

{% step %}
Click the **menu icon** to the right of the document name and select `Rename`.

<img src="/files/pIRM93ebiUHVvck5MLea" alt="Document menu in folder" width="563">
{% endstep %}

{% step %}
Enter the new name in the dialog that appears and click the `Update` button.
{% endstep %}
{% endstepper %}

## Rename from document editor

You can rename a document at any time by editing its name directly in the editor header.

{% stepper %}
{% step %}
Open the document you want to rename in **edit mode**.
{% endstep %}

{% step %}
Click the document name in the header at the top of the editor.

![Rename document in editor](/files/mpWfhfP7GkWIoiayq8rr)
{% endstep %}

{% step %}
Type the new name and click somewhere outside the name field, or press `Enter`, to save. The new name is saved automatically.
{% endstep %}
{% endstepper %}


# Move document

Documents live inside folders, and you can move them between folders at any time.

{% stepper %}
{% step %}
Go to `Files` in the main menu.
{% endstep %}

{% step %}
Navigate to the **folder** where the document is located.
{% endstep %}

{% step %}
Click the **menu icon** to the right of the document name and select `Move to` .

<img src="/files/pIRM93ebiUHVvck5MLea" alt="Document menu in folder" width="563">
{% endstep %}

{% step %}
I the dialog, select the destination folder and confirm. The document is moved to the new folder and everyone who has access to it will see the new location the next time they open it.
{% endstep %}
{% endstepper %}

{% hint style="info" %}
You need write access to the target folder to move a document there. For meeting folders, you must be the meeting organiser or a meeting administrator.
{% endhint %}


# Delete document

If you need to delete a document, follow these steps

{% hint style="danger" %}
**Warning:** If you delete a document it will be permanently deleted and cannot be restored.
{% endhint %}

{% stepper %}
{% step %}
Go to `Files` in the main menu.
{% endstep %}

{% step %}
Navigate to the **folder** where the document is located.
{% endstep %}

{% step %}
Click the **menu icon** to the right of the document name and select `Delete`.

<img src="/files/pIRM93ebiUHVvck5MLea" alt="Document menu in folder" width="563">
{% endstep %}

{% step %}
Confirm the deletion in the dialog.
{% endstep %}
{% endstepper %}


# Files and folders

Store, organise, and share files securely within your workspace. Everything stays structured, easy to access, and available from both desktop and mobile.

## Understand Files and Folders

In Hippoly, all workspace users can:

* **Create, upload, delete, and view** files and folders.
* **Manage file versions** with built-in version control, making it easy to update files and track changes over time.

The folder structure is intended for:

* **long-term** or **archived documents** that need to stay organised and accessible.
* Files in the folder structure can **easily be reused** in meetings, posts, and discussions across the workspace.

{% hint style="info" %}
**Tip:** Files related to a specific meeting should be uploaded **directly to the meeting**, not to the general folder structure.
{% endhint %}

Safe file viewing and storage:

* All files are protected by **multi-layered encryption** to ensure security.
* Hippoly **does not manipulate or change** uploaded files - they can always be downloaded in their original format and state.
* Common file types like **PDFs, PowerPoint presentations,** and **Word documents** can be **viewed directly in Hippoly** without downloading, helping to prevent the spread of sensitive information.

<figure><img src="/files/G6qUuv3qztb2S2AQgCeC" alt=""><figcaption><p>Files and folders</p></figcaption></figure>

## Files and Folders FAQ

<details>

<summary>Can I see who has viewed a specific file?</summary>

**Answer:**\
Yes, under the file details panel you can [see who has viewed or downloaded a specific file](/using-hippoly/files-and-folders/view-and-download-log) in Hippoly.

</details>

<details>

<summary>Is my team automatically notified when I upload new files?</summary>

**Answer:**\
No, uploading files to folders or meetings does **not** automatically notify your team.\
If you want to make sure others are aware of the new files, you can [share them as a post](/using-hippoly/files-and-folders/share-file-as-post) or as part of a [meeting agenda](broken://pages/v5YyAFeZGfJbE89QOYCl) to trigger an automatic notification.

</details>

<details>

<summary>Can I edit my uploaded files in Hippoly? </summary>

**Answer:**\
No, you can’t edit uploaded files, such as Word or Excel documents, directly in Hippoly. To make changes, you’ll need to [download the file](/using-hippoly/files-and-folders/download-files-and-folders#download-file) to your computer, edit it, and then [upload it as a new version](/using-hippoly/files-and-folders/update-file).

However, **agendas and minutes** can be created and edited directly in Hippoly using the built-in editor.

</details>

<details>

<summary>What's the file size limit for uploads?</summary>

**Answer:**\
Individual files uploaded to Hippoly can be up to 1000 MB (1 GB) in size. The total amount of storage available to your workspace depends on your subscription plan.

</details>

<details>

<summary>Can I download all files from my workspace? </summary>

**Answer:**\
Yes, you can [download all files from your workspace](/using-hippoly/files-and-folders/download-files-and-folders#download-all-files-and-folders) in one go. It's a quick way to back up or transfer everything from your workspace.

</details>


# Create folders

Folders make it easy for you to organise documents in a clear, structured way within the workspace.

You can create a folder structure by:

* Manually **create folders** one by one.
* Uploading an existing folder structure from your computer, either by **dragging and dropping** it into Hippoly or by clicking the **Upload folder** button.
* Using the **built-in folder structure** (available as a template for certain workspace types when creating the first folder).

With flexible options for organising your files, Hippoly helps you keep important information easy to find and well-managed.

## Manually create folder

{% stepper %}
{% step %}
Navigate to `Files` in the main menu.&#x20;

If you want to create a subfolder in an existing folder structure, click on the folder you want as the parent to open it.
{% endstep %}

{% step %}
Click the `Create folder` button at the top of the page.&#x20;

<figure><img src="/files/0LT5PVWThcwVkSzX7anP" alt=""><figcaption><p>Create folder</p></figcaption></figure>
{% endstep %}

{% step %}
Name the folder in the dialog that appears.

<figure><img src="/files/INXmIxgs4FxMhyyAExdn" alt="" width="375"><figcaption><p>Create folder dialog</p></figcaption></figure>
{% endstep %}

{% step %}
Finally, click the `Create` button.
{% endstep %}
{% endstepper %}

## Upload existing folder structure

When uploading an existing folder structure, all files and subfolders within the selected or dragged-and-dropped folder will be uploaded. It’s a fast and easy way to move your work into Hippoly.

{% hint style="warning" %}
**Note:** If the folder structure you upload contains folders that are empty (with no files inside), those folders will besskipped and not uploaded to Hippoly.
{% endhint %}

### &#x20;Drag and drop

{% stepper %}
{% step %}
Navigate to `Files` in the main menu.
{% endstep %}

{% step %}
Drag and drop your existing folder structure from your computer into Hippoly.&#x20;

If you drop the folders onto an existing folder, it will be created as subfolders under that folder.
{% endstep %}
{% endstepper %}

### Using the upload dialog

{% stepper %}
{% step %}
Navigate to `Files` in the main menu.
{% endstep %}

{% step %}
Click the `Upload` button at the top of the page and select the option `Folder`  from the menu.&#x20;

<figure><img src="/files/kCsIzwmdgiYfWVyYaCPy" alt=""><figcaption></figcaption></figure>
{% endstep %}

{% step %}
In the dialog that appears, select the folder you want to upload from your computer.
{% endstep %}
{% endstepper %}

## Use the bulit in folder structure

**In some cases, new workspaces come with a predefined folder structure template.**\
This depends on factors such as the use of a registration code, organisation type, or workspace type.

If a template is available, you’ll have the option to use it during setup - but it’s entirely optional.\
You can also choose to [create your own folder structure manually](#manually-create-folder) or [upload an existing one](#upload-existing-folder-structure) from your computer.&#x20;

To use the template click the `Use the structure below` button.

<figure><img src="/files/AxujjRLSegSO4DF7onra" alt="" width="563"><figcaption><p>New workspace with folder structure template available</p></figcaption></figure>


# Rename folder

If you need to rename a folder, follow these steps

{% hint style="info" %}
**Note:** [Automatically generated meeting folders](/using-hippoly/files-and-folders/meeting-folders) are named after the meeting title and stay synced with the meeting. If you rename the folder manually, the name will no longer be synced with the meeting.
{% endhint %}

{% stepper %}
{% step %}
Go to your folder and click the `Menu-icon`  to the right of the folder name.&#x20;
{% endstep %}

{% step %}
Select the `Rename` menu option.

<figure><img src="/files/eRRTP7cNH1GgUKjC3s6P" alt=""><figcaption></figcaption></figure>
{% endstep %}

{% step %}
Enter the the new name in the dialog and click the `Update` button.

<figure><img src="/files/aBvUKbpQXLhwXhup7SoK" alt="" width="375"><figcaption></figcaption></figure>
{% endstep %}
{% endstepper %}


# Move folder

If you need to move a folder, follow these steps

{% hint style="info" %}
**Note:** [Automatically generated meeting folders](/using-hippoly/files-and-folders/meeting-folders) cannot be moved. However, the files inside them can be moved to other folders.
{% endhint %}

{% stepper %}
{% step %}
Go to your folder and click the `Menu-icon`  to the right of the folder name.&#x20;
{% endstep %}

{% step %}
Select the `Move` menu option.

<figure><img src="/files/0RTCIkoSaAuSP4djMaJ2" alt=""><figcaption></figcaption></figure>
{% endstep %}

{% step %}
Select the folder you want to move to in the dialog and click the `Move` button.

<figure><img src="/files/LutB2s3a1KYtxj0LCcDF" alt="" width="563"><figcaption></figcaption></figure>
{% endstep %}
{% endstepper %}


# Delete folder

If you need to delete a folder, follow these steps

{% hint style="danger" %}
**Warning:** If you delete a folder, all its subfolders and files will also be permanently deleted and cannot be restored.
{% endhint %}

{% stepper %}
{% step %}
Go to your folder and click the `Menu-icon`  to the right of the folder name.&#x20;
{% endstep %}

{% step %}
Select the `Delete` menu option.&#x20;

<figure><img src="/files/qqn8VAHea0hlm5cspIm2" alt=""><figcaption></figcaption></figure>
{% endstep %}

{% step %}
A confirmation dialog will appear. Click the **`Delete`** button to confirm the deletion.

<figure><img src="/files/0Ai2mRvdR10kBWJ8ptRU" alt="" width="375"><figcaption></figcaption></figure>
{% endstep %}
{% endstepper %}


# Meeting folders

For every meeting created in Hippoly, a corresponding folder is automatically generated. This means you don’t have to worry about manually organising meeting minutes or related documents - Hippoly takes care of it for you. All meeting folders are located under the *Quick Access* section on the files page.&#x20;

<figure><img src="/files/07EBc3vzpeAOShLWQAdR" alt="" width="563"><figcaption><p>Click to show meeting folders</p></figcaption></figure>

<figure><img src="/files/eo1Oxko9mdwFPOvm2ADI" alt="" width="563"><figcaption><p>Meeting folder list</p></figcaption></figure>

## What to know about meeting folders

* **Automatically created:** A meeting folder is automatically generated when a user creates a meeting in Hippoly.
* **Follows meeting title:** The folder inherits its name from the meeting title. If the meeting title changes, the folder name updates accordingly.

{% hint style="warning" %}
**Note:** You can manually rename the folder from the meeting folder list. However, doing so will **break the sync** between the meeting title and the folder name - future title changes will no longer update the folder name.
{% endhint %}

* **Permission-based access:** Only users who have access to the meeting will be able to see its corresponding folder.
* **Mirrored content:** The meeting folder mirrors the meeting content. For example, if you upload a file to the meeting and then delete it from the folder, it will also be removed from the meeting.
* **Folder restrictions:** Meeting folders cannot be moved into other folders. However, files within the meeting folder, including signed meeting minutes, can be moved.

{% hint style="warning" %}
**Note:** Files added to meetings will no longer be accessible through the meeting if they are moved out of the meeting folder - **unless** they are attached to an **agenda item** or are the **final signed protocol PDF**.\
These files will still be accessible from the **Agenda** or **Minutes** tabs.
{% endhint %}

* **Linked to the meeting:** The only way to delete a meeting folder is by deleting the meeting itself, you can't delete the folder from the meeting folder list. Deleting a meeting will also delete its folder and all associated files.&#x20;


# Post attachments folder

All files uploaded when creating a post are automatically stored in a system folder called **Post attachments**. This ensures that every file shared through posts is easy to locate, and accessible beyond the original post itself. The folder is located under the *Quick Access* section on the **files page**.&#x20;

<figure><img src="/files/2C82YONnNK5IlIkmjTUd" alt="" width="563"><figcaption></figcaption></figure>

{% hint style="info" %}
You can [move files](/using-hippoly/files-and-folders/move-file) from the **Post attachments folder** into other folders without breaking the file reference in the original post.
{% endhint %}

{% hint style="warning" %}
**If you delete a file from the Post attachments folder, the file will not be removed from the original post.**\
However, users will no longer be able to view or access it - they will see a message indicating that the file has been deleted. To fully remove the file from the post itself, you need to [edit the post](/using-hippoly/posts/edit-post) and manually delete the file reference.&#x20;
{% endhint %}


# TODO: View file


# Add files

Files can be added to the folder structure for long-term organisation and archiving, uploaded directly to meetings for context, or attached to posts to support updates and discussions.

## Add files to folder

{% stepper %}
{% step %}
Navigate to `Files` in the main menu.&#x20;
{% endstep %}

{% step %}
Open the folder where you want to add the files.
{% endstep %}

{% step %}
Drag and drop your files onto the folder, or click the `Upload` button at the top of the page and choose files to add.

<figure><img src="/files/jbvJy6myjoB1hG1Is1YA" alt="" width="563"><figcaption></figcaption></figure>
{% endstep %}
{% endstepper %}

{% hint style="info" %}
**Tips:** You can also drag and drop folders, or select them in the upload dialog, to upload all files they contain.
{% endhint %}

## Add files to meeting

{% stepper %}
{% step %}
Navigate to `Meetings` in the main menu.
{% endstep %}

{% step %}
Open the meeting where you want to add the files.
{% endstep %}

{% step %}
Click the `Agenda & Files` tab

<figure><img src="/files/JZPq2NPP7SBhCLg8RP7D" alt="" width="375"><figcaption></figcaption></figure>
{% endstep %}

{% step %}
Drag and drop your files onto the meeting panel or click the `Choose file to upload` button.
{% endstep %}
{% endstepper %}

{% hint style="info" %}
**Note:** Files can also be added to a meeting by attaching them directly to agenda items. These files will appear alongside the agenda in the meeting view, making it easier for participants to prepare in advance and follow along during the meeting. [Learn more about adding files to agenda items in this article](/using-hippoly/meetings/create-and-edit-agenda#attach-files-to-agenda-items).&#x20;
{% endhint %}

## Add files to post

{% stepper %}
{% step %}
Click the `Clip-icon`  below the post message field.&#x20;

<figure><img src="/files/TLfKHMVHHYQVE8eys4g1" alt=""><figcaption></figcaption></figure>
{% endstep %}

{% step %}
Select `From computer` to upload new files, or `Hippoly` to reference files that have already been uploaded.
{% endstep %}
{% endstepper %}

{% hint style="info" %}
**Note:** Files uploaded to posts are stored in [posts attachments folder](/using-hippoly/files-and-folders/post-attachments-folder), which can be found under the **Quick access** section on the **Files** page.
{% endhint %}

{% hint style="info" %}
**Tips:** In addition to attaching files when creating a post, you can also share any file from the folder structure as a post. [Learn more about share file as post in this article](/using-hippoly/files-and-folders/share-file-as-post).
{% endhint %}


# Update file

You can update a file by either **dragging and dropping** a new version onto the folder where the file is located, or by using the **Update file** dialog.

{% hint style="info" %}
**Note:** When using drag and drop to update a file, the new version must have the **exact same filename** and be of the **same file type** as the existing one.  Otherwise, it will be uploaded as a **new file** instead of updating the current version.
{% endhint %}

If you want to update a file using the **Update file dialog**, follow these steps

{% stepper %}
{% step %}
Navigate to `Files` in the main menu.&#x20;
{% endstep %}

{% step %}
Go to your file and click the `Menu-icon`  to the right of the file name.
{% endstep %}

{% step %}
Select the `Update file` menu option.

<figure><img src="/files/AiIUYaeqnEXUh8MseAJ5" alt="" width="563"><figcaption></figcaption></figure>

The **file previewer** will open with the **details panel** visible showing the **versions tab.**
{% endstep %}

{% step %}
&#x20;Click the `Upload new file version` button.

<figure><img src="/files/m784vepe4ftXx6voqDOo" alt="" width="563"><figcaption></figcaption></figure>

{% endstep %}

{% step %}
In the dialog that appears, either drag and drop the new version of the file, or click to browse and select it manually.

<figure><img src="/files/guvzujVdHEL5xT4kBBEm" alt="" width="375"><figcaption></figcaption></figure>
{% endstep %}

{% step %}
Finally, click the `Upload` button.
{% endstep %}
{% endstepper %}

Learn more about [file versioning](/using-hippoly/files-and-folders/file-versioning) or how to [restore a previous file version](/using-hippoly/files-and-folders/file-versioning#restore-a-previous-file-version).&#x20;


# Rename file

If you need to rename a file, follow these steps

{% hint style="info" %}
**Note:** Files added to posts, meetings or agendas can only be renamed from the folder where they are stored. This means you need to rename the file from the [post attachments folder](/using-hippoly/files-and-folders/post-attachments-folder) or the [meeting folder](/using-hippoly/files-and-folders/meeting-folders), depending on where it was added.

If the file was linked to a post, meeting, or agenda from another folder, you must go to **that original folder** to rename it.&#x20;
{% endhint %}

{% stepper %}
{% step %}
Navigate to `Files` in the main menu.&#x20;
{% endstep %}

{% step %}
Go to your file and click the `Menu-icon`  to the right of the file name.&#x20;
{% endstep %}

{% step %}
Select the `Rename` menu option.

<figure><img src="/files/E6Gu6PJwX3fkdsaifUvD" alt="" width="563"><figcaption></figcaption></figure>
{% endstep %}

{% step %}
Enter the new name in the dialog that appears and click the `Update` button.
{% endstep %}
{% endstepper %}


# Move file

Sometimes you may need to move a file from one folder to another. To do so, follow these steps

{% stepper %}
{% step %}
Navigate to `Files` in the main menu.&#x20;
{% endstep %}

{% step %}
Go to your file and click the `Menu-icon`  to the right of the file name.&#x20;
{% endstep %}

{% step %}
Select the `Move to` menu option.

<figure><img src="/files/fCmmO2OP1pz9PvEBLTkq" alt="" width="563"><figcaption></figcaption></figure>
{% endstep %}

{% step %}
Select the folder you want to move the file to in the dialog and click the `Move` button.

<figure><img src="/files/gBsxA6OZCvjy2KSUgpCA" alt="" width="563"><figcaption></figcaption></figure>
{% endstep %}
{% endstepper %}

{% hint style="info" %}
**Note:** Moving files from meeting folders can affect whether they remain accessible through the meeting.\
[Learn more about how this works in this article](/using-hippoly/files-and-folders/meeting-folders).
{% endhint %}


# Delete file

If you need to delete a file, follow these steps

{% hint style="danger" %}
**Warning:** If you delete a file it will be permanently deleted and cannot be restored.
{% endhint %}

{% stepper %}
{% step %}
Navigate to `Files` in the main menu.&#x20;
{% endstep %}

{% step %}
Go to your file and click the `Menu-icon`  to the right of the file name.&#x20;
{% endstep %}

{% step %}
Select the `Delete` menu option.&#x20;

<figure><img src="/files/T2ALovAzZUlq46UKGub0" alt="" width="563"><figcaption></figcaption></figure>
{% endstep %}

{% step %}
A confirmation dialog will appear. Click the `Delete` button to confirm the deletion.

<figure><img src="/files/xGI6OygbV13LPjVJM1z8" alt="" width="375"><figcaption><p>Confirm file deletion</p></figcaption></figure>
{% endstep %}
{% endstepper %}


# Share file as post

If you've uploaded a file to a folder and want to make sure others see it, you can share the file as a post directly from the folder. When you do, a post is created and users in the workspace are automatically notified.

{% stepper %}
{% step %}
Click the `Menu-icon`  to the right of the file name.&#x20;
{% endstep %}

{% step %}
Select the `Share as post` menu option.

<figure><img src="/files/LqxsOKcr6IW35ciJIAXj" alt="" width="563"><figcaption></figcaption></figure>
{% endstep %}

{% step %}
A dialog will appear where you can write your post message (optional).

<figure><img src="/files/MahbLQuDvOTDmf45o2GX" alt="" width="563"><figcaption></figcaption></figure>
{% endstep %}

{% step %}
Click the `Share` button to create the post. &#x20;
{% endstep %}
{% endstepper %}


# Download files and folders

Users can download any file from Hippoly at any time. While all files are securely encrypted within the platform, they are never altered - meaning you can download them in their original format and structure.\
\
You can also download entire folders, or as workspace admin choose to download **all files uploaded to your Hippoly workspace** with just one click.

## Download file

#### From files list

{% stepper %}
{% step %}
Navigate to `Files` in the main menu.&#x20;
{% endstep %}

{% step %}
Go to your file and click the `Menu-icon`  to the right of the file name.&#x20;
{% endstep %}

{% step %}
Select the `Download` menu option.

<figure><img src="/files/wwFruvbaO6XUdPVaXsyr" alt=""><figcaption></figcaption></figure>
{% endstep %}
{% endstepper %}

#### From file preview

{% stepper %}
{% step %}
Open the file&#x20;
{% endstep %}

{% step %}
In the file preview, click the `Download` button located at top right corner.&#x20;

<figure><img src="/files/yAw6EN2fFFa39vhVLft3" alt=""><figcaption></figcaption></figure>
{% endstep %}
{% endstepper %}

## Download folder

{% stepper %}
{% step %}
Go to your folder and click the `Menu-icon`  to the right of the folder name.&#x20;
{% endstep %}

{% step %}
Select the `Download` menu option.

<figure><img src="/files/Lu8qT0qz9xrMTbEOoivd" alt=""><figcaption></figcaption></figure>
{% endstep %}

{% step %}
A confirmation dialog will appear - click the `Confirm` button to start the download preparation.

<figure><img src="/files/6c8BXglWNVjl4Td53bGC" alt="" width="375"><figcaption></figcaption></figure>
{% endstep %}

{% step %}
A download preparation dialog will appear.&#x20;

Preparation time may vary depending on the number of subfolders and files in the folder you’re downloading.

You can safely close the dialog during this process and return later to complete the download.

<figure><img src="/files/DpqG2nZdQZ8N5hjaXlhN" alt="" width="375"><figcaption></figcaption></figure>
{% endstep %}

{% step %}
When the download preparation is complete, a final dialog will appear. Click the `Download` button to begin downloading the files to your computer.

<figure><img src="/files/go41BS4fpXNfQ16TEUiG" alt="" width="375"><figcaption></figcaption></figure>
{% endstep %}

{% step %}
The folder will be downloaded as a ZIP file. To view the folder and its contents, you’ll need to unzip (extract) the file on your computer.

* **On Windows:** Right-click the ZIP file and select **Extract All**, then choose where to save the unzipped folder.
* **On macOS:** Double-click the ZIP file, and the folder will automatically be extracted in the same location.
  {% endstep %}
  {% endstepper %}

## Download all files and folders

{% hint style="info" %}
**Note:** To perform this action, you must be either a **workspace admin** or the **workspace owner**.
{% endhint %}

{% stepper %}
{% step %}
Navigate to `Settings` in the main menu.&#x20;
{% endstep %}

{% step %}
Click the `Subscription` tab.&#x20;
{% endstep %}

{% step %}
On the **File storage** row In the **Subscription status** section click the `Download` button.

<figure><img src="/files/hijqqSmQfkM4OEhTMoRF" alt=""><figcaption></figcaption></figure>
{% endstep %}

{% step %}
A confirmation dialog will appear - click the `Confirm` button to start the download preparation.

<figure><img src="/files/4roVScjdPqBDqTXabTA2" alt="" width="375"><figcaption></figcaption></figure>
{% endstep %}

{% step %}
A download preparation dialog will appear.&#x20;

Preparation time may vary depending on the number of folders and files in your workspace.

You can safely close the dialog during this process and return later to complete the download.

<figure><img src="/files/DpqG2nZdQZ8N5hjaXlhN" alt="" width="375"><figcaption></figcaption></figure>
{% endstep %}

{% step %}
When the download preparation is complete, a final dialog will appear. Click the `Download` button to begin downloading the files to your computer.

<figure><img src="/files/R1D5ApNP7CYrP4MaN86j" alt="" width="375"><figcaption></figcaption></figure>
{% endstep %}

{% step %}

The folder will be downloaded as a ZIP file. To view the folder and its contents, you’ll need to unzip (extract) the file on your computer.

* **On Windows:** Right-click the ZIP file and select **Extract All**, then choose where to save the unzipped folder.
* **On macOS:** Double-click the ZIP file, and the folder will automatically be extracted in the same location.

<figure><img src="/files/ATbXD9X4KF1P4tcXxXLb" alt=""><figcaption></figcaption></figure>

The ZIP file contains three main folders:

* **Files** – includes the workspace's shared folder structure
* **Meetings** – includes all meeting folders
* **Posts** – includes all files uploaded to posts

In addition to these folders, the ZIP file also includes an **index.txt** file, which provides a complete list of all downloaded files along with their folder paths.

{% hint style="info" %}
**Download hash**

For each workspace download Hippoly stores a hash which can be used to verify the file structure and integrity in the future.&#x20;
{% endhint %}

{% endstep %}
{% endstepper %}


# File versioning

All files in Hippoly are versioned, meaning you can view a file’s history, download, or restore previous versions of an uploaded file.<br>

**Want to update an existing file with a new version?** [Read this article to learn how to add a new version.](/using-hippoly/files-and-folders/update-file)&#x20;

## View the file version history

{% stepper %}
{% step %}
Navigate to `Files` in the main menu.&#x20;
{% endstep %}

{% step %}
Go to your file and click the `Menu-icon`  to the right of the file name.
{% endstep %}

{% step %}
Select the `Show details` menu option.

<figure><img src="/files/roxoVOFx058r6HkaoeZa" alt=""><figcaption></figcaption></figure>
{% endstep %}

{% step %}
Click on the `Versions` tab.

<figure><img src="/files/KVugxTKB8cGPyuKBjNwe" alt=""><figcaption></figcaption></figure>
{% endstep %}
{% endstepper %}

## View a previous file version

{% stepper %}
{% step %}
Navigate to `Files` in the main menu.&#x20;
{% endstep %}

{% step %}
Go to your file and click the `Menu-icon`  to the right of the file name.
{% endstep %}

{% step %}
Select the `Show details` menu option.
{% endstep %}

{% step %}
Click on the `Versions` tab.
{% endstep %}

{% step %}
Click on the file version you want to view or select `Open` in the version menu.&#x20;

<figure><img src="/files/vP6Zu2nvhRdRxW9NYcxK" alt=""><figcaption></figcaption></figure>
{% endstep %}
{% endstepper %}

## Restore a previous file version

{% stepper %}
{% step %}
Navigate to `Files` in the main menu.&#x20;
{% endstep %}

{% step %}
Go to your file and click the `Menu-icon`  to the right of the file name.
{% endstep %}

{% step %}
Select the `Show details` menu option.
{% endstep %}

{% step %}
Click on the `Versions` tab.
{% endstep %}

{% step %}
Open the `Menu`  located to the right on the version item and select `Restore` .

{% hint style="info" %}
**Note:**  When you restore a previous file version, Hippoly creates a **new version** based on the one you restored. The original version history remains intact.
{% endhint %}

<figure><img src="/files/vP6Zu2nvhRdRxW9NYcxK" alt=""><figcaption></figcaption></figure>
{% endstep %}

{% step %}
In the confirmation dialog appearing click the `Restore` button.
{% endstep %}
{% endstepper %}

## Download a previous file version

{% stepper %}
{% step %}
Navigate to `Files` in the main menu.&#x20;
{% endstep %}

{% step %}
Go to your file and click the `Menu-icon`  to the right of the file name.
{% endstep %}

{% step %}
Select the `Show details` menu option.
{% endstep %}

{% step %}
Click on the `Versions` tab.
{% endstep %}

{% step %}
Open the `Menu`  located to the right on the version item and select `Download`.

<figure><img src="/files/vP6Zu2nvhRdRxW9NYcxK" alt=""><figcaption></figcaption></figure>
{% endstep %}
{% endstepper %}


# View and download log

Hippoly keeps a detailed log of who has viewed or downloaded a file, helping you track engagement and maintain transparency. For each file, you can see when it was accessed, by whom, and whether it was viewed or downloaded. This is especially useful for sensitive or critical documents where traceability matters.

{% stepper %}
{% step %}
Open the file.
{% endstep %}

{% step %}
In the file preview, click the `Details` button located at top right corner.&#x20;

<figure><img src="/files/Hd0PosqnI2muoKLlvyOV" alt=""><figcaption></figcaption></figure>
{% endstep %}

{% step %}
The file details panel will open with the `Activity tab` selected. Here, you can see an overview of who has accessed the file and how - whether it was viewed or downloaded.

{% hint style="info" %}
**Tip:** Hover your mouse over the **view** or **download** icons next to each user to see when they last accessed the file.
{% endhint %}

<figure><img src="/files/4IPZ0t5jMlyqxJbwVjwL" alt=""><figcaption></figcaption></figure>

Switching to the `Log tab` gives you a detailed view of when and by whom the file was viewed or downloaded. The log also shows if and when the file was updated with a new version.

<figure><img src="/files/LagW2xk2MHtmGXhA8T2n" alt=""><figcaption></figcaption></figure>
{% endstep %}
{% endstepper %}


# Actions

Actions help you capture and follow up on tasks, either from meetings or directly in the workspace. You can assign them to a user, set a due date, and track progress until completion.

## Understand Actions

Actions in Hippoly help you stay on top of tasks and follow-ups, whether they’re shared with your team or just for you.

All **workspace users** can create, update, and delete actions, making it easy to collaborate and take ownership of what needs to get done.\
Each action includes a **title**, and can also have an optional **description**, **due date**, and **assigned responsible user**.

You can also create **private actions,** ideal for personal to-dos, which are only visible to you.

Each **workspace** has its own action list, giving everyone a clear overview of shared responsibilities.\
As a user, you also have a **personal action list** that brings together:

* All actions assigned to you across your workspaces
* Your private actions

Actions can be created **during meetings** to quickly capture next steps. There's no need for linking, they’ll automatically appear in the workspace’s action list.

To keep things moving, Hippoly sends **automatic notifications** to the assigned user when an action is about to be due, and again when it becomes overdue.

<figure><img src="/files/Z21f9FC6rVfTTIo0N3fb" alt=""><figcaption></figcaption></figure>

## Actions FAQ

<details>

<summary>Can I attach files to an action? </summary>

**Answer:**\
No, at the moment, there is no support for attaching files directly to an action.

</details>

<details>

<summary>Can I assign multiple users as responsible for an action? </summary>

**Answer:**\
No, in Hippoly you can only assign **one user** as responsible for an action.

This helps ensure **clear ownership and accountability**, so it’s always clear who’s expected to follow up.

If the task involves several people, you can mention others in the description or create separate actions for each person.

</details>

<details>

<summary>Can I create private actions only available to me? </summary>

**Answer:**\
Yes. You can [create Private Actions](/using-hippoly/actions/my-actions#create-private-action) that are only visible to you. These are useful for personal reminders or tasks you don’t need to share with your team.

</details>


# Action list

The Action List provides an overview of all actions within your team, both ongoing and completed. From this view, you can search, [create new actions](/using-hippoly/actions/create-action) and [manage existing actions](/using-hippoly/actions/edit-action) efficiently. The list can also be organised in different ways to match your workflow:

* **Custom order (default)** – Arrange Actions manually by dragging and dropping them in your preferred sequence.
* **By due date** – Display Actions according to whether they have a set due date or not.
* **By user** – Group Actions based on who is assigned and responsible.

### Arrange your action list

{% stepper %}
{% step %}
Navigate to `Actions` in the main menu.&#x20;
{% endstep %}

{% step %}
In the sort order dropdown, select `Custom order` . &#x20;
{% endstep %}

{% step %}
To reorder your list, hover over the Action you want to move and click the **drag handle** on the left side. Then, drag the item to its new position.

<figure><img src="/files/arVfJwpmIoCWSq4eM6qH" alt=""><figcaption></figcaption></figure>
{% endstep %}
{% endstepper %}

### Group actions by due date

{% stepper %}
{% step %}
Navigate to `Actions` in the main menu.&#x20;
{% endstep %}

{% step %}
In the sort order dropdown, select `Due date` .&#x20;

<figure><img src="/files/JS3qf1eRsdHjEh7dtvTv" alt=""><figcaption></figcaption></figure>
{% endstep %}
{% endstepper %}

### Group actions by user

{% stepper %}
{% step %}
Navigate to `Actions` in the main menu.&#x20;
{% endstep %}

{% step %}
In the sort order dropdown, select `User` .&#x20;

<figure><img src="/files/tHpf4hDT7SMtMwblMkwz" alt=""><figcaption></figcaption></figure>
{% endstep %}
{% endstepper %}


# Create action

## Create action from action list

{% stepper %}
{% step %}
Navigate to `Actions` in the main menu.&#x20;
{% endstep %}

{% step %}
Click the `New action` button and enter a **title** for action.&#x20;

<figure><img src="/files/5SXAu1BdVdjSHHhaWmzm" alt=""><figcaption></figcaption></figure>
{% endstep %}

{% step %}
Click the `Add` button or hit `Enter` on your keyboard to save the action.

<figure><img src="/files/PiBUIKMYqPo6aE8dRYFg" alt=""><figcaption></figcaption></figure>
{% endstep %}

{% step %}
To set a due date for the action (optional), hover your mouse over the action and click the `Calendar icon` to the right of the title, then select a date.

<figure><img src="/files/go88gKCEmS7H82djL6Wo" alt=""><figcaption></figcaption></figure>
{% endstep %}

{% step %}
To assign a responsible user to the action (optional), hover your mouse over the action and click the `User icon` to the right of the title, then select a user.

<figure><img src="/files/u4G0ejWeWWFYS44C6lr3" alt=""><figcaption></figcaption></figure>

{% hint style="info" %}
When a user is assigned an action, they receive a notification informing them of the assignment. If the action has a due date, the assigned user also receives a notification on the day it becomes due.
{% endhint %}
{% endstep %}

{% step %}
To add optional descriptive text, hover over the action and click the `Arrow icon` on the right to open the **Details** panel. Enter any additional information in the **Description** field.

<figure><img src="/files/eG2EvrhyiWwlXBGUAePt" alt=""><figcaption></figcaption></figure>
{% endstep %}
{% endstepper %}

## Create action from meeting

{% stepper %}
{% step %}
Open the Actions panel by clicking  `Actions` in the right-hand sidebar on the meeting page.

<figure><img src="/files/MFzP9qcIAbpJmfZnofPT" alt=""><figcaption></figcaption></figure>
{% endstep %}

{% step %}
Enter an action **title** and click the `Add` button or hit `Enter` on your keyboard to save the action.
{% endstep %}

{% step %}
Hover your mouse over an action to assign a user, set a due date, or open the action’s details panel.
{% endstep %}
{% endstepper %}


# Edit action

## Edit action title

{% stepper %}
{% step %}
Navigate to `Actions` in the main menu.&#x20;
{% endstep %}

{% step %}
Click the current **title** of the action you want to edit.

<figure><img src="/files/0HM8HlkCDKAZC0JDFvuy" alt=""><figcaption></figcaption></figure>
{% endstep %}

{% step %}
Make your edits and press `Enter` on your keyboard to save the changes
{% endstep %}
{% endstepper %}

{% hint style="info" %}
You can also edit the action title in the same way from the action list on the meeting page and from your personal actions list.
{% endhint %}

## Add or update due date

{% stepper %}
{% step %}
Navigate to `Actions` in the main menu.&#x20;
{% endstep %}

{% step %}
To set or update a due date for a action, hover your mouse over the action and click the `Calendar icon` to the right of the title, then select a date.

<figure><img src="/files/bEjvvm3InRX3dA3Ch7eM" alt=""><figcaption></figcaption></figure>
{% endstep %}
{% endstepper %}

{% hint style="info" %}
You can also edit due date in the same way from the action list on the meeting page and from your personal actions list.
{% endhint %}

## Add or update assigned responsible

{% stepper %}
{% step %}
Navigate to `Actions` in the main menu.&#x20;
{% endstep %}

{% step %}
To assign or update a responsible user to a action, hover your mouse over the action and click the `User icon` to the right of the title, then select a user.

<figure><img src="/files/WGEHqyB6Xtu64bZ7Ah2D" alt=""><figcaption></figcaption></figure>

{% hint style="info" %}
When a user is assigned an action, they will receive a notification informing them of the assignment.
{% endhint %}
{% endstep %}
{% endstepper %}

{% hint style="info" %}
You can also edit assigned responsible in the same way from the action list on the meeting page and from your personal actions list.
{% endhint %}

## Add or update description

{% stepper %}
{% step %}
Navigate to `Actions` in the main menu.&#x20;
{% endstep %}

{% step %}
To add or update a action description text, hover your mouse over the action and click the `Arrow icon` to the right of the action item to open the **details panel**.&#x20;

<figure><img src="/files/MzcamRxihf5Gfa3G8Q2k" alt=""><figcaption></figcaption></figure>
{% endstep %}

{% step %}
Click the **description text field** in the details panel.

<figure><img src="/files/7vpyYcmepMHpRBxkv5jz" alt=""><figcaption></figcaption></figure>
{% endstep %}

{% step %}
Make your edits. They are saved automatically.&#x20;
{% endstep %}
{% endstepper %}

{% hint style="info" %}
You can also edit the description in the same way from the action list on the meeting page and from your personal actions list.
{% endhint %}

## Mark action as complete

{% stepper %}
{% step %}
Navigate to `Actions` in the main menu.&#x20;
{% endstep %}

{% step %}
Tick the `Checkbox` for the action you want to set as complete

<figure><img src="/files/ROwo9omw9i5ePTHYWeVP" alt=""><figcaption></figcaption></figure>
{% endstep %}

{% step %}
The action will be moved from the **Things to do** section to the **Done** section.

<figure><img src="/files/Ai9r4ZhAF6IQsa162xmY" alt=""><figcaption></figcaption></figure>
{% endstep %}
{% endstepper %}

{% hint style="info" %}
You can also mark an action as complete in the same way from the action list on the meeting page and from your personal actions list.
{% endhint %}

## Mark an action as not completed

{% stepper %}
{% step %}
Navigate to `Actions` in the main menu.&#x20;
{% endstep %}

{% step %}
Untick the `Checkbox` for the action you want to set as complete

<figure><img src="/files/bvgh52ZoMGO0dRpNSrZ6" alt=""><figcaption></figcaption></figure>
{% endstep %}

{% step %}
The action will be moved back from the **Done** section to the **Things to do** section.

<figure><img src="/files/P5Hll0iHtg2i1oxNERzm" alt=""><figcaption></figcaption></figure>
{% endstep %}
{% endstepper %}

{% hint style="info" %}
You can also mark an action as not complete in the same way from the action list on the meeting page and from your personal actions list.
{% endhint %}


# Delete action

{% hint style="danger" %}
**Warning:** If you delete an action it will be permanently deleted and cannot be restored.
{% endhint %}

{% stepper %}
{% step %}
Navigate to `Actions` in the main menu.&#x20;
{% endstep %}

{% step %}
Hover your mouse over the action you want to delete and click the `Arrow icon` to the right of the action item to open the **details panel**.&#x20;

<figure><img src="/files/MzcamRxihf5Gfa3G8Q2k" alt=""><figcaption></figcaption></figure>
{% endstep %}

{% step %}
Click the `Trash bin` icon at the top right of the details panel.&#x20;

<figure><img src="/files/yQBxK6vd6Wwwic3VjwXu" alt=""><figcaption></figcaption></figure>
{% endstep %}

{% step %}
A confirmation dialog will appear, click the `Delete action` button to confirm the deletion.

<figure><img src="/files/ivuxKcisNsk7ijTjzzIi" alt="" width="375"><figcaption></figcaption></figure>
{% endstep %}
{% endstepper %}


# My actions

**My Actions** gathers all Actions assigned to you across every workspace you belong to. The list follows the same structure and grouping options as the action list within an individual workspace, making it easy to review and prioritize your tasks in one place.

You can also create **Private Actions** directly from this view. Private Actions are visible only to you and are helpful for setting personal reminders, such as preparing meeting materials or drafting an Agenda item ahead of time.

Click the `My actions button` in the page header to open the **My Actions p**anel&#x20;

<figure><img src="/files/oRjnqIOUQOcBlMVRnkLr" alt=""><figcaption></figcaption></figure>

### My actions panel&#x20;

From the **My Actions** panel, you can mark any action assigned to you as completed. When you do this, the action is automatically updated in the action list of the workspace it belongs to.

If you need to view or update the details of an action created within a workspace, click the action. You will be redirected to the action list in the workspace where it was created.

<figure><img src="/files/xlX1EH2U8WeRU6vSyO9i" alt=""><figcaption></figcaption></figure>

### Create private action

{% stepper %}
{% step %}
Open **My actions** panel
{% endstep %}

{% step %}
Click the `Input field` at the top of the panel and enter a **title** for action.&#x20;
{% endstep %}

{% step %}
Click the `Add` button or hit `Enter` on your keyboard to save the action.

<figure><img src="/files/cAPljZHqJMZBpwFnieBW" alt="" width="375"><figcaption></figcaption></figure>
{% endstep %}

{% step %}
To set a due date for the action (optional), hover your mouse over the action and click the `Calendar icon` to the right of the title, then select a date

<figure><img src="/files/uRLo8fFi5j57kxYJzUw3" alt="" width="375"><figcaption></figcaption></figure>

{% hint style="info" %}
If the action has a due date, you will receive a notification on the day it becomes due.
{% endhint %}
{% endstep %}

{% step %}
To add optional descriptive text, hover over the action and click the `Arrow icon` on the right to open the **details** panel. Enter any additional information in the **Description** field.

<figure><img src="/files/3PuYZv3NOo8yNyj0XQGV" alt="" width="375"><figcaption></figcaption></figure>
{% endstep %}
{% endstepper %}

### Delete private action

{% stepper %}
{% step %}
Open **My actions** panel.
{% endstep %}

{% step %}
Hover over the action you want to delete and click the `Arrow icon` on the right to open the **details** panel.
{% endstep %}

{% step %}
Click the `Trash-bin` icon in the top right corner of the **details** panel.
{% endstep %}

{% step %}
A confirmation dialog will appear, click the `Delete action` button to confirm the deletion.&#x20;
{% endstep %}
{% endstepper %}


# Notes and annotations

Notes and Annotations let you organize your thoughts and prepare for meetings by creating personalized notes and annotating documents and agendas directly within Hippoly.

## **Understand Notes and Annotations**

Notes and annotations are **private tools for your personal use**. Nothing you write in a note or add as an annotation can be seen by other users in the workspace — not even workspace administrators.

### Notes

Notes are private rich-text documents where you can capture thoughts, prepare for meetings, or jot down questions. You can create notes in three different contexts:

* **Workspace notes** — general-purpose notes that are not linked to any specific meeting or file.
* **Meeting notes** — notes linked to a specific meeting, making it easy to prepare before or reflect after.
* **File and document notes** — notes linked to a specific file or Hippoly Doc, useful for capturing feedback or review comments for yourself.

All your notes are gathered in one place regardless of where they were created, and they are automatically saved as you type.

### Annotations

Annotations let you highlight and comment on specific parts of a document, file, or meeting agenda. When you create an annotation, it's automatically linked to the corresponding note for that context, so your highlights and comments are collected together with your notes.

You can annotate:

* **Files** — highlight text or areas on any file that can be previewed in Hippoly (PDFs, Word documents, spreadsheets, presentations, and more).
* **Hippoly Docs** — select and mark specific text passages.
* **Meeting agendas** — add comments to individual agenda items.

## Notes and Annotations FAQ

<details>

<summary>Can anyone else see my notes or annotations?</summary>

No. Notes and annotations are completely private. Only you can see them — other workspace members and administrators have no access to your personal notes or annotations.

</details>

<details>

<summary>Where can I find all my notes?</summary>

All your notes are gathered in the notes panel, accessible from the meeting tools or file preview. You can search and filter to find a specific note.

</details>

<details>

<summary>Are my notes linked to annotations?</summary>

Yes. When you create an annotation on a document, file, or agenda item, the annotation is automatically linked to the note for that context. This means your highlights and comments appear together with your notes, making it easy to review everything in one place.

</details>

<details>

<summary>What happens to my notes if I leave the workspace?</summary>

Your notes are tied to your user account within the workspace. If you leave the workspace, your notes are no longer accessible.

</details>


# Create and work with notes

Notes can be created from several places in Hippoly depending on what you want to take notes on. Regardless of where you create them, all your notes are gathered in one place and are always private to you.

## Create a note

{% tabs %}
{% tab title="Workspace note" %}
To create a general-purpose note that is not linked to a specific meeting or file:

1. Open the notes panel.
2. Click `New note`.
3. Start writing — your note is saved automatically.
   {% endtab %}

{% tab title="Meeting note" %}
To create a note linked to a specific meeting:

1. Open the meeting and go to the tools panel.
2. Click the **Notes** section.
3. Click `New note` or open an existing note for the meeting.
4. Start writing — your note is saved automatically.

Meeting notes are linked to the meeting and will appear when you open the meeting's notes section again.
{% endtab %}

{% tab title="File or document note" %}
To create a note linked to a specific file or Hippoly Doc:

1. Open the file preview or document.
2. Open the **Private notes** section.
3. Click `New note` or open an existing note for the file.
4. Start writing — your note is saved automatically.
   {% endtab %}
   {% endtabs %}

## Edit a note

Open the note you want to edit and start typing. Notes use a rich-text editor that supports formatting such as headings, bold, italic, lists, and links. Your changes are **saved automatically** as you type — there is no manual save button.

## Find your notes

All your notes are gathered in the notes panel. You can browse through them or use the search field to find a specific note by title or content. Notes show a context icon (meeting or file) so you can quickly see what they are linked to.

{% hint style="info" %}
Notes are **completely private**. No one else in the workspace can see your notes — not even workspace administrators.
{% endhint %}


# Archive note

If you no longer need a note but don't want to delete it permanently, you can archive it. Archived notes are hidden from your main notes list but can be restored at any time.

## Archive a note

{% stepper %}
{% step %}
Open the notes panel and find the note you want to archive.
{% endstep %}

{% step %}
Open the note's menu and select `Move to archive`.
{% endstep %}

{% step %}
The note is moved to the archive and hidden from your active notes list.
{% endstep %}
{% endstepper %}

## Unarchive a note

{% stepper %}
{% step %}
Open the notes panel and navigate to the archived notes view.
{% endstep %}

{% step %}
Find the note you want to restore, open its menu, and select `Unarchive`.
{% endstep %}

{% step %}
The note is moved back to your active notes list.
{% endstep %}
{% endstepper %}


# Delete note

If you no longer need a note, you can delete it. Deleting a note removes it from your notes list.

{% hint style="warning" %}
Deleting a note is permanent. The note and any annotations linked to it cannot be recovered.
{% endhint %}

{% stepper %}
{% step %}
Open the notes panel and find the note you want to delete.
{% endstep %}

{% step %}
Open the note's menu and select `Delete`.
{% endstep %}

{% step %}
Confirm the deletion in the dialog that appears. The note is permanently removed.
{% endstep %}
{% endstepper %}


# Create annotations

Annotations let you highlight and comment on specific parts of a document, file, or meeting agenda. Annotations are **private** — only you can see them — and they are automatically linked to the corresponding note for that context.

## Annotate a file

You can annotate any file that can be previewed in Hippoly — including PDFs, Word documents, spreadsheets, and presentations. The preview is rendered as a PDF, so the annotation experience is the same regardless of the original file format.

{% stepper %}
{% step %}
Open the file preview by clicking on the file.
{% endstep %}

{% step %}
Select the text or area you want to annotate by clicking and dragging on the page.
{% endstep %}

{% step %}
The highlighted area is saved as an annotation. You can optionally add a comment to describe your thought or question.
{% endstep %}
{% endstepper %}

The annotation appears as a highlight on the preview and is also added to your private note for the file.

## Annotate a Hippoly Doc

{% stepper %}
{% step %}
Open the document in the Hippoly Docs editor.
{% endstep %}

{% step %}
Select the text you want to annotate.
{% endstep %}

{% step %}
Click the `Annotate` button that appears. The selected text is marked with a highlight.
{% endstep %}
{% endstepper %}

The annotation is added to your private note for the document, where you can find all your annotations in one place.

## Annotate a meeting agenda item

{% stepper %}
{% step %}
Open the meeting and go to the agenda.
{% endstep %}

{% step %}
Click the annotate action on the agenda item you want to comment on.
{% endstep %}

{% step %}
Add your comment or note. The annotation is linked to the specific agenda item and also appears in your private meeting note.
{% endstep %}
{% endstepper %}

## View your annotations

Annotations are displayed in two places:

* **On the source** — as highlights on PDF pages, marked text in documents, or indicators on agenda items.
* **In your note** — as quoted blocks showing the source and your comment. Clicking an annotation in your note takes you back to the source location.

{% hint style="info" %}
Annotations are **completely private**. No other user can see your annotations, regardless of their role in the workspace.
{% endhint %}


# Delete annotation

To remove an annotation, you delete it from the note it's linked to. Annotations can only be removed from within the note — not directly from the source document, file, or agenda.

{% stepper %}
{% step %}
Open the note that contains the annotation you want to remove.
{% endstep %}

{% step %}
Find the annotation block in the note and delete it.
{% endstep %}

{% step %}
The annotation is removed from both the note and the source.
{% endstep %}
{% endstepper %}


# E-signing

In Hippoly you can e-sign files such as meeting minutes, annual reports, contracts and more, directly from your workspace.

E-signing in Hippoly is powered by [Scrive](https://www.scrive.com/), a trusted digital signature provider, giving you a robust, seamless signing experience backed by industry-leading security standards and verified audit trails so you can sign with confidence every time.

## Understand e-Signing

### What is e-Signing?

E-signing means adding a legally recognised electronic signature to a document. Instead of a wet-ink signature, signers use a digital process to confirm their agreement. The result is legally binding in many jurisdictions and often accepted in courts just like a handwritten signature.

### Why it matters

* **Save time and costs** of printing, transporting and storing paper documents.
* **Sign from anywhere**, on any device.
* **Track status in real time** and follow up directly.
* **Keep everything in one place** inside Hippoly.

### How it works

Hippoly makes it easy to send documents for e-signing directly from your workspace. E-signing is available for documents in **PDF format**. Files that are not already PDF are automatically converted before signing starts.

When you start an e-signing process, you choose who needs to sign the document. You can include **workspace members** as well as **external parties** who are not part of the workspace, making it possible to complete agreements and approvals across organisations. The sender can also decide **how each signer should verify their identity**, for example through Swedish BankID, Norwegian BankID, Danish MitID, Finnish FTN, SMS PIN, or without additional verification, depending on requirements and the level of assurance needed. See [Signing methods](/using-hippoly/e-signing/signing-methods) for details on each option.

You can also control the **order of signing**. This allows you to decide whether all signers can sign in parallel or whether signing should happen in a specific sequence, for example ensuring that a chairperson or key stakeholder signs first or last. Throughout the process, Hippoly and Scrive handle secure delivery, verification, signing and audit logging, so the result is a legally reliable and traceable signed document.

<figure><img src="/files/2clooyR4El6R0Dlveivg" alt=""><figcaption></figcaption></figure>

You have **full control of the signing process** in Hippoly. You can monitor the status in real time, see who has signed and who hasn't, and send reminders to signers who have not yet completed their signing. Once all required signers have signed, Hippoly automatically stores the **signed version of the document**. See [Manage signing process](/using-hippoly/e-signing/manage-signing-process) for more details on tracking and managing ongoing signings.

### What can be e-signed?

Hippoly supports e-signing for three types of content, each with its own flow:

| Type                              | Where to start                                | Learn more                                                                           |
| --------------------------------- | --------------------------------------------- | ------------------------------------------------------------------------------------ |
| **Files** (PDFs, Word docs, etc.) | From the file context menu in the folder view | [Send for e-signing](/using-hippoly/e-signing/e-sign-files-and-docs)                 |
| **Hippoly Docs**                  | From the document editor                      | [Send for e-signing](/using-hippoly/e-signing/e-sign-files-and-docs)                 |
| **Meeting minutes**               | From the meeting protocol panel               | [Send meeting minutes for e-signing](/using-hippoly/meetings/e-sign-meeting-minutes) |

## E-signing FAQ

<details>

<summary>How long do signers have to complete the signing?</summary>

Signers have **90 days** from when the signing request is sent to complete their signature. If the signing is not completed within this period, it times out and the process must be restarted.

</details>

<details>

<summary>Can I send a signing request to someone outside my workspace?</summary>

Yes. When adding signers, you can include external parties by entering their name and email address. External signers receive an invitation by email and can sign without having a Hippoly account.

</details>

<details>

<summary>What happens to the original document after signing?</summary>

For **files**, the signed PDF replaces the original file and previous versions remain in the version history. For **Hippoly Docs**, the signed PDF is stored alongside the document, and the document status changes to Signed (read-only). For **meeting minutes**, the signed protocol is stored in the meeting folder.

</details>

<details>

<summary>Can I cancel a signing that's already in progress?</summary>

Yes. As long as the signing is still in progress, you can cancel it. See [Manage signing process](/using-hippoly/e-signing/manage-signing-process) for details.

</details>

<details>

<summary>What signing methods are available?</summary>

Hippoly supports Swedish BankID, Norwegian BankID, Danish MitID, Finnish FTN, SMS PIN, and signing without additional verification. See [Signing methods](/using-hippoly/e-signing/signing-methods) for a full overview.

</details>


# Send for e-signing

This article covers e-signing **files and Hippoly Docs** from the folder view. The signing flow is the same for both, you select the document, add signers, and send.

{% hint style="info" %}
**Signing meeting minutes works differently.** The flow is started from the meeting protocol panel, not the folder view. See [Send meeting minutes for e-signing](/using-hippoly/meetings/e-sign-meeting-minutes) under Meetings.
{% endhint %}

{% stepper %}
{% step %}
Navigate to the file or Hippoly Doc in the folder view. The file must be in a format that can be converted to PDF (such as `.pdf`, `.docx`, `.xlsx` or similar). Hippoly Docs are automatically converted to PDF as part of the signing flow.
{% endstep %}

{% step %}
Open the context menu and select `Sign document`. The signing dialog opens.

{% hint style="info" %}
If the Hippoly Doc is still a **draft** or has a **draft in progress**, it will be automatically published before signing starts. This ensures that the version being signed is the final, shared version.
{% endhint %}
{% endstep %}

{% step %}
Add the people who need to sign the document:

* **Workspace members:** search by name and select from the list.
* **External parties:** enter the person's name and email address. They will receive a signing invitation by email and do not need a Hippoly account.

For each signer, select a [signing method](/using-hippoly/e-signing/signing-methods) that determines how they verify their identity (for example Swedish BankID, SMS, or no additional verification).
{% endstep %}

{% step %}
By default, all signers can sign in parallel. If signatures need to happen in a specific sequence, for example the chairperson signs last, enable `Set signing order` and arrange the signers in the desired order.
{% endstep %}

{% step %}
Review the settings and click `Send for signing`. Hippoly converts the document to PDF if needed, creates the signing request through Scrive, and notifies all signers.
{% endstep %}
{% endstepper %}

Once signing is initiated, the document shows a **Signing** indicator. You can track progress and send reminders from the [signing management view](/using-hippoly/e-signing/manage-signing-process).

## After signing completes

When all signers have signed:

* **For files:** the signed PDF **replaces the original file**. The unsigned version remains available in the file's version history for full traceability.
* **For Hippoly Docs:** the document status changes to **Signed** and it becomes **read-only**. The signed PDF is stored alongside the document and can be [downloaded](/using-hippoly/hippoly-docs/download-document) by anyone with access. The original content and full [version history](/using-hippoly/hippoly-docs/version-history) remain available.


# Sign a document

When someone sends you a document for e-signing, you'll receive a notification asking you to review and sign. This article describes the signing experience from the signer's perspective.

## How you get notified

How you receive the signing request depends on whether you are a workspace member or an external signer:

* **Workspace members** receive an in-app notification in Hippoly and can open the signing request directly from there.
* **External signers** (people who are not part of the workspace) receive an email from Scrive with a link to sign the document.

## Review and sign

{% stepper %}
{% step %}
**As a workspace member**, click the notification in Hippoly and then click the `Sign` button in the signing details. A new tab opens with the Scrive signing page.

**As an external signer**, click the link in the email you received. You are taken directly to the Scrive signing page.
{% endstep %}

{% step %}
On the Scrive signing page, you can read through the full document before signing. Take the time to review the content carefully.
{% endstep %}

{% step %}
Depending on the [signing method](/using-hippoly/e-signing/signing-methods) chosen by the sender, you may need to verify your identity, for example using BankID, MitID, SMS PIN, or another method. Follow the instructions on the Scrive signing page.
{% endstep %}

{% step %}
Once your identity is verified, confirm your signature. You'll see a confirmation that the signing is complete.
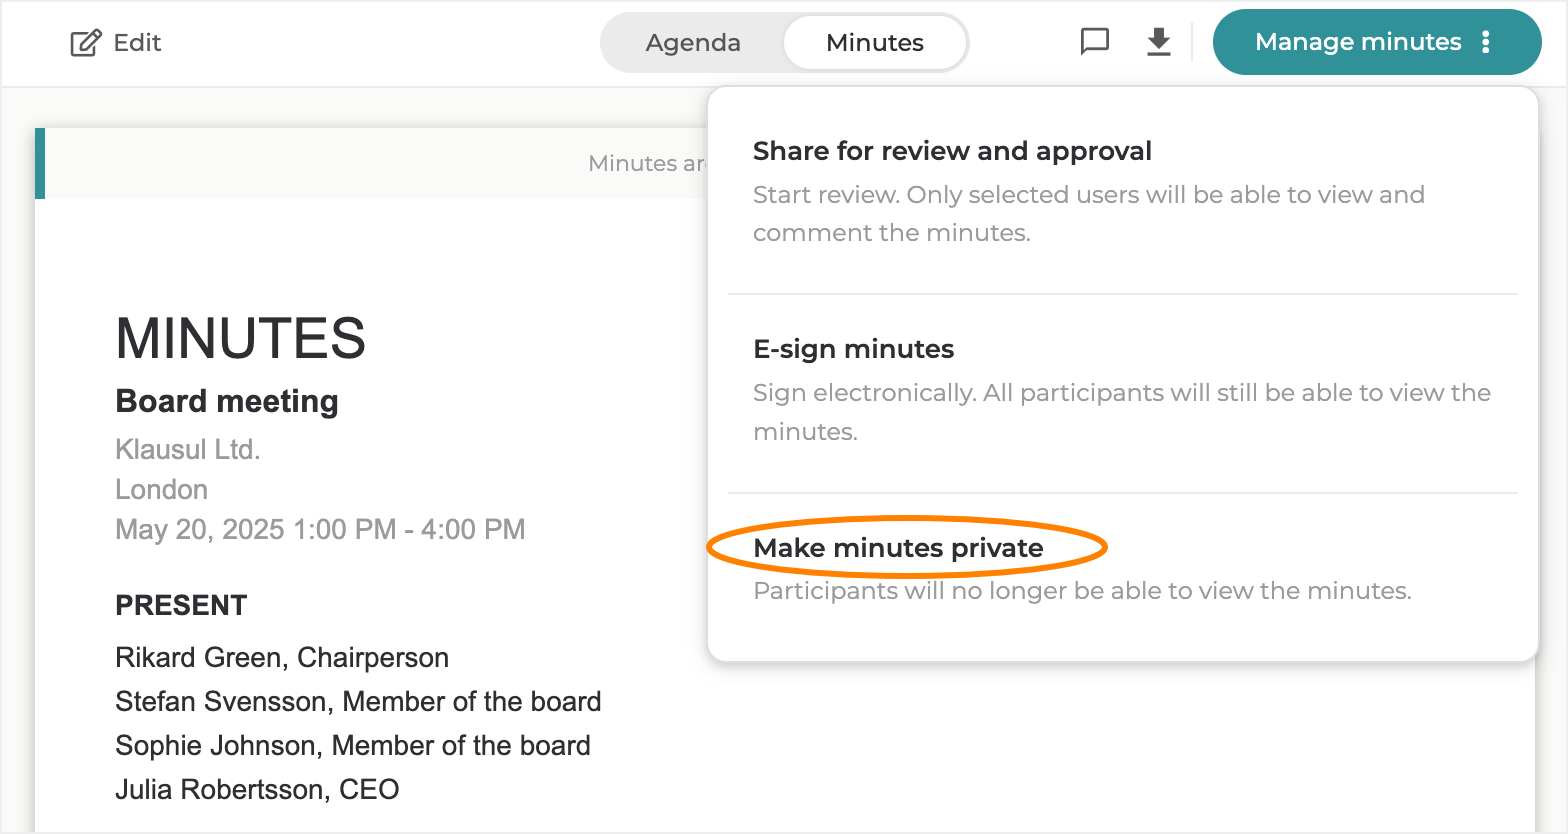
{% endstep %}
{% endstepper %}

## Decline to sign

If you don't agree with the document or are unable to sign, you can **reject** the signing request on the Scrive signing page. The sender will be notified that you have declined. You can optionally provide a reason for the rejection.

{% hint style="info" %}
Rejecting a signing request cancels the entire signing process. The sender can make changes and start a new signing if needed.
{% endhint %}

## Sequential signing

If the sender has set a signing order, you may see a status of **Waiting for prior signatures**. This means another signer needs to complete their signature before it's your turn. You'll be notified when it's time for you to sign.

## After signing

Once all signers have completed their signatures, the signed document is finalised and stored in Hippoly. All parties, both workspace members and external signers, are notified when the signing is complete.


# Re-sign a document

Sometimes a signed document needs to be signed again, for example if the content needs to be updated or if the signing needs to include different signers. The re-signing flow depends on the type of document.

| Type                       | How to re-sign                                                                               |
| -------------------------- | -------------------------------------------------------------------------------------------- |
| **Files and Hippoly Docs** | [Create a copy](#re-sign-a-file-or-hippoly-doc), then sign the copy.                         |
| **Meeting minutes**        | [Recall the minutes](#re-sign-meeting-minutes) to draft, make your changes, then sign again. |

***

## Re-sign a file or Hippoly Doc

A signed file or Hippoly Doc cannot be edited directly. To re-sign, you first create a copy of the original content from before it was signed, which gives you a new editable file. The original signed document is not affected.

{% stepper %}
{% step %}
Open the signed file or document and select the copy action from the menu. For an uploaded **file** this is `Create unsigned copy`; for a **Hippoly Doc** it's `Create editable copy`. Hippoly creates a new copy of the original unsigned content in the same folder.
{% endstep %}

{% step %}
The copy is a regular, editable file that you can open and edit. Make any changes that are needed before the new signing.
{% endstep %}

{% step %}
[Send the copy for e-signing](/using-hippoly/e-signing/e-sign-files-and-docs): add signers, choose signing methods, and send.
{% endstep %}
{% endstepper %}

{% hint style="info" %}
The original signed document remains unchanged. Both the signed original and the new copy exist side by side in the folder, so you keep a complete audit trail.
{% endhint %}

***

## Re-sign meeting minutes

Meeting minutes work differently because they are tied to the meeting itself. Instead of creating a copy, you **recall the minutes** back to draft, which makes them editable again. You can then update the content and start a new signing.

{% stepper %}
{% step %}
Open the meeting and go to the **Protocol** panel. Click `Make minutes private`. The minutes revert to **draft** and are no longer visible to meeting participants until they are shared again.
{% endstep %}

{% step %}
The minutes are now editable. Make the changes that are needed before re-signing.
{% endstep %}

{% step %}
When the minutes are ready, [send the minutes for e-signing](/using-hippoly/meetings/e-sign-meeting-minutes) again from the protocol panel.
{% endstep %}
{% endstepper %}

{% hint style="warning" %}
Recalling the minutes makes them invisible to all meeting participants until you share or sign them again. Make sure to communicate with participants if they need to know that the signed version is being revised.
{% endhint %}


# Manage signing process

Once a document has been sent for e-signing, you can track its progress, remind signers, or cancel the signing if needed.

## Track signing status

Every document with an ongoing or completed signing shows a status indicator. The possible statuses are:

| Status        | Meaning                                                              |
| ------------- | -------------------------------------------------------------------- |
| **Signing**   | The signing is in progress. One or more signers have not yet signed. |
| **Completed** | All signers have signed. The signed PDF has been stored.             |
| **Rejected**  | A signer has declined to sign. The signing is cancelled.             |
| **Cancelled** | The signing was manually cancelled by the sender.                    |
| **Timed out** | The signing was not completed within 90 days and has expired.        |

Open the signing details on the document to see the full list of signers, their individual status, and when they signed.

## Send reminders

If one or more signers have not yet completed their signing, you can send them a reminder.

{% stepper %}
{% step %}
Open the signing details on the document.
{% endstep %}

{% step %}
Click `Remind signers`. All signers who have not yet signed receive a new notification.
{% endstep %}
{% endstepper %}

## Cancel a signing

If the signing is no longer needed, for example the document needs to be updated before signing, you can cancel it as long as it's still in the **Signing** status.

{% stepper %}
{% step %}
Open the signing details on the document.
{% endstep %}

{% step %}
Click `Cancel signing` and confirm the action.
{% endstep %}

{% step %}
The signing is cancelled and all pending signers are notified. The document returns to its previous state, and a new signing can be initiated when ready.
{% endstep %}
{% endstepper %}

## Signatory statuses

Each individual signer in a signing process has their own status:

| Status               | Meaning                                                                           |
| -------------------- | --------------------------------------------------------------------------------- |
| **Pending**          | The signer has been invited but has not yet signed.                               |
| **Signed**           | The signer has completed their signature.                                         |
| **Rejected**         | The signer has declined to sign.                                                  |
| **Waiting**          | The signer is waiting for a prior signer to complete (when signing order is set). |
| **Delivery problem** | The signing invitation could not be delivered to the signer.                      |


---

[Next Page](/llms-full.txt/1)