> For the complete documentation index, see [llms.txt](https://help.hippoly.com/llms.txt). Markdown versions of documentation pages are available by appending `.md` to page URLs; this page is available as [Markdown](https://help.hippoly.com/using-hippoly/meetings/create-and-edit-meeting-minutes.md).
# Create and edit meeting minutes
{% hint style="info" %}
The user who creates the Minutes document **automatically becomes the Meeting Secretary**. [This can be changed later if needed](#change-meeting-secretary).
{% endhint %}
{% stepper %}
{% step %}
## Create minutes
Open the **Meeting panel** and select the `Minutes` tab.
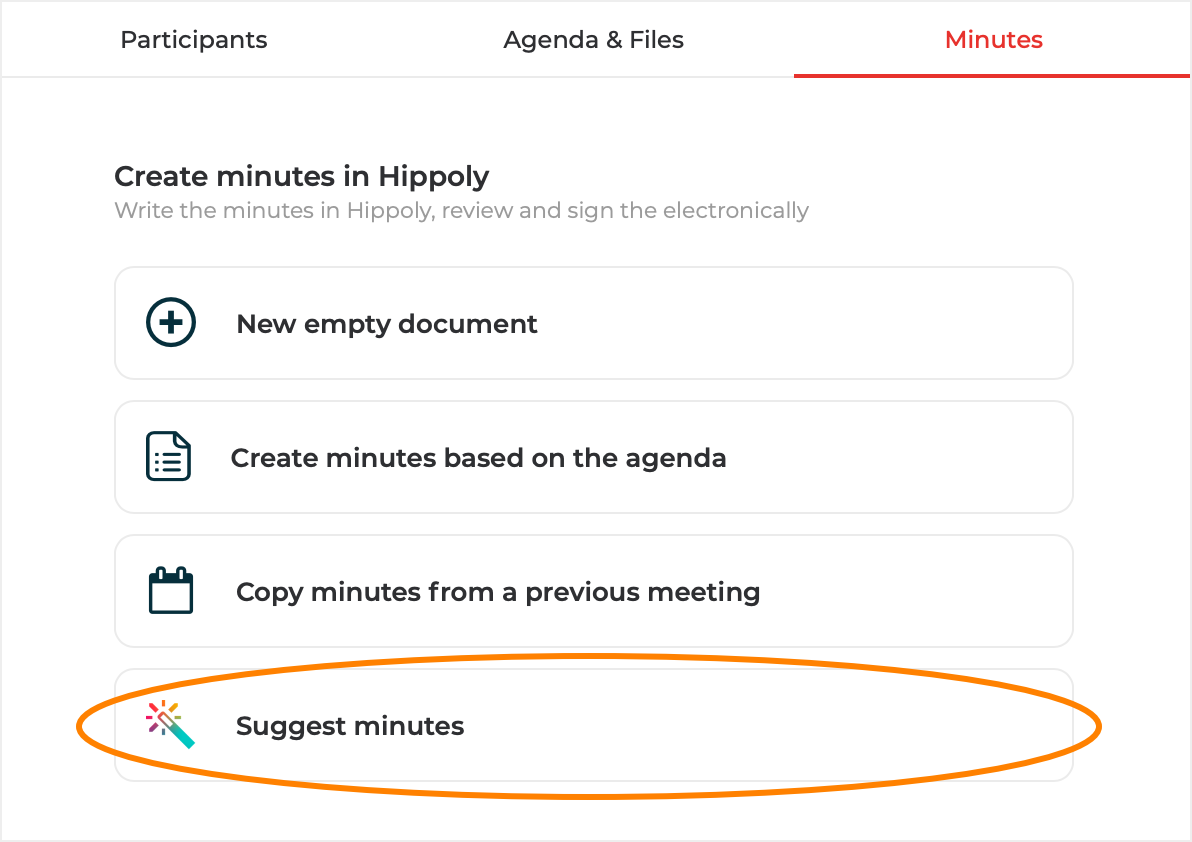
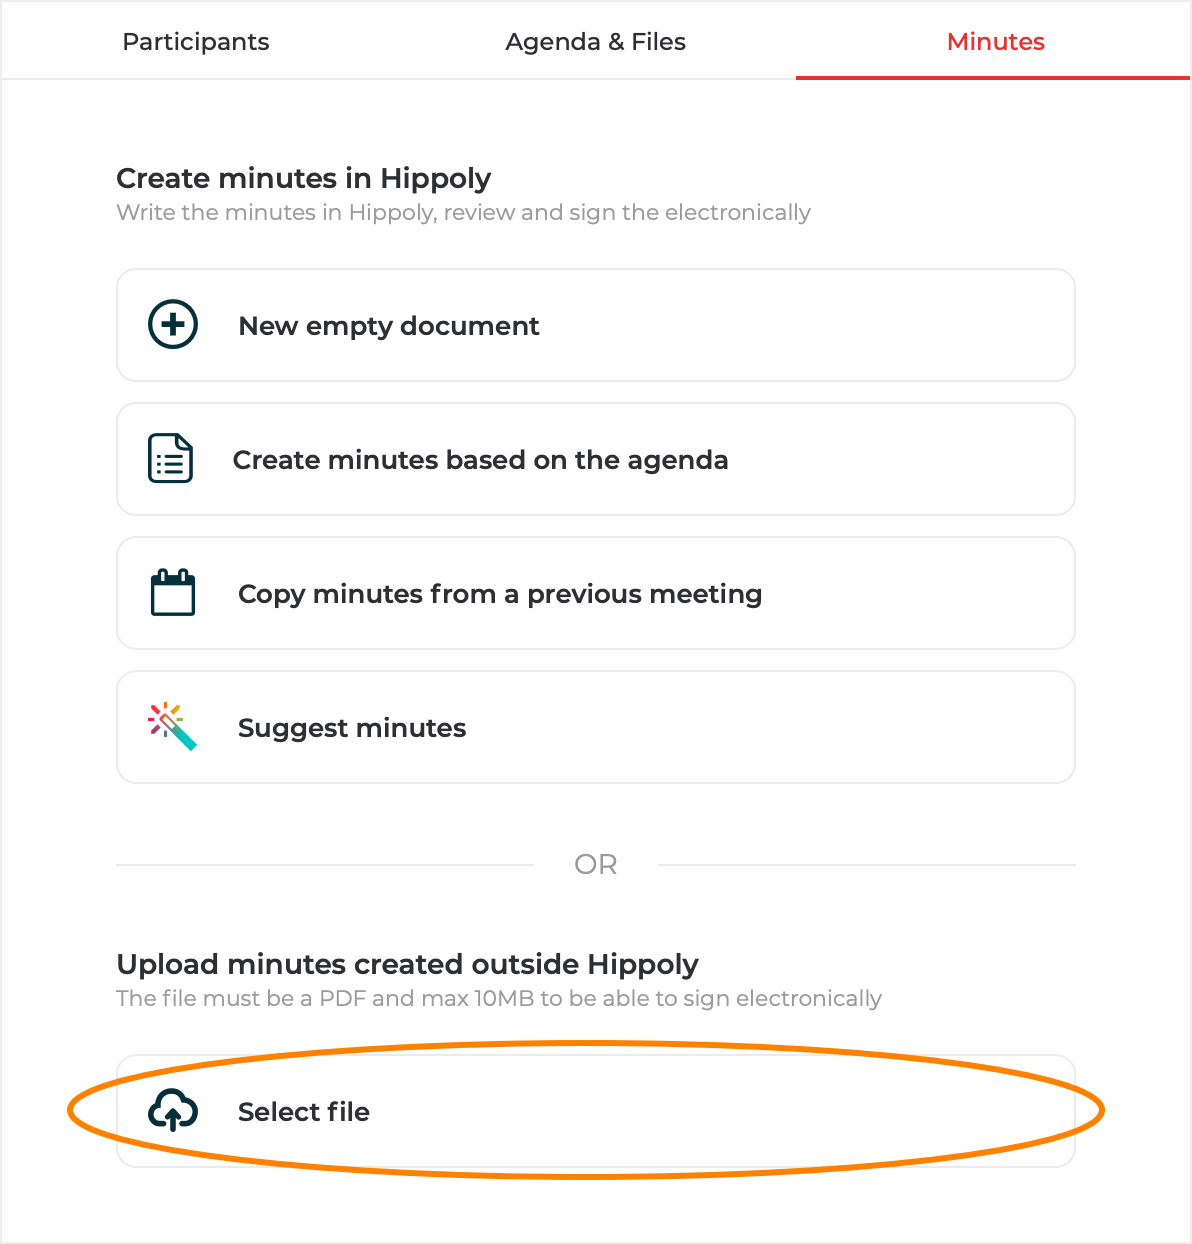
You can start creating your Minutes in four different ways.
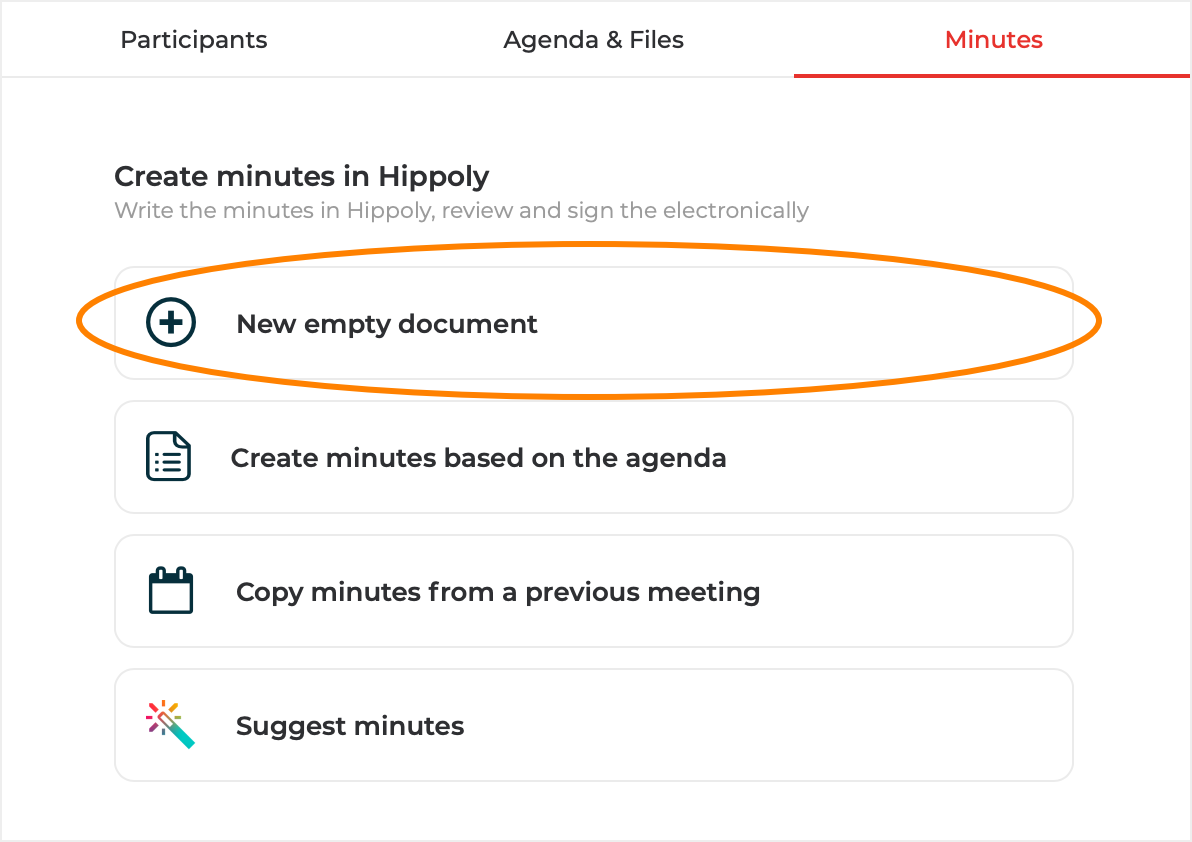
* Blank document
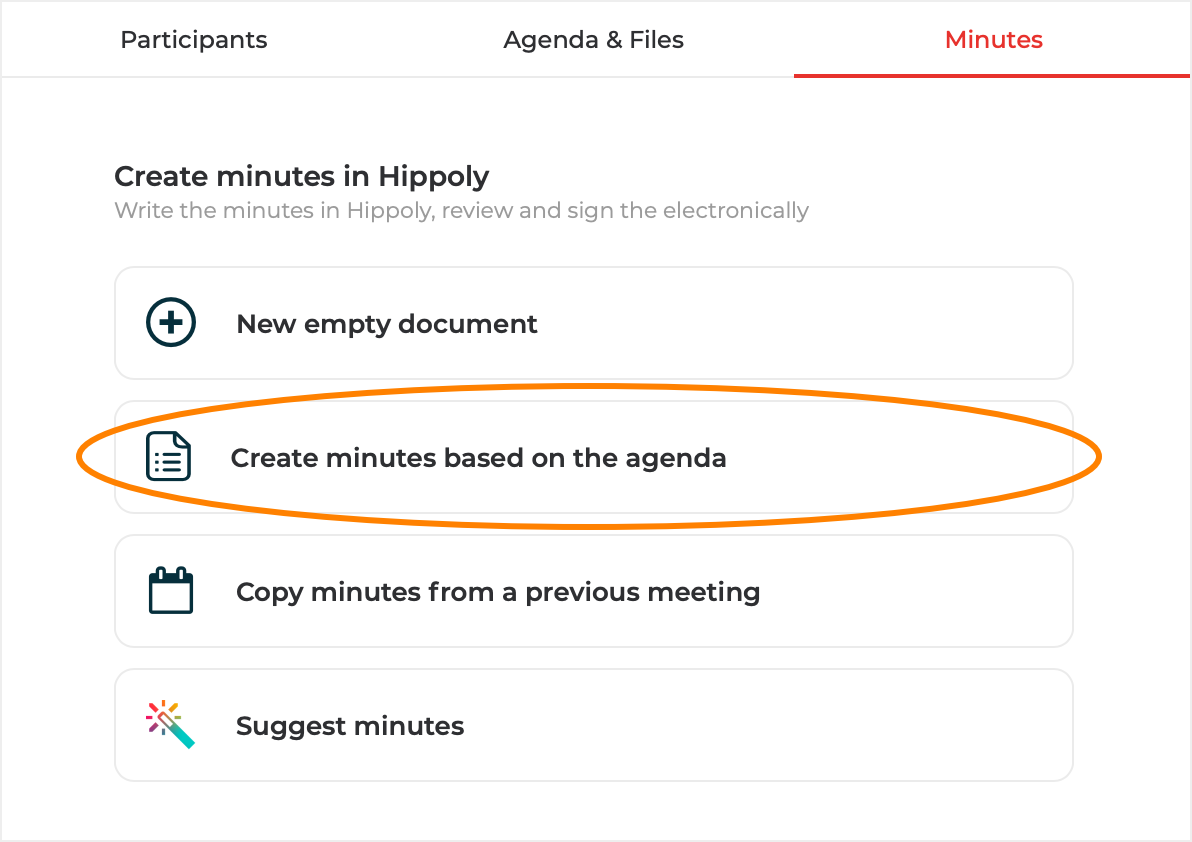
* Based on the meeting agenda (most common)
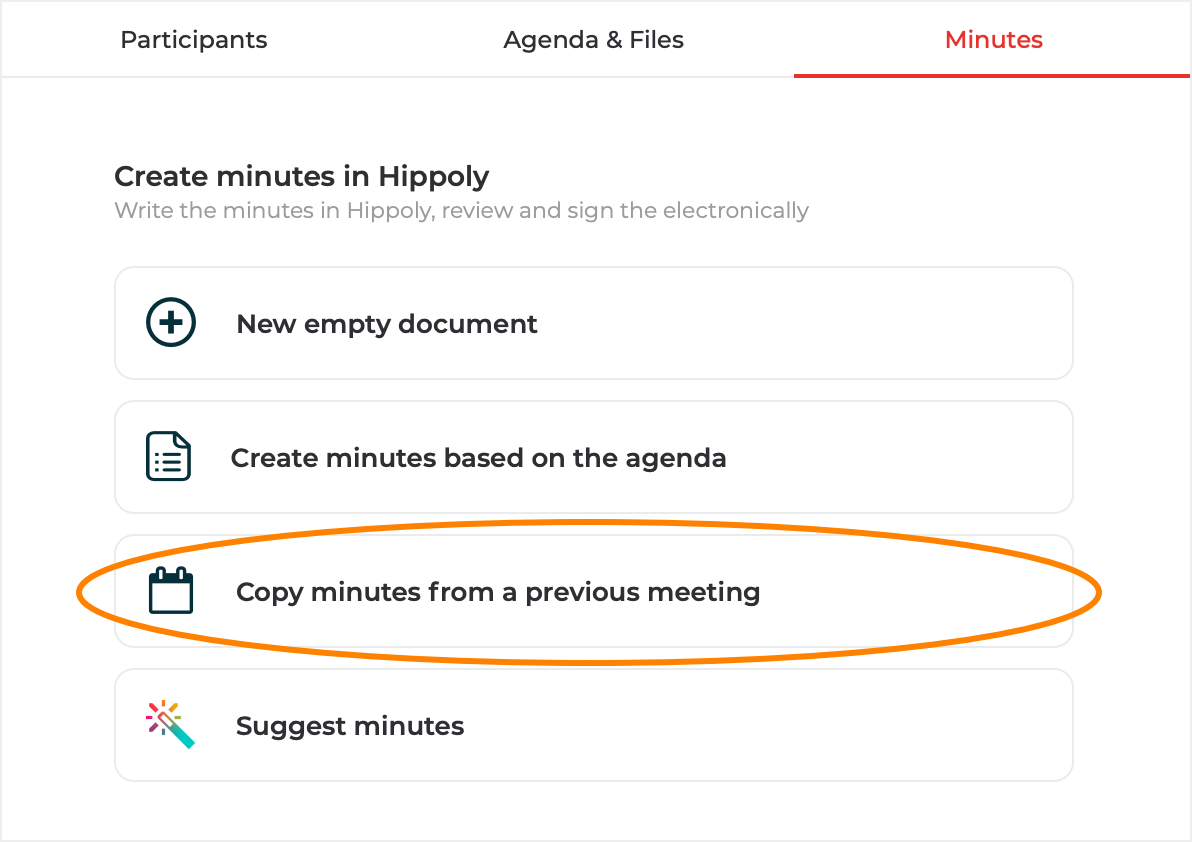
* Copy minutes from a previous meeting
* With help from AI
{% tabs %}
{% tab title="Blank document" %}
Creates a blank document where you add all Minutes sections and notes from scratch.
{% endtab %}
{% tab title="Based on meeting agenda" %}
Creates a document where all Agenda items become Minutes sections. Any description text from the Agenda items is also copied into the Minutes sections. You can remove or add Minutes sections if needed.
{% hint style="info" %}
To create Minutes based on the Agenda, the Agenda must be **shared** and not in draft status.
{% endhint %}
{% endtab %}
{% tab title="Copy from a previous meeting" %}
Creates a document by copying the Minutes from a previous Meeting. All Minutes sections and text will be copied.
{% hint style="info" %}
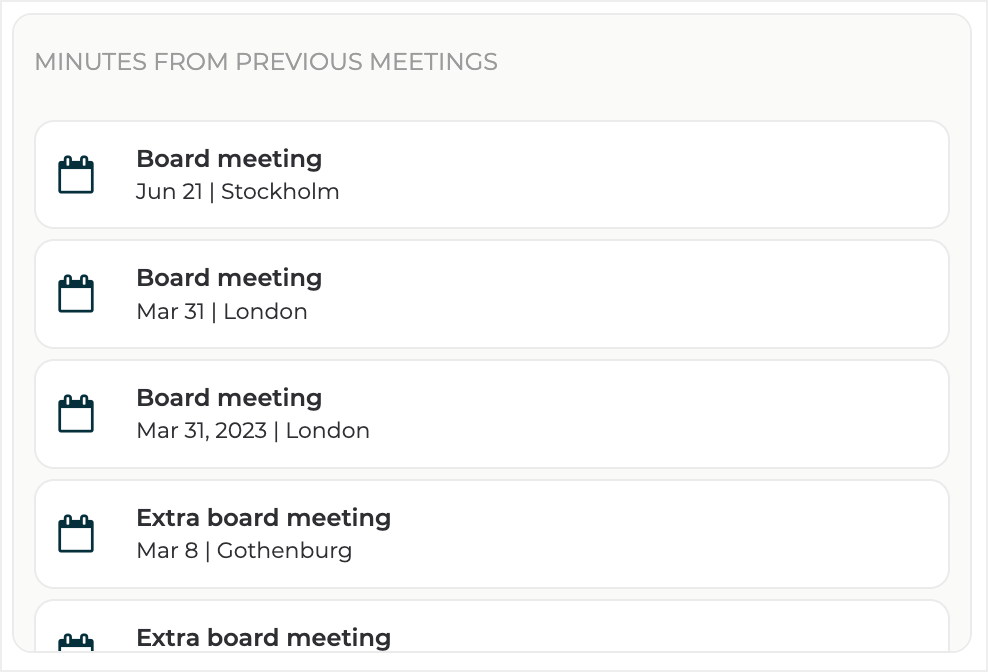
It is only possible to copy previous Meeting Minutes **that have been shared** and are no longer in draft status.
{% endhint %}
1. Click `Copy minutes from a previous meeting` .
2. All previous Meetings you have access to and that have **shared** Minutes will be listed. Click the `Meeting` you want to copy the Minutes from**.**
{% endtab %}
{% tab title="With help from AI" %}
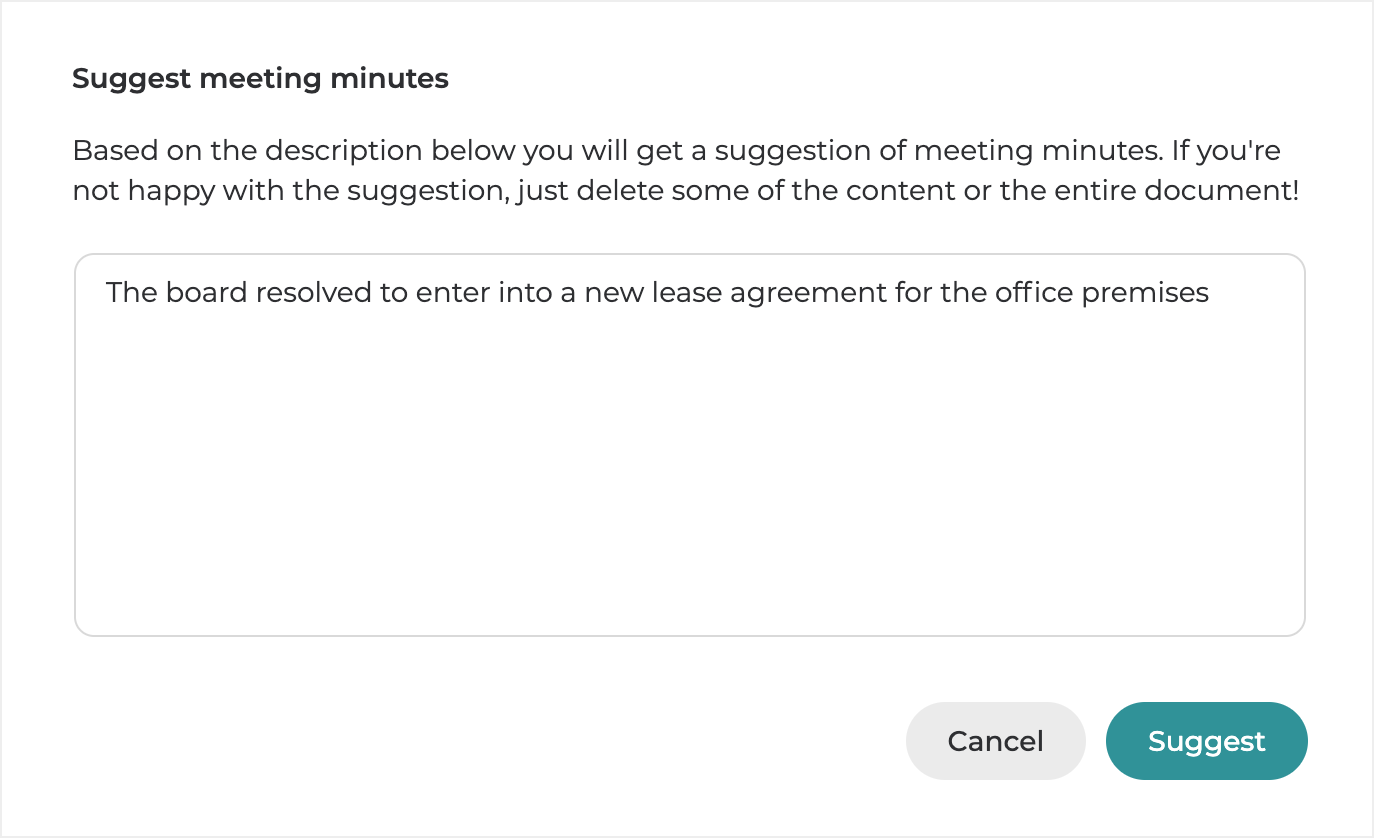
This option allows you to create a Minutes document by simply adding a short description of what was discussed or decided during the Meeting.
1. Click `Suggest minutes` .
2. In the dialog that appear, write a short description of what was discussed or decided and click `Suggest` .
{% endtab %}
{% endtabs %}
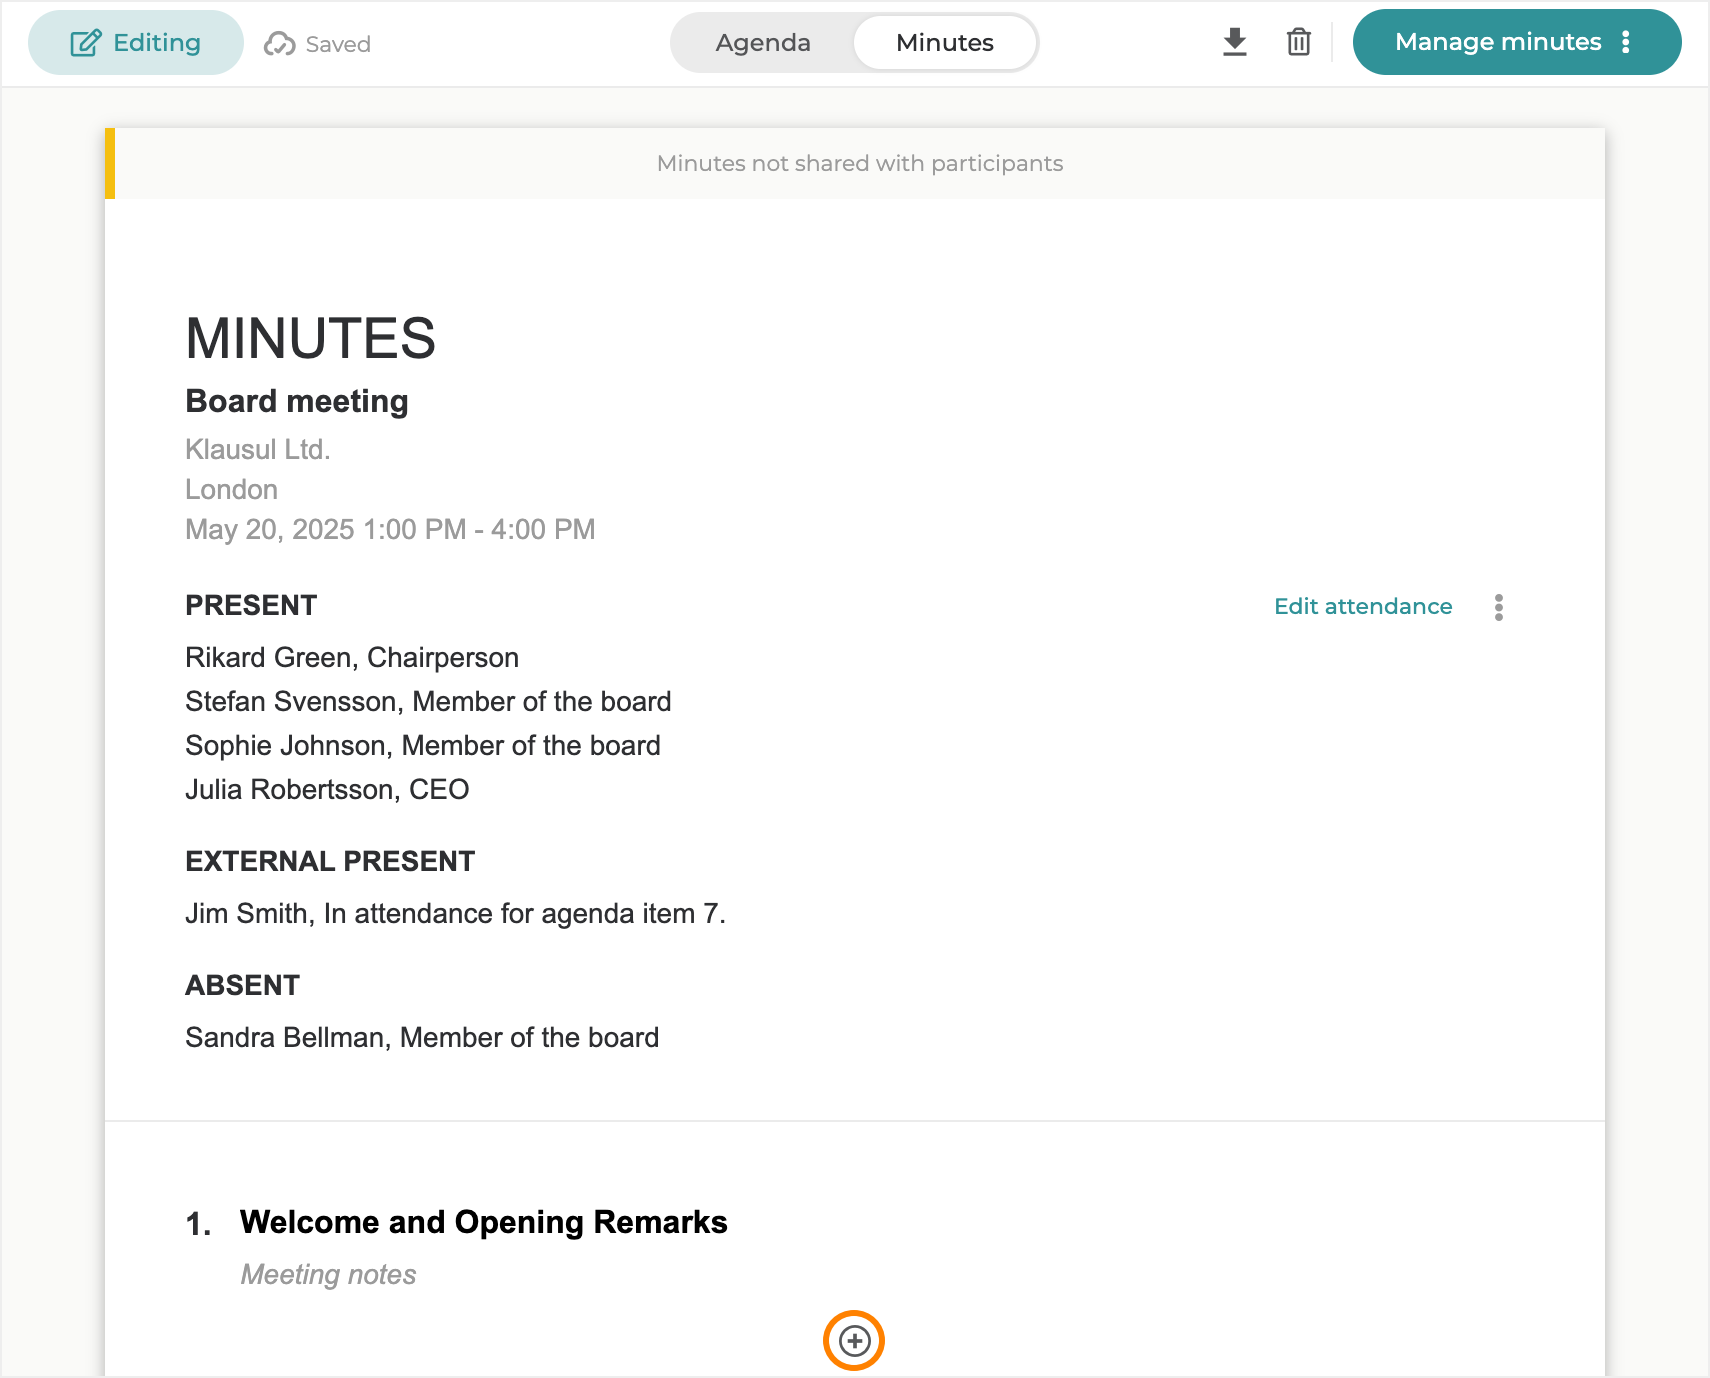
Regardless of which option you choose to create the Minutes, the document will open in the Minutes editor. **The document will have draft status**, meaning that only you, as the Meeting Secretary, can see it until you choose to share it with the Meeting participants.
{% endstep %}
{% step %}
## Manage attendance
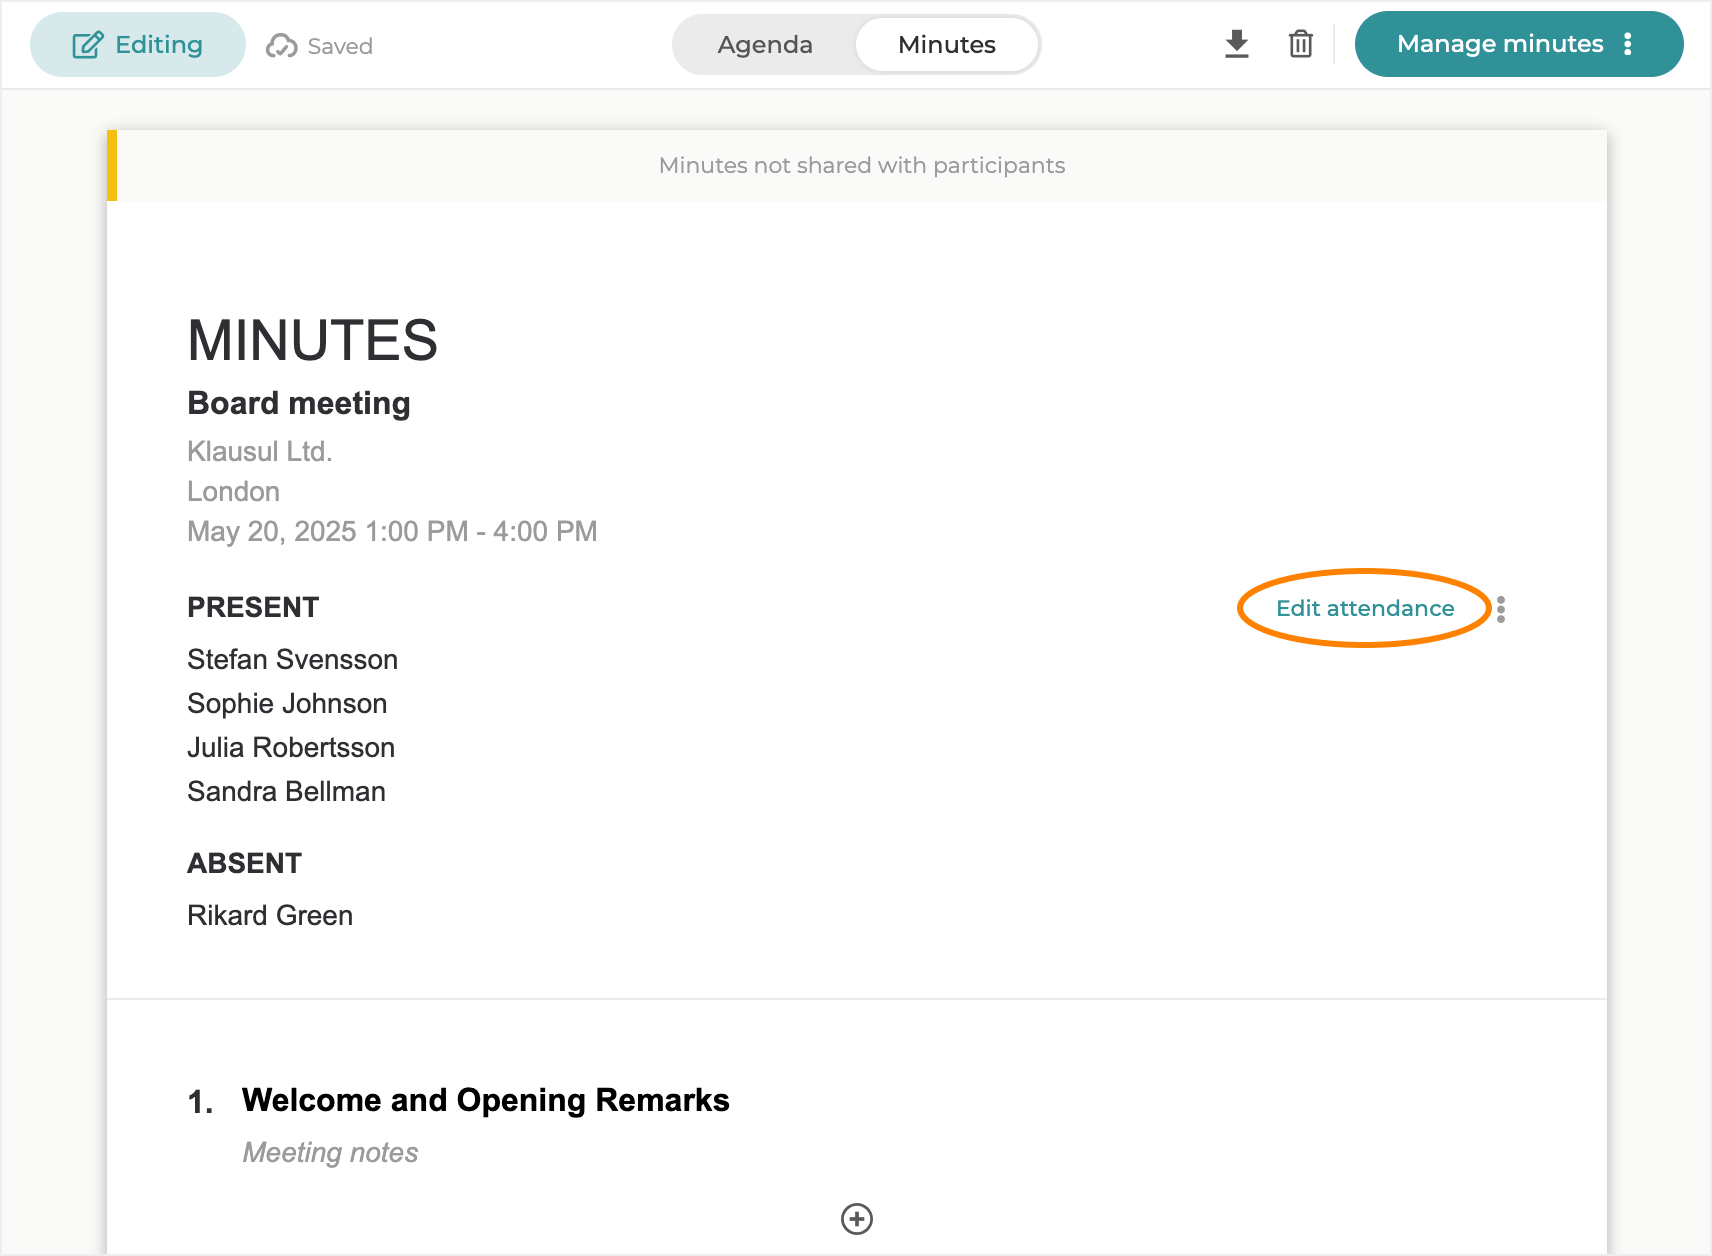
In the attendance section, you record who was present at the Meeting, including full attendees and any guests participating in specific Agenda items. This ensures that the Minutes accurately reflect who took part in the Meeting.
### Edit attendance
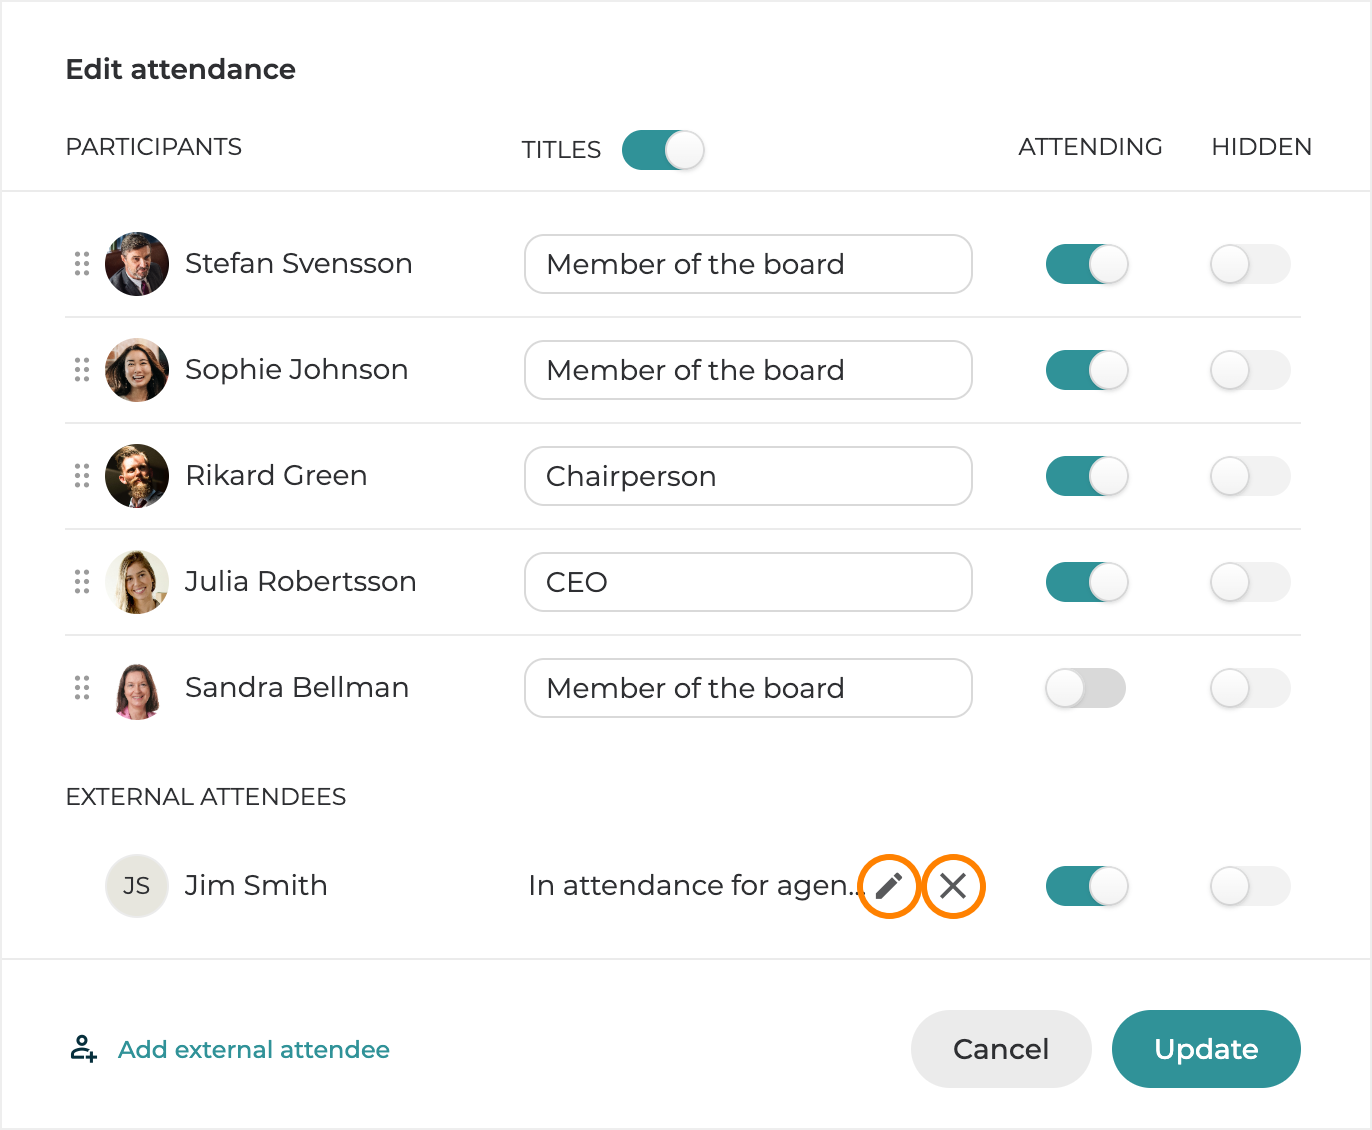
Click the `Edit attendance` button to open the **Attendande dialog**.
### Absent or Present
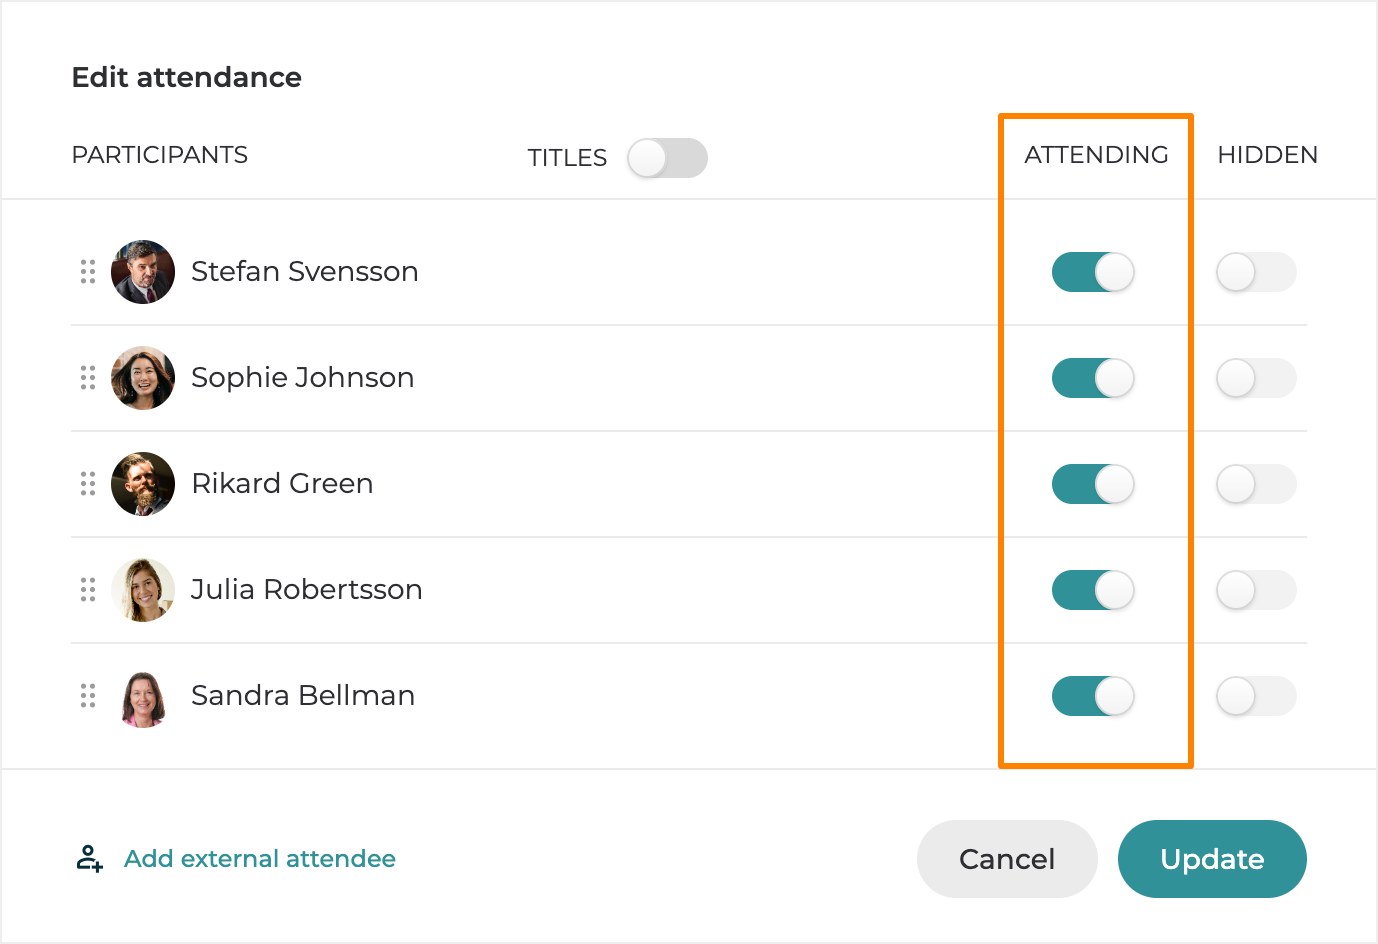
All participants invited to the Meeting are automatically listed as present if they accepted the invitation or replied “maybe,” and as absent if they declined. To change this, use the `Attending` toggles.
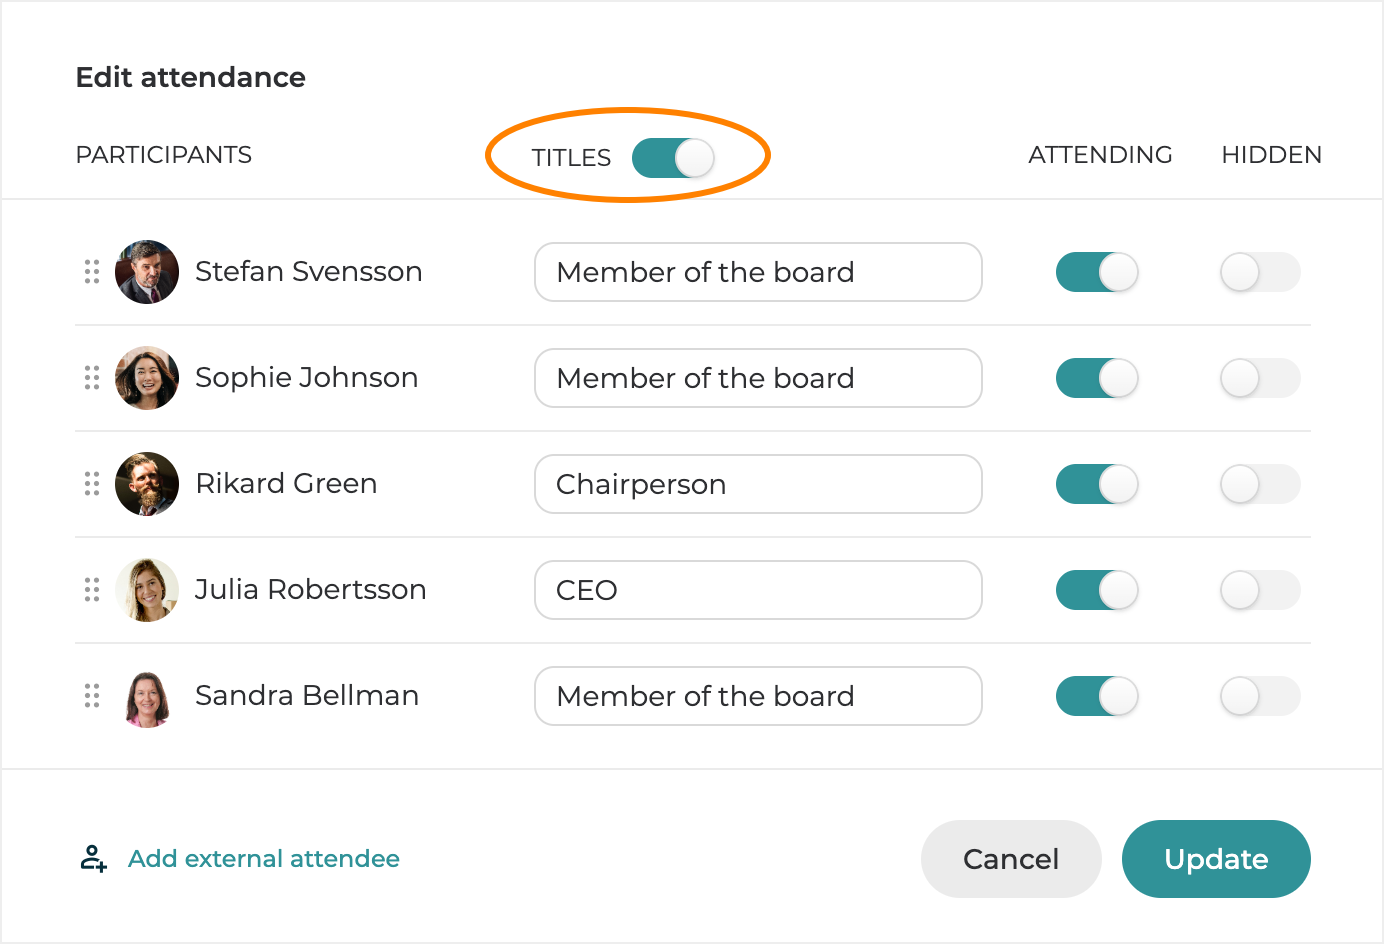
### Show titles
If you want attendees titles to be shown in the attendance section, use the `Title` toggle. Titles are fetched from the title each user has in the workspace and are managed by workspace administrators. However, if needed, you can edit the titles for each individual Minutes document.
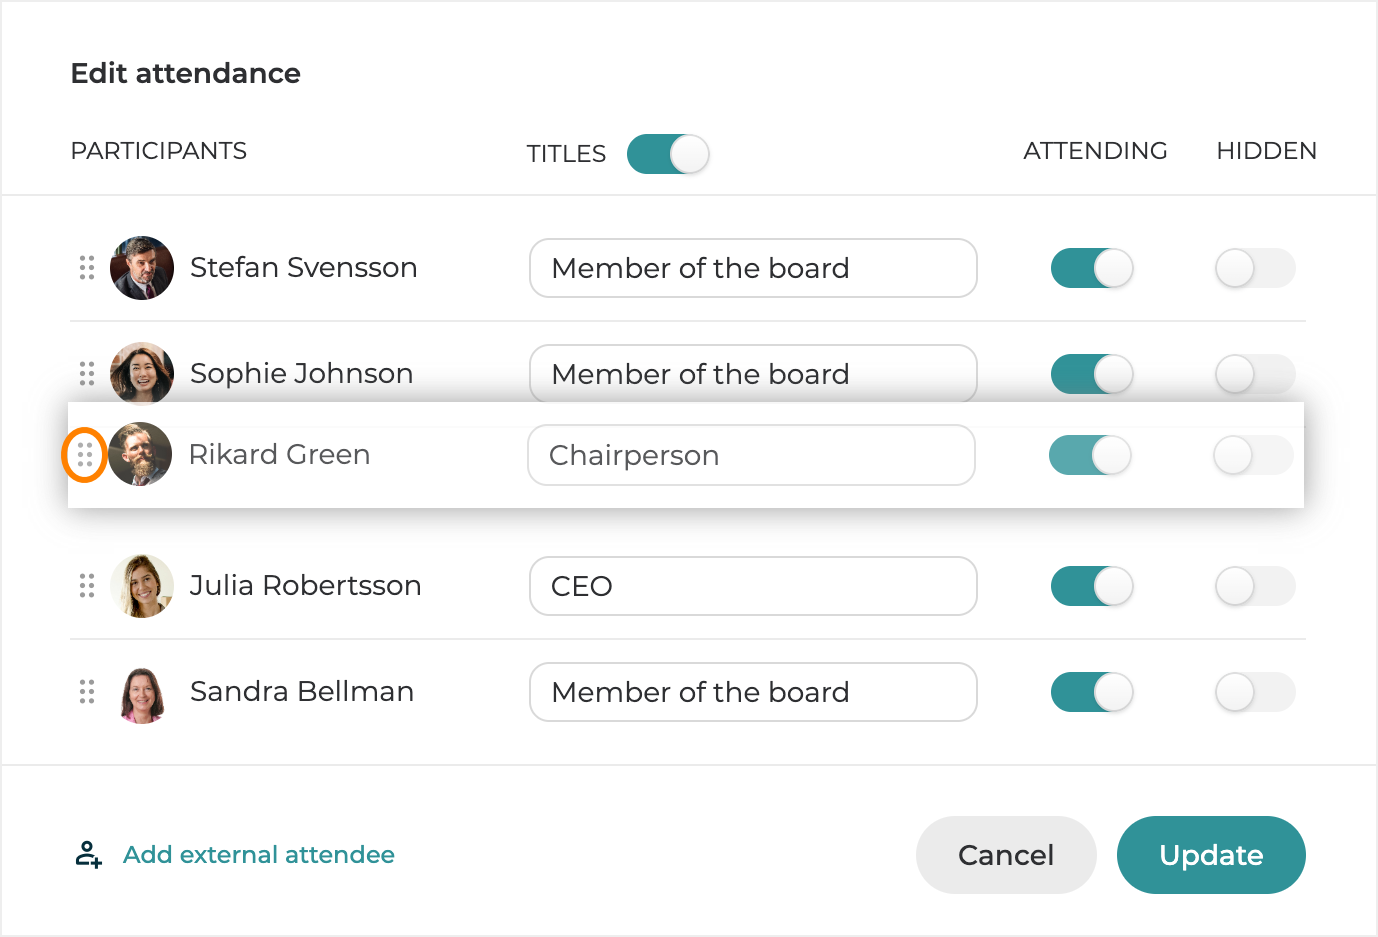
### Change the order of attendees
If you want to change the order in which attendees appear in the attendance section, click the `Drag handle` to the right of an attendee and drag them to the desired position.
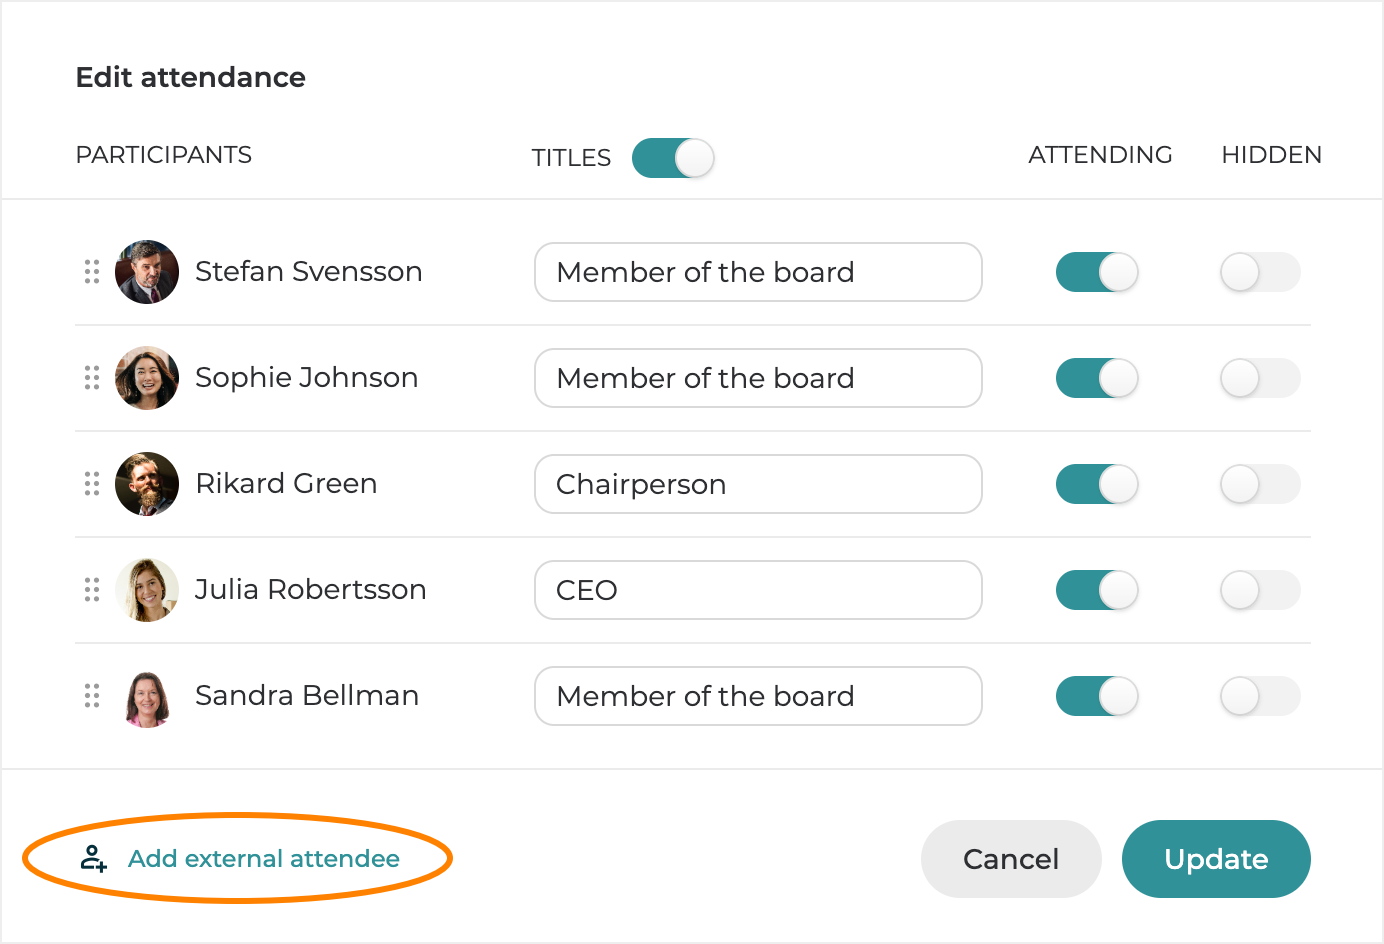
### Add external attendee
If you want to add an external attendee to the attendance section, click the `Add external attendee` button.
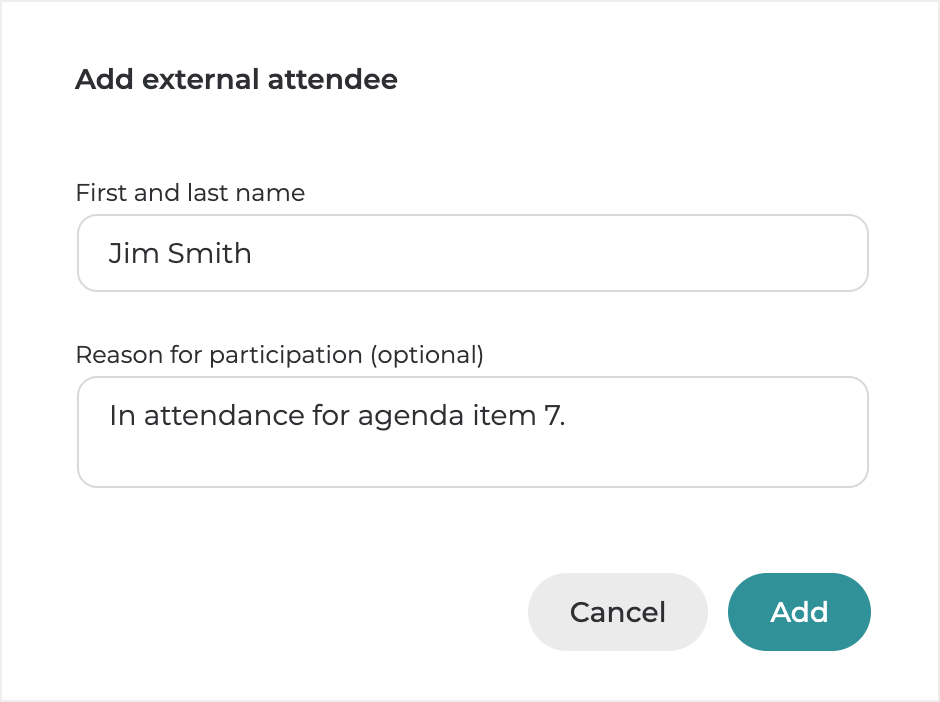
In the dialog that appears, enter the person’s **full name**, optionally add a reason for their attendance, and then click the `Add` button.
If you need to edit or remove an external attendee, use the `Edit` or `Remove` buttons.
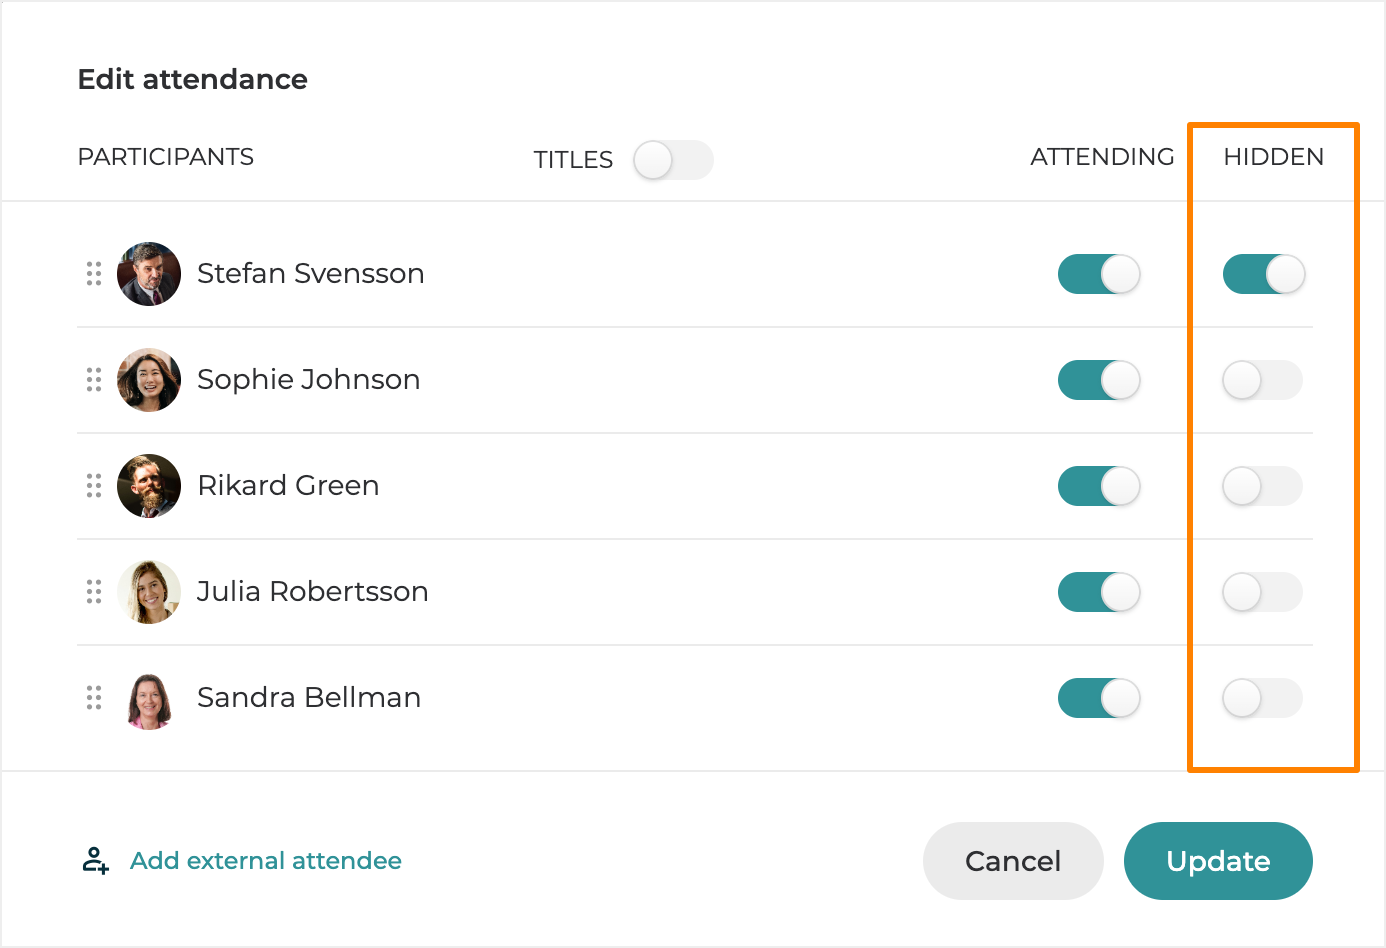
### Hide a participant from the attendance section
If you want to hide an invited user from the attendance section, you can do so by using the `Hidden` toggles.
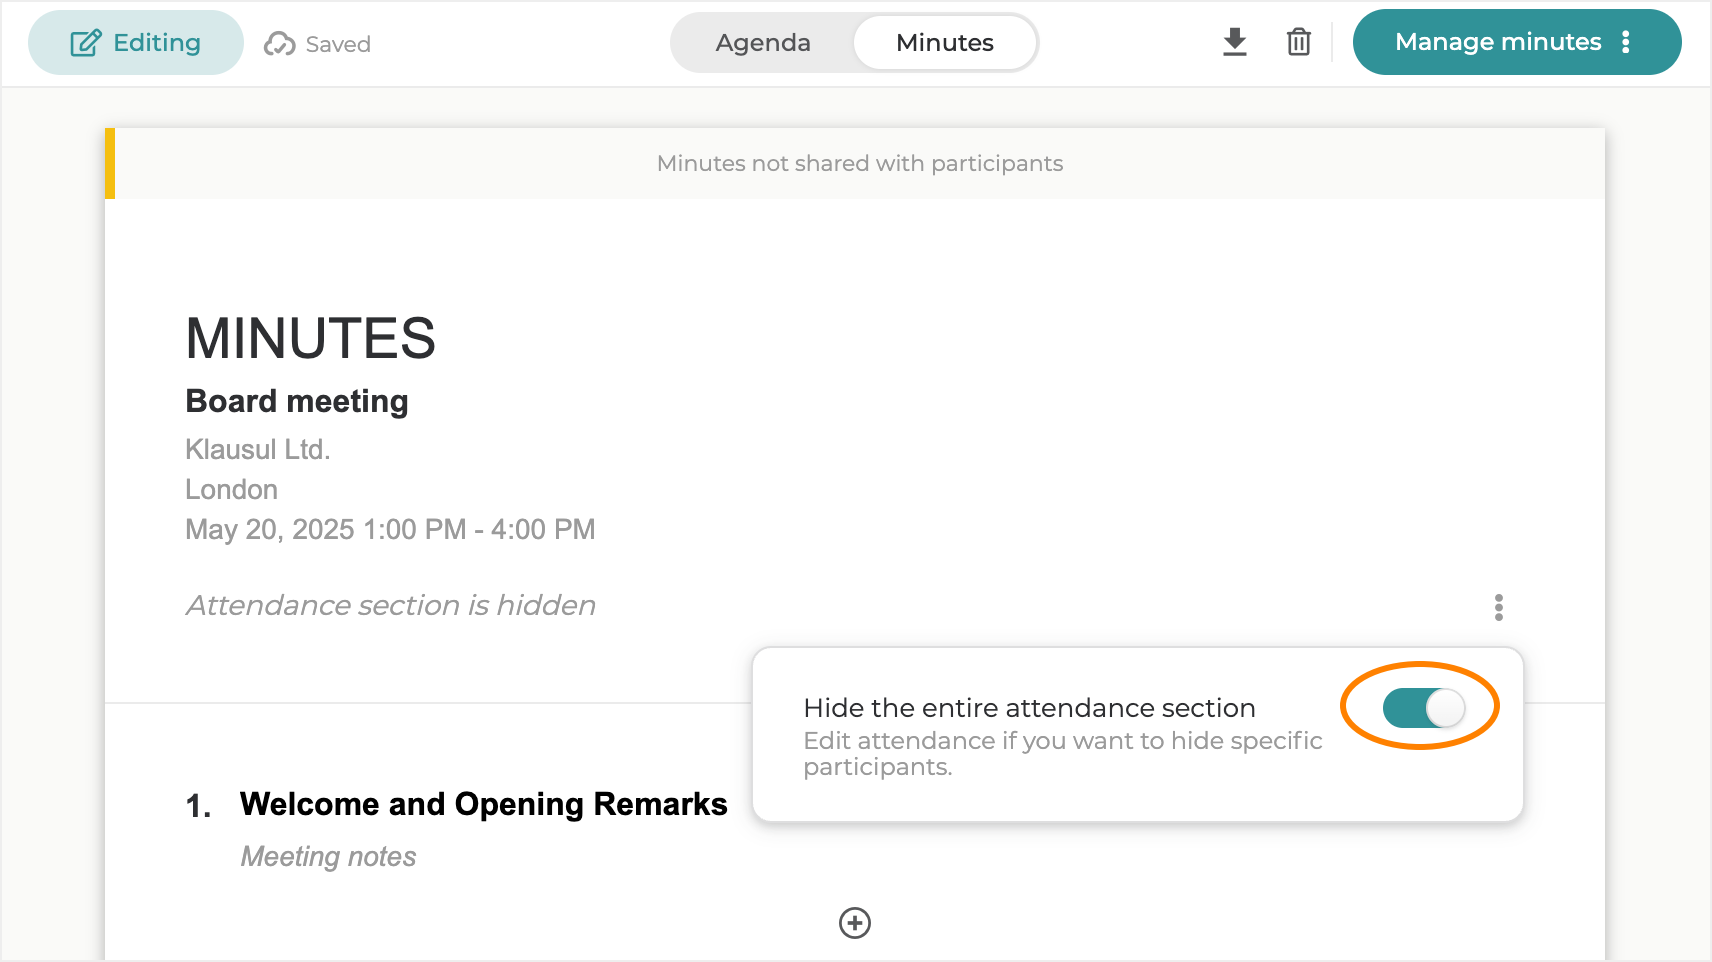
### Hide entire attendance section
If you want to hide the entire attendance section from the Minutes document, use the `Hide entire attendance section` toggle located in the **Edit attendance menu**.
{% endstep %}
{% step %}
## Write minutes
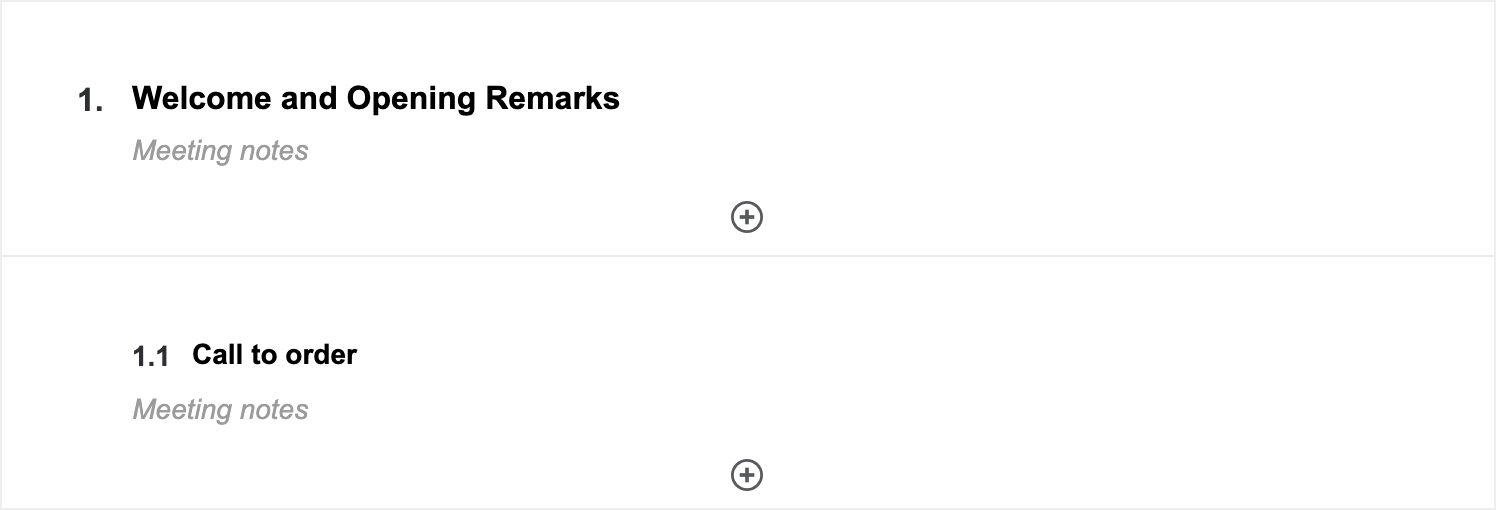
A minutes document consists of sections, each with a **title** and a block for the **minutes notes**. Use the `arrow keys` on your keyboard to seamlessly navigate through the document’s sections.
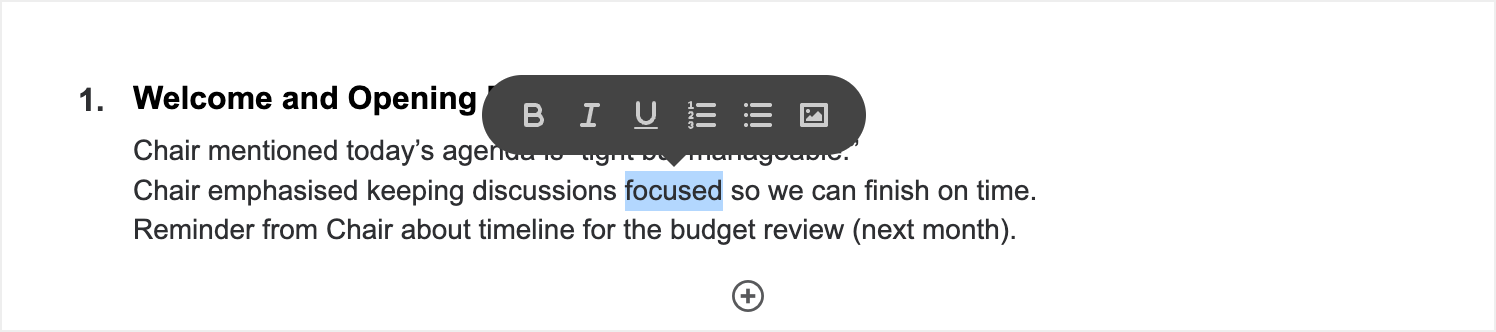
In a sections notes block, you write the Minutes text for that section. You can format the text by selecting it. A toolbar will appear where you can choose the formatting you want to apply, such as **Bold**, **Italic**, **Underline**, **Ordered list,** or **Unordered list**. You can also insert **images** into the section using the menu. In addition to the menu options, you can use common keyboard shortcuts that you’re familiar with from other text editors.
### Write Minutes text with AI
If you’ve jotted down notes during the Meeting and are now turning them into a readable Minutes document, you can use AI to help formalise the text.
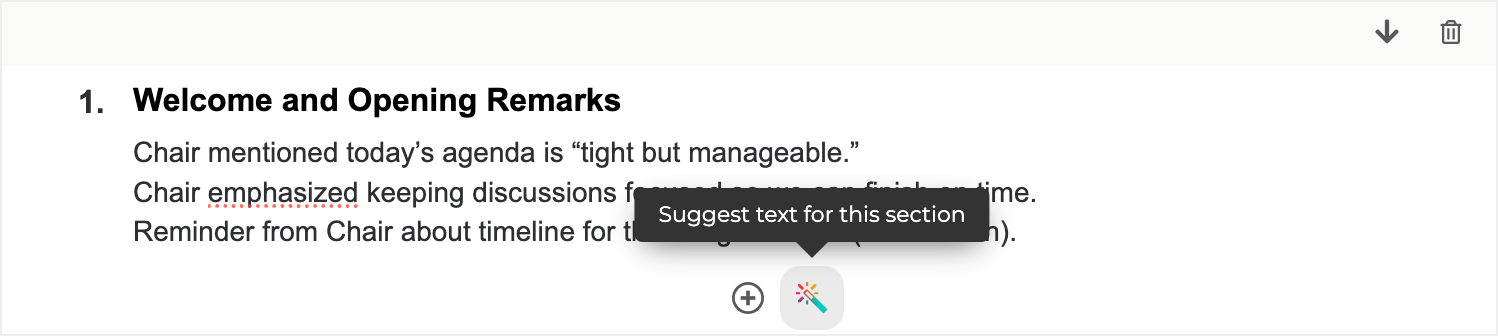
1. Move the cursor over the `+` button at the bottom of an existing item.
2. Click the `Suggest text for this section` button
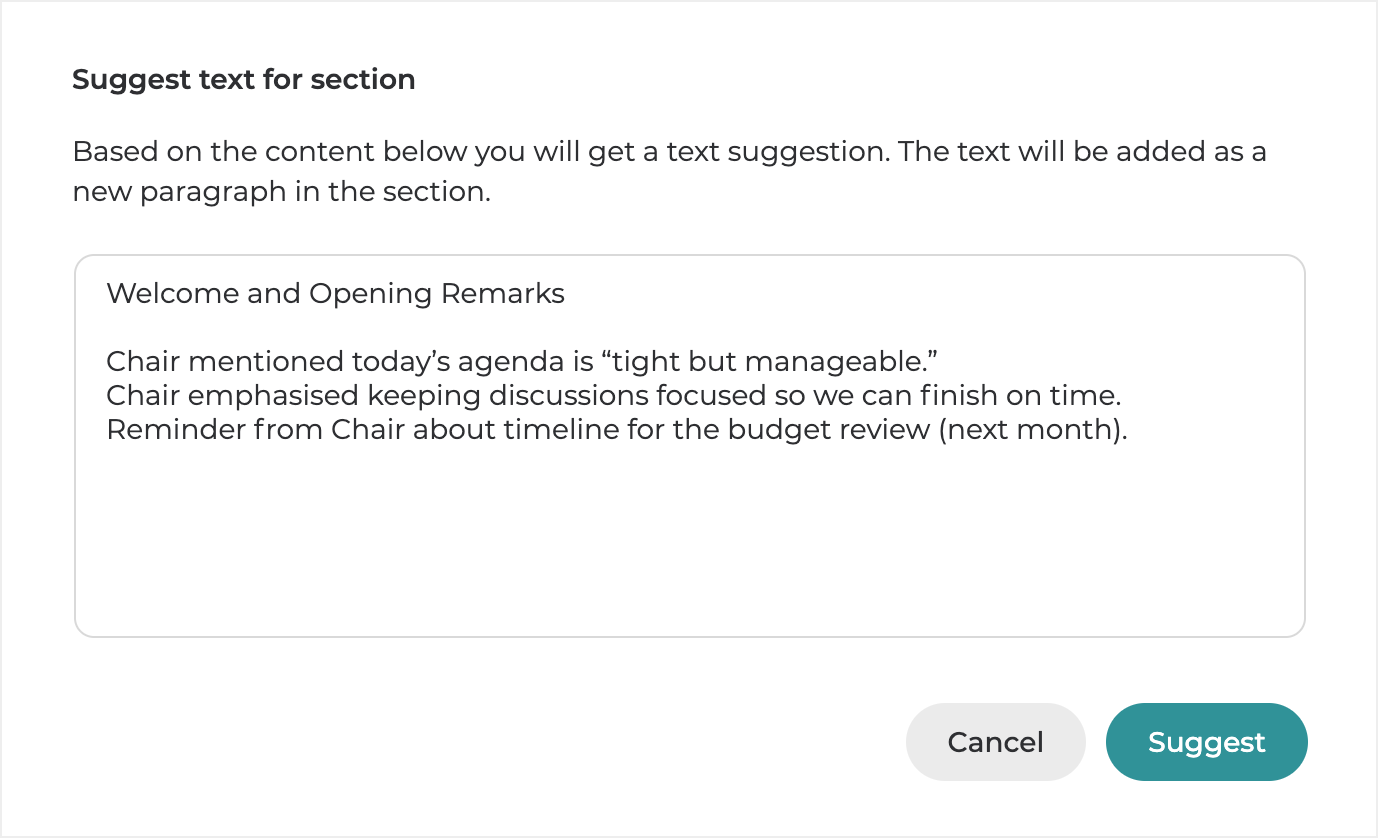
3. A dialog will appear with the sections's title and notes text pre-filled in the input field, serving as the basis for the suggestions. You can modify this text to add more details.
4. Click the `Suggest` button.
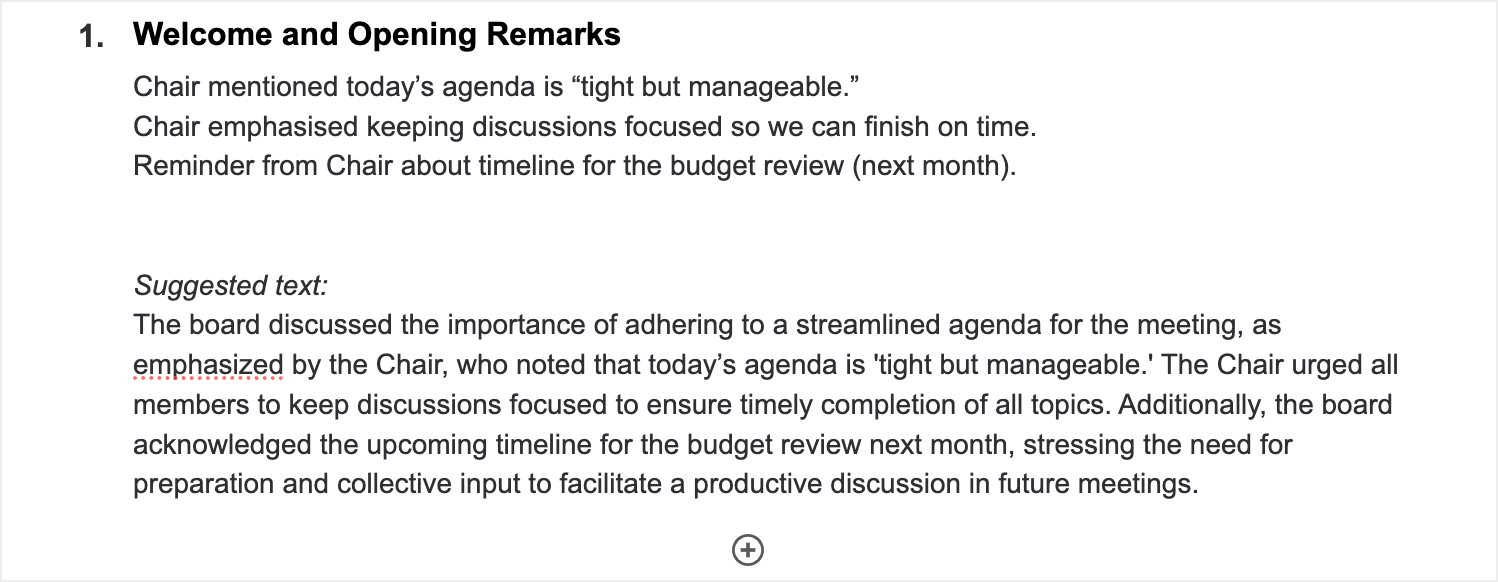
5. A new block with suggested text will be added to the section. You can use it as is, or use it as a base and edit it to fit your needs. If you don’t want to use the suggested text, simply delete it.
### Add, move and remove minutes sections
**To add a new section** click the `+` button at the bottom of an existing section.
Sections can be structured in a two level hierarchy. **To convert an section to a sub-subsection** Click the `Make sub-section` button.
A converted section will appear as an indented subsection to the section above.
Use the `Move item up` or `Move item down` buttons to reorder sections within the document.
To delete a section, use the `Trash bin` button. A confirmation dialog will appear where you need to **confirm** the deletion.
{% endstep %}
{% step %}
## Next steps: share, approve or e-sign
Once you’re satisfied with the Minutes, you can move on to the final steps. You can share the document with the Meeting participants, manage any approval or review needed and, if required, complete the process by e-signing the Minutes.
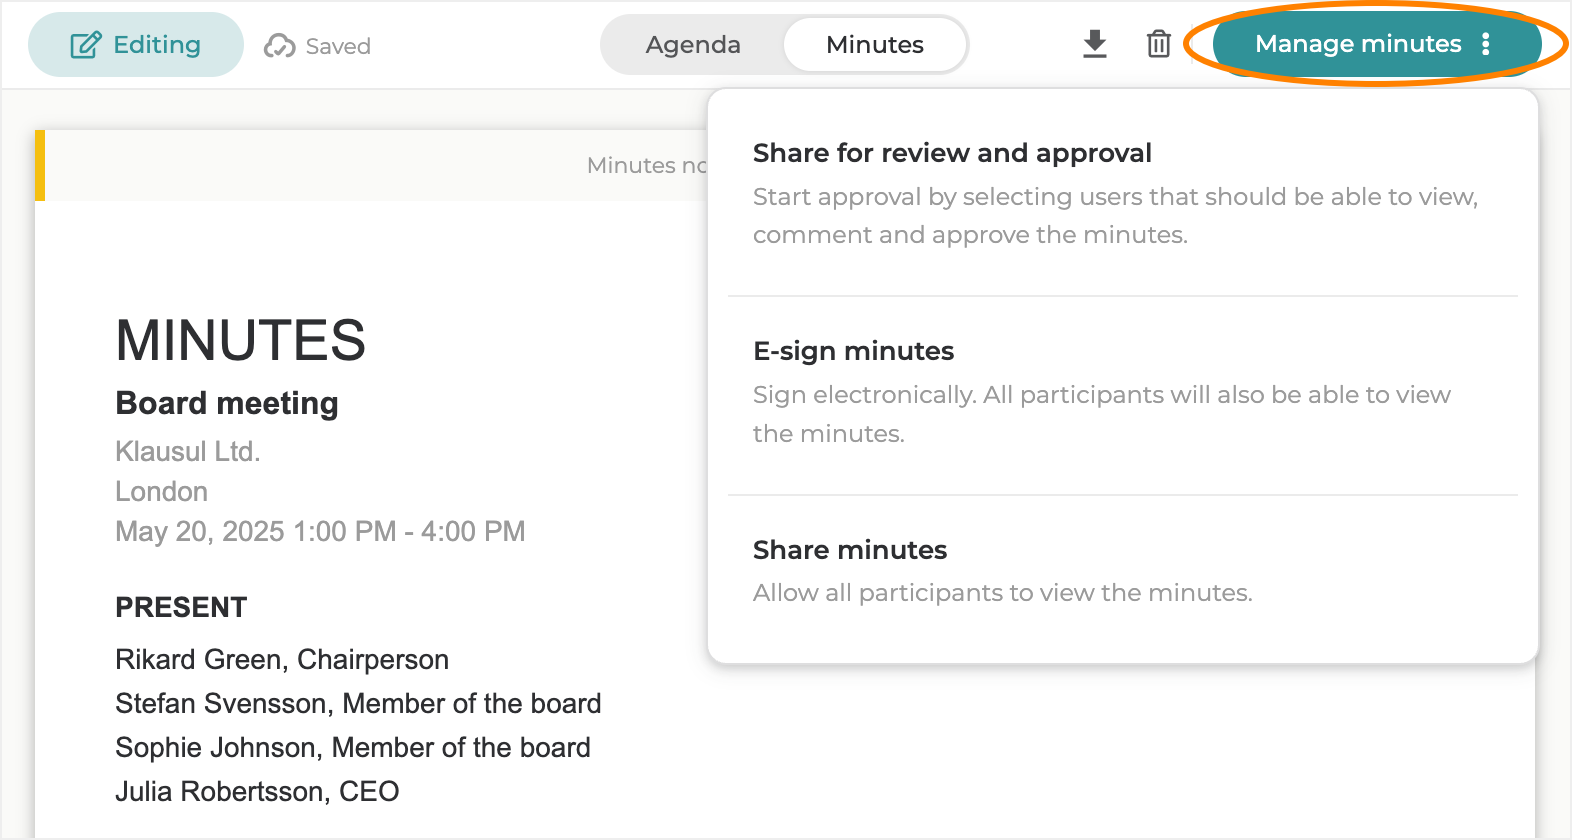
Click the `Manage minutes` button in the top-right corner of the **Minutes editor** and choose how you want to proceed from the menu.
### Share minutes
Until the Minutes are shared, they are only visible to the Secretary. Once shared, all Meeting participants can view them, but only the Secretary can edit the document. As the Secretary, you can choose to share the Minutes at any time. If you share them during the Meeting while writing, participants will be able to see your live edits.
### Unshare minutes
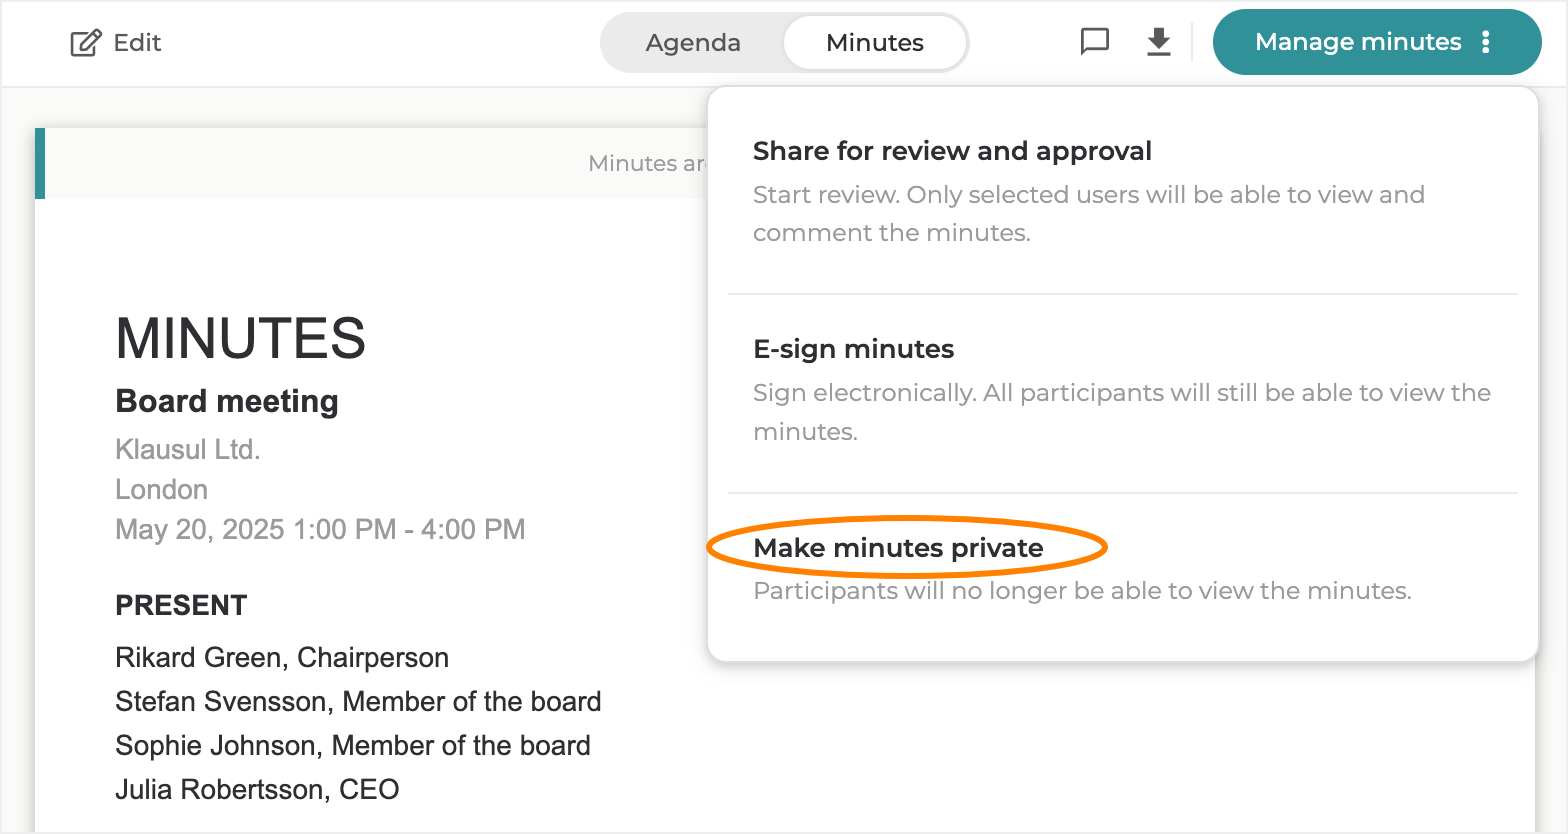
If you, as the Secretary, have shared the Minutes and for some reason want to unshare them, you can do so by clicking the `Manage minutes` button and selecting the `Make minutes private` option.
### Share for review and approval
If you want to share the Minutes for review and approval, select that option in the **Manage minutes menu**. To learn more about this process, continue reading the [Approve meeting minutes](/using-hippoly/meetings/approve-meeting-minutes.md) article.
### E-sign minutes
If you want to e-sign the Minutes, select that option in the **Manage minutes menu**. To learn more about this process, continue reading the [Send meeting minutes for e-signing](/using-hippoly/meetings/e-sign-meeting-minutes.md) article.
{% endstep %}
{% endstepper %}
## Change Meeting Secretary
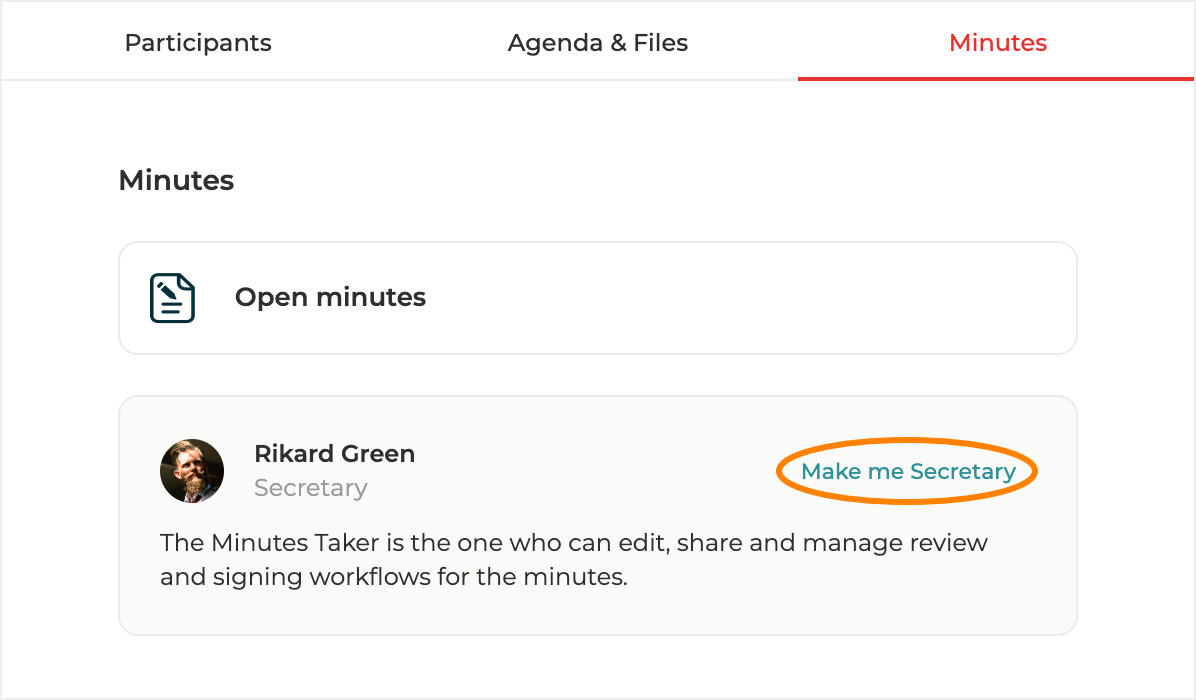
The user who creates the Minutes document for a Meeting automatically becomes the Secretary, and any Meeting participant can take on this role. Sometimes the Secretary needs to be changed, and the process is simple. **It must be initiated by the user who will take over the Secretary role**, and only that user can perform the change.
{% stepper %}
{% step %}
To take over as Secretary, open the **Meeting panel** and select the `Minutes` tab.
{% endstep %}
{% step %}
Click the `Make me Secretary` button.
{% endstep %}
{% step %}
You are now the Meeting Secretary and can edit and manage the Minutes.
{% endstep %}
{% endstepper %}
## Upload minutes document
If you have written your Minutes in another application, such as Word or Google Docs, you can upload the document to your Hippoly Meeting. The file must be a PDF, and the file size cannot exceed 10 MB.
{% hint style="info" %}
**Note:** If you have created a minutes document in Hippoly using the built-in editor, you cannot upload a minutes file for the same meeting unless you first [delete the existing minutes document](/using-hippoly/meetings/delete-meeting-minutes.md).
{% endhint %}
{% stepper %}
{% step %}
Open the **Meeting panel** and select the `Minutes` tab.
{% endstep %}
{% step %}
Click the `Select file` button
{% endstep %}
{% step %}
Select the minutes file you want to upload from your device and confirm.
{% endstep %}
{% step %}
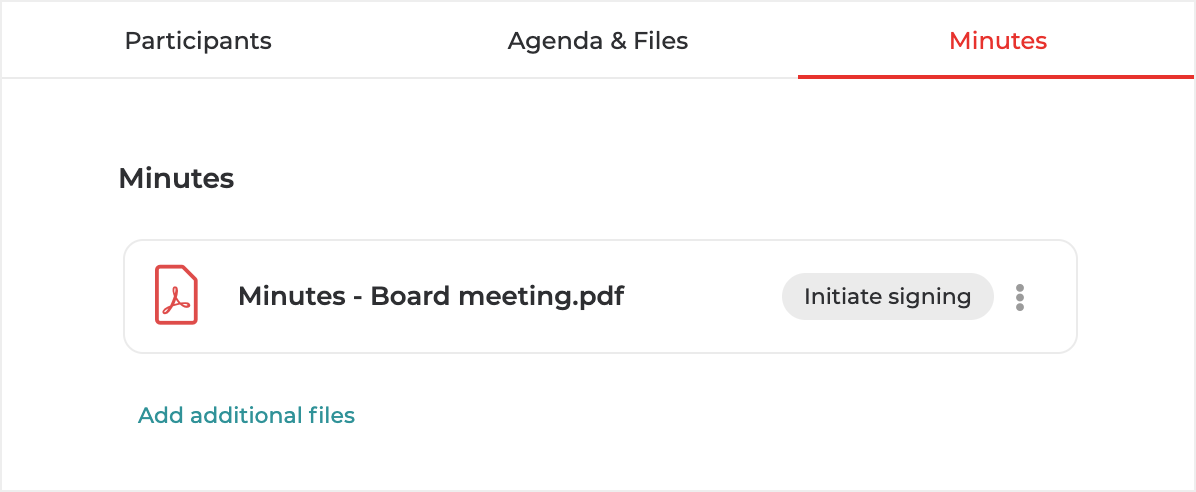
The minuts are now uploaded to the meeting and you can, if you want, [initiate e-signing of the uploaded minutes file](/using-hippoly/meetings/e-sign-meeting-minutes.md).
{% endstep %}
{% endstepper %}
---
# Agent Instructions
This documentation is published with GitBook. GitBook is the documentation platform designed so that both humans and AI agents can read, navigate, and reason over technical content effectively. Learn more at gitbook.com.
## Querying This Documentation
If you need additional information that is not directly available in this page, you can query the documentation by asking a question.
Perform an HTTP GET request on the following URL with the `ask` and `goal` query parameters:
```
GET https://help.hippoly.com/using-hippoly/meetings/create-and-edit-meeting-minutes.md?ask=&goal=
```
`ask` is the immediate question: it should be specific, self-contained, and written in natural language.
`goal` is what the user is ultimately trying to achieve, the reason they need the answer. Sharing it helps GitBook give you a better, more relevant answer. A goal is most helpful when it describes the outcome the user wants rather than restating the question. For example, with `ask=how do I create an API token`, a goal like `automate deployments from our CI pipeline` lets GitBook tailor the answer to that use case.
The response will contain a direct answer to the question and relevant excerpts and sources from the documentation.
Use this mechanism when the answer is not explicitly present in the current page, you need clarification or additional context, or you want to retrieve related documentation sections.